Teams
Teams let you group workspace members and control the resources they can access in PipeOps. You can create a team, assign projects, servers, and add-ons, invite members, and review team activity from the audit trail.
Access Teams
To open the Teams page:
- Click the account menu in the top-right corner of your dashboard.
- Select Teams.
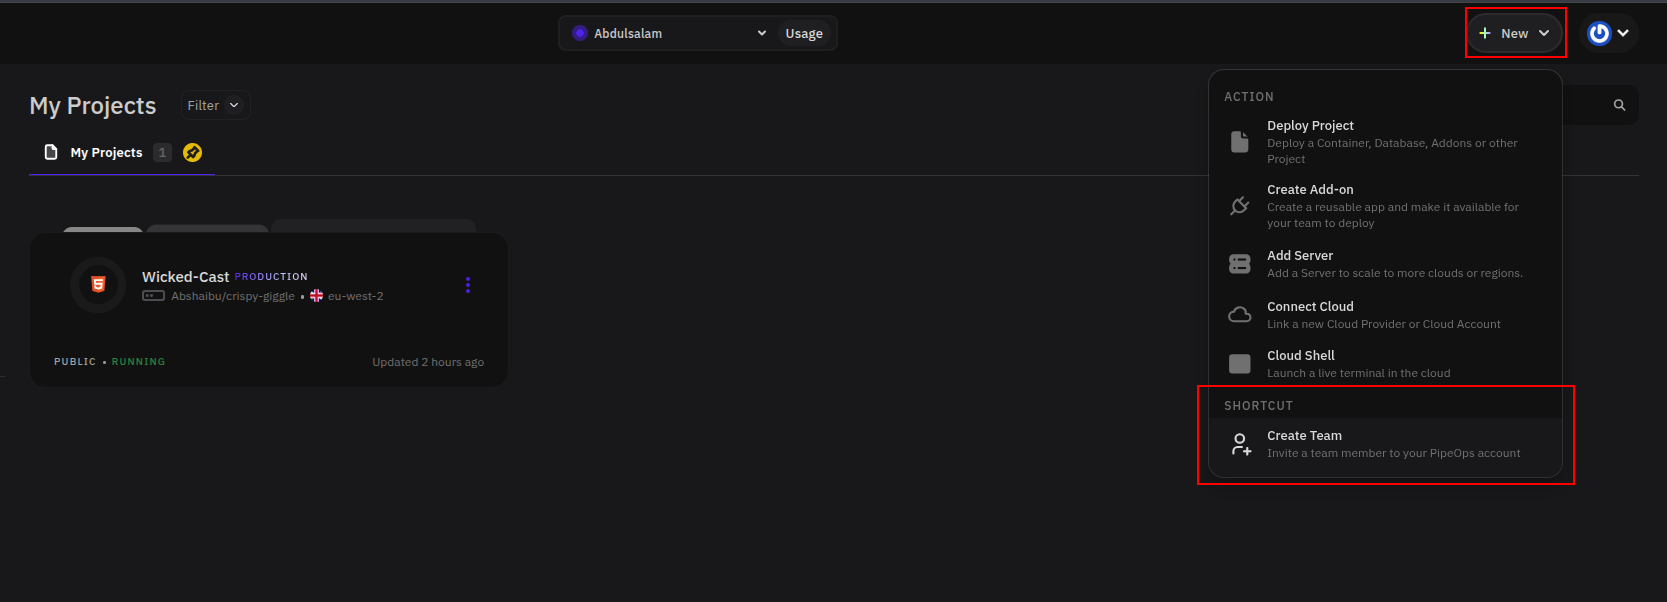
You can also create a team directly from the dashboard by clicking New in the top-right corner and selecting Create Team under Shortcut.
Teams Page
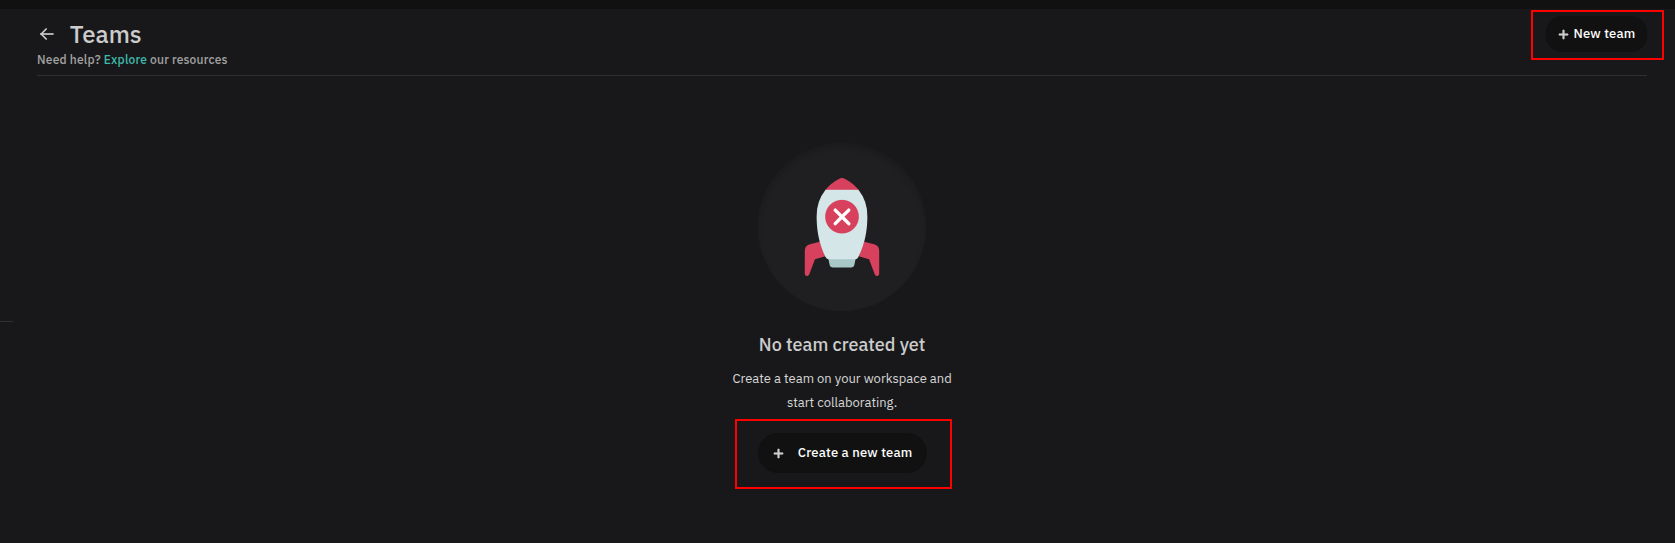
The Teams page lists all teams in your workspace. If no teams exist yet, PipeOps shows an empty state with a Create a new team button. You can also click New team in the top-right corner at any time.
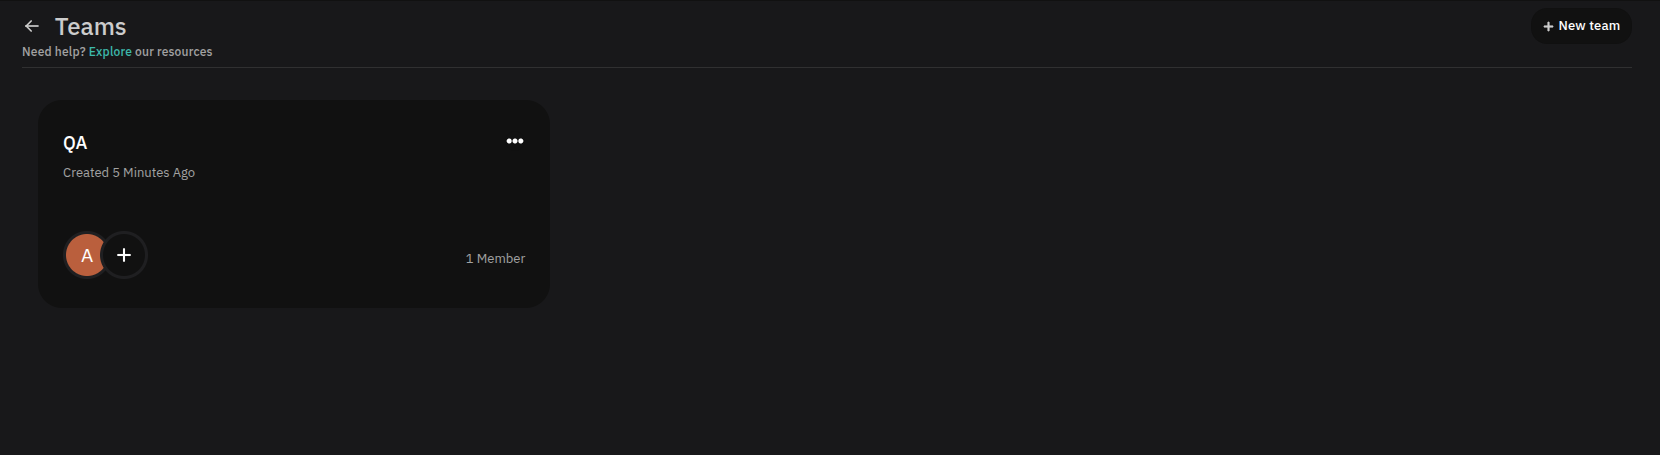
Once teams have been created, each team appears as a card showing the team name, creation time, member avatars, member count, and a menu for additional actions.
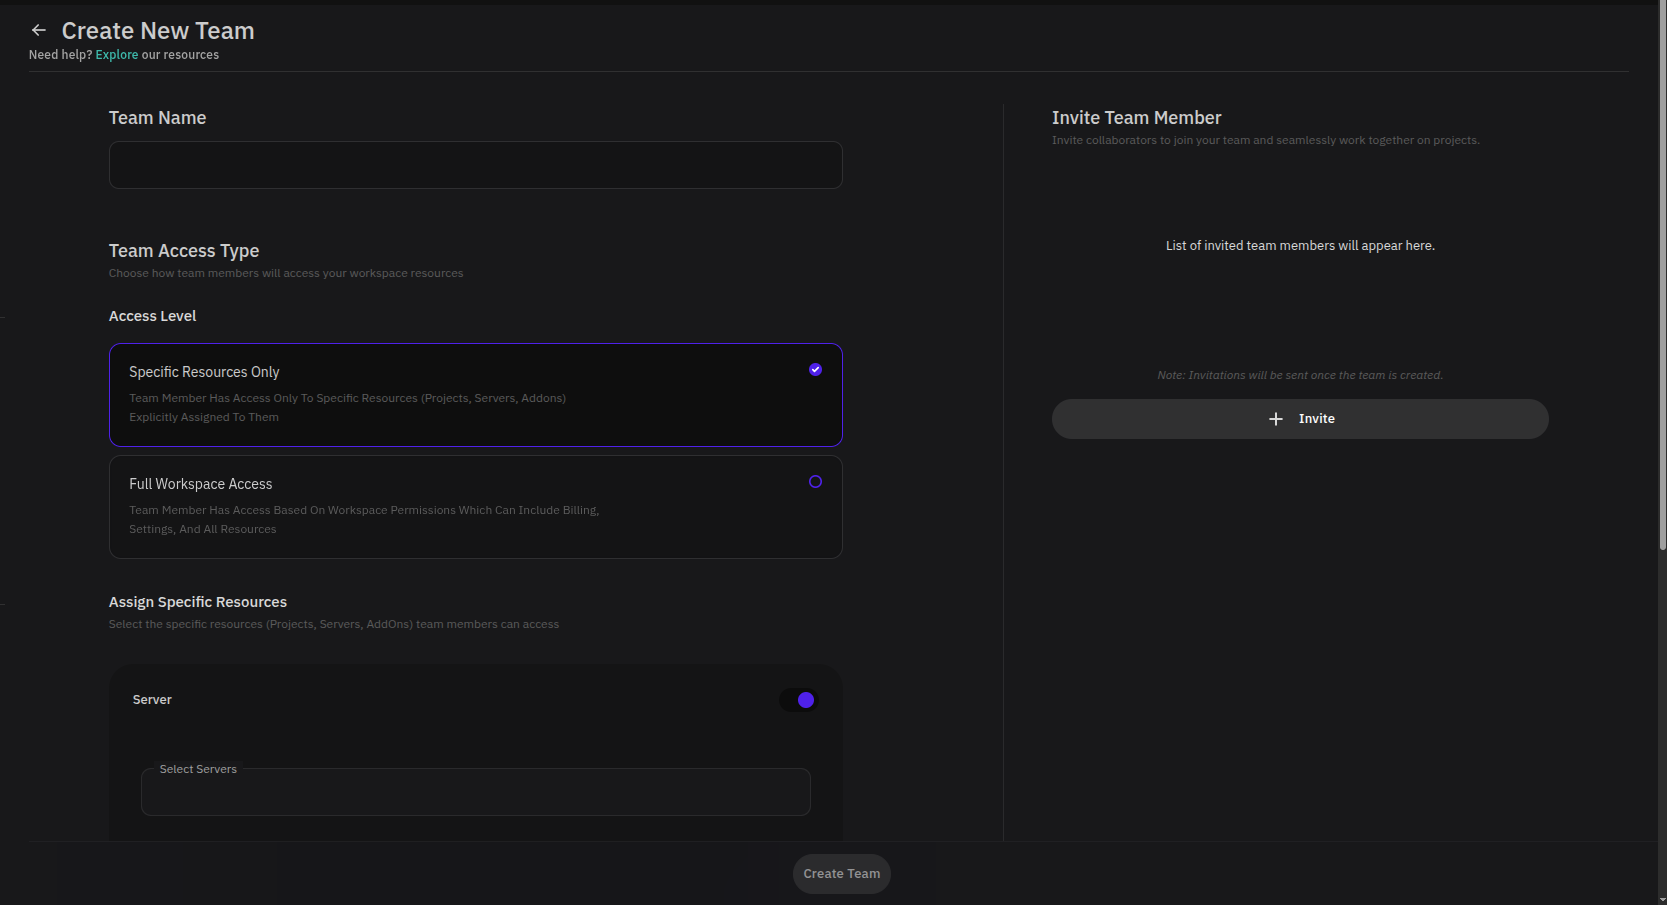
Create a Team
- On the Teams page, click New team or Create a new team.
- Enter a Team Name.
- Choose an Access Level — this determines whether team members access specific assigned resources or broader workspace areas.
- Assign resources or configure permissions based on the access level you selected (see Team Access Levels below).
- Invite team members if needed (see Invite Team Members).
- Click Create Team.
Team Access Levels
PipeOps supports two access levels for teams:
Specific Resources Only
Team members can only access the resources you explicitly assign to them.
Use Assign Specific Resources to select which Servers, Projects, and AddOns the team can access. Each resource type can be toggled individually before selecting specific items.

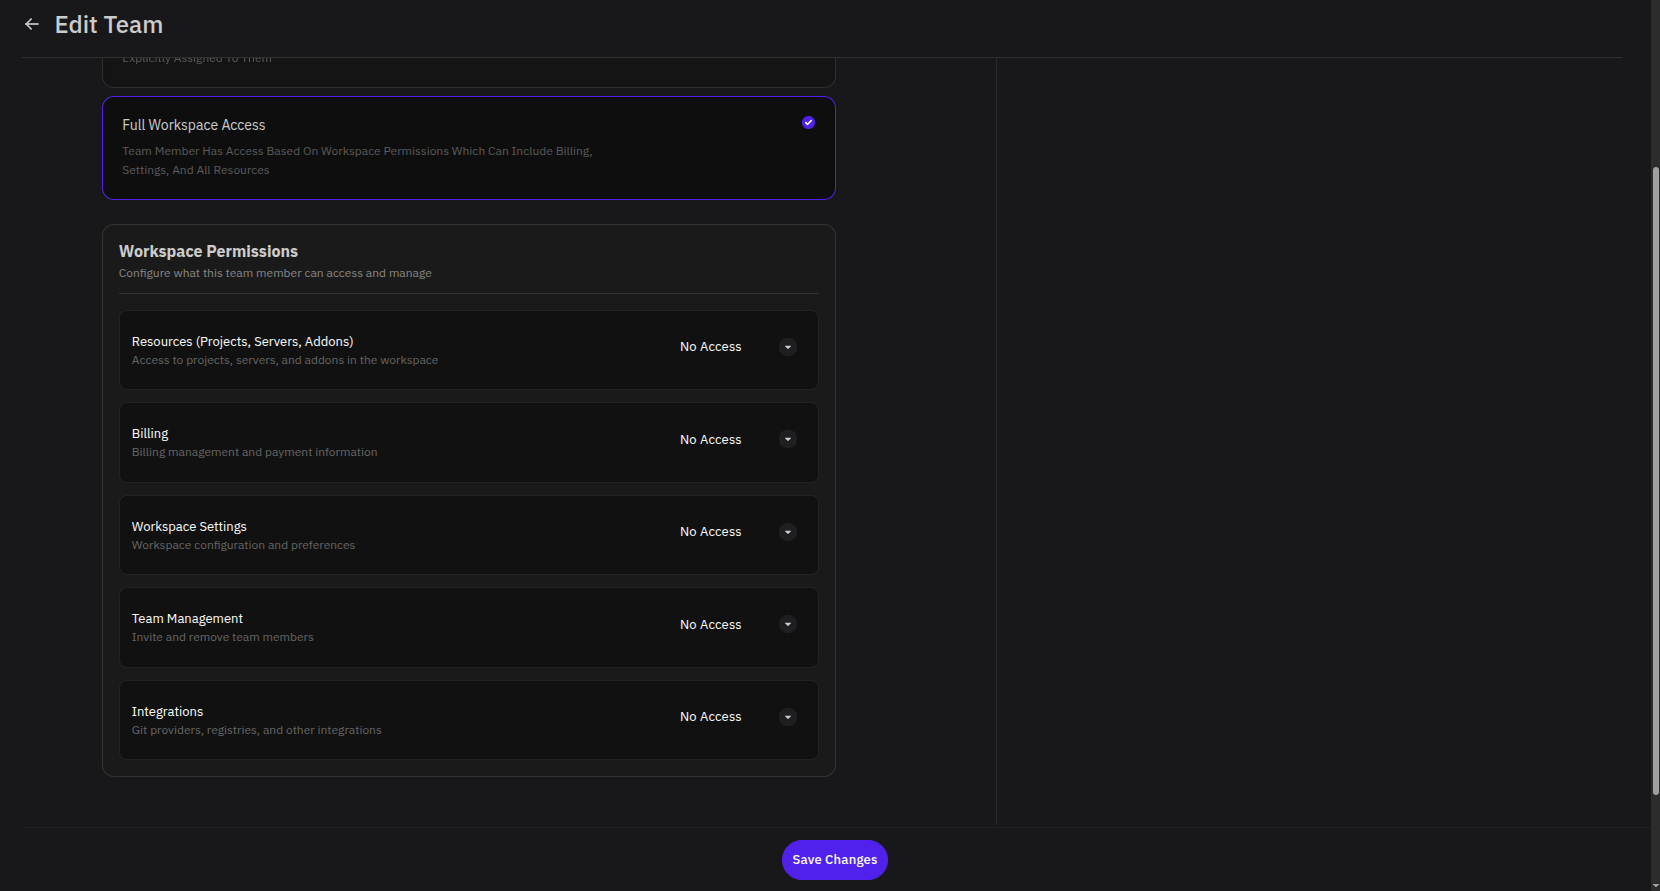
Full Workspace Access
Team members can access workspace areas based on the permissions you configure for the team. Available permission categories are:
| Permission Category | Covers |
|---|---|
| Resources | Projects, Servers, and Add-ons |
| Billing | Billing management and payment information |
| Workspace Settings | Workspace configuration and preferences |
| Team Management | Inviting and removing team members |
| Integrations | Git providers, registries, and other integrations |
Invite Team Members
You can invite members while creating a team or from an existing team's overview page.
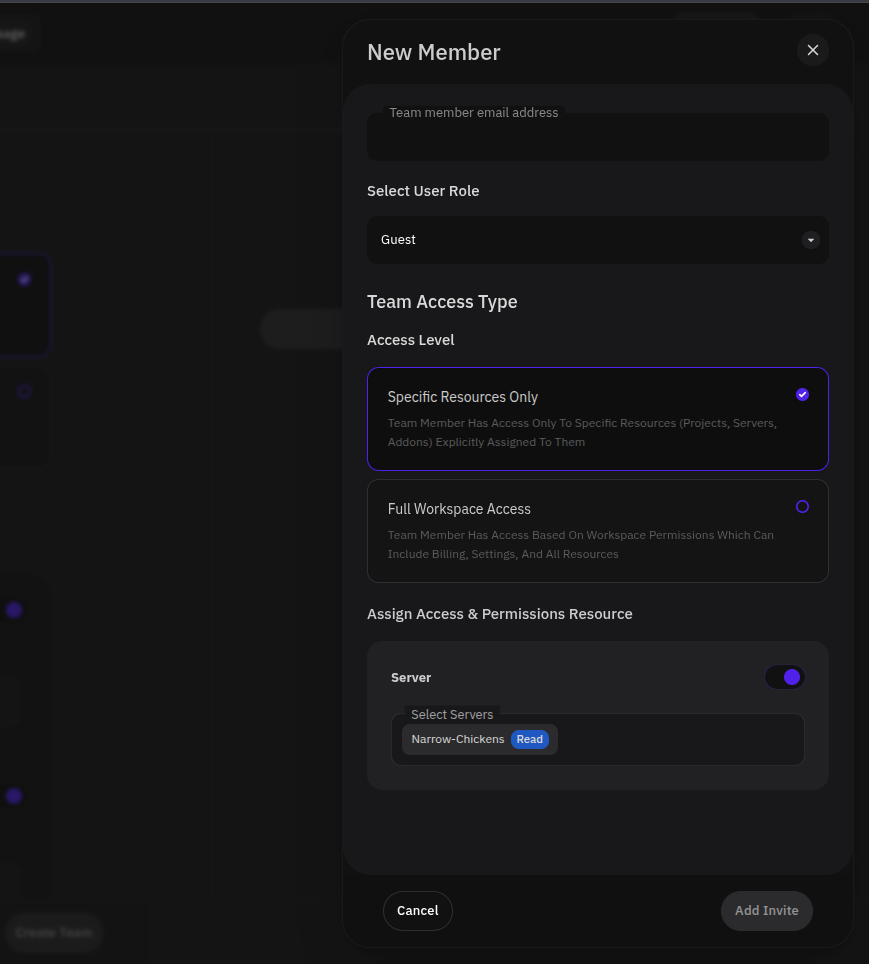
To invite a member:
- Click Invite in the Invite Team Member section.
- Enter the member's email address.
- Select their Role.
- Choose their Access Level — this works the same way as the team-level access configuration. You can assign specific resources or configure workspace permissions depending on your selection.
- Click Add Invite.
Invitations are sent after the team is fully created, not immediately when you click Add Invite.
Manage a Team
Click on any team card to open it. Each team page has two tabs: Overview and Audit Trail.
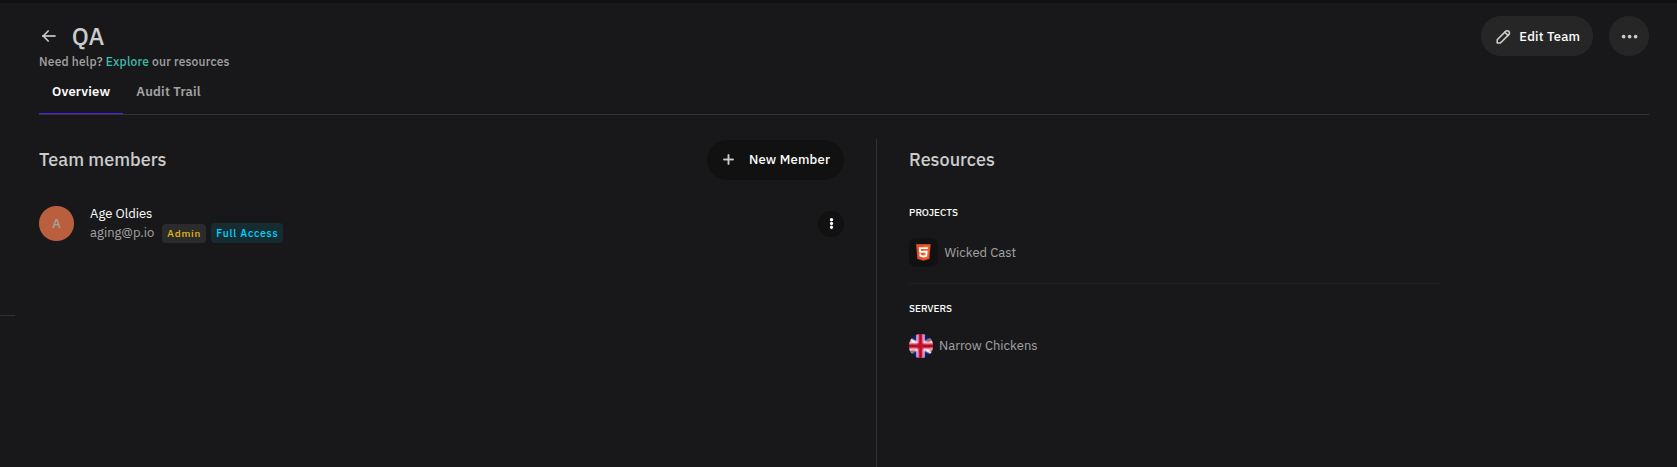
Overview
The Overview tab is where you manage the team's members and resources day-to-day. From here you can:
- View all team members alongside their roles and access labels.
- Click New Member to invite an additional member.
- Review the projects and servers assigned to the team.
- Click Edit Team to update the team name, access level, or assigned resources.
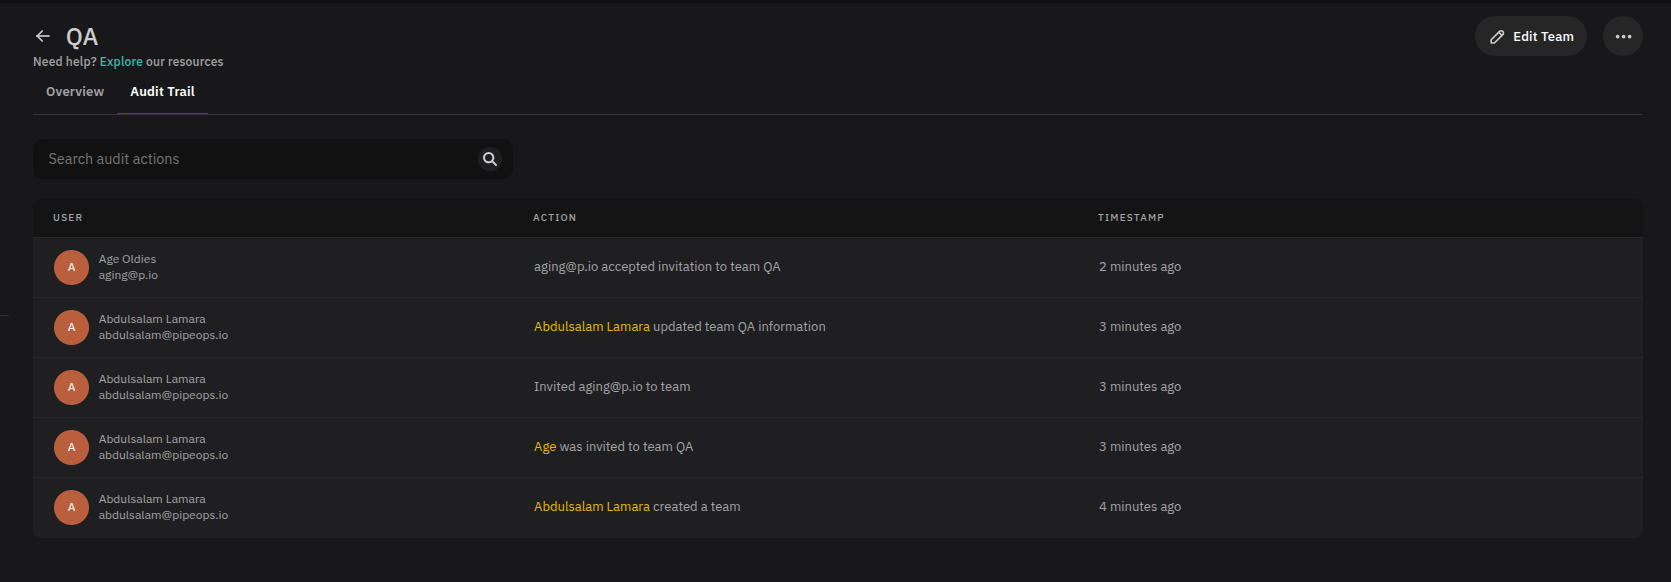
Audit Trail
The Audit Trail tab records all activity for the team, giving you a clear history of changes and who made them.
Use the search field to filter for specific actions. Each entry in the audit table shows:
- User — The person who performed the action.
- Action — The event that occurred, such as creating the team, inviting a member, updating team information, or accepting an invitation.
- Timestamp — When the action took place.