Deploy Template Projects
Template projects help you deploy a working sample application on PipeOps without setting up a repository from scratch. Use this option when you want to try PipeOps quickly, test a supported framework, or deploy a starter project before connecting your Git provider.
You can deploy a template project during onboarding or from the PipeOps dashboard after your account has already been created.
Before You Begin
Make sure you have:
- A PipeOps account.
- At least one server available for deployments.
- Access to the PipeOps dashboard.
If you do not have a server yet, create one before deploying your template project. See Server Provisioning for the full setup guide.
Start a Template Deployment
Choose the flow that matches where you are in PipeOps.
Option 1: During Onboarding
If you are a new user and do not want to connect GitHub, GitLab, Bitbucket, or Azure DevOps yet, you can deploy a template project from the Git provider connection step.
- On the Connect Your Git Provider page, click Deploy a template project.
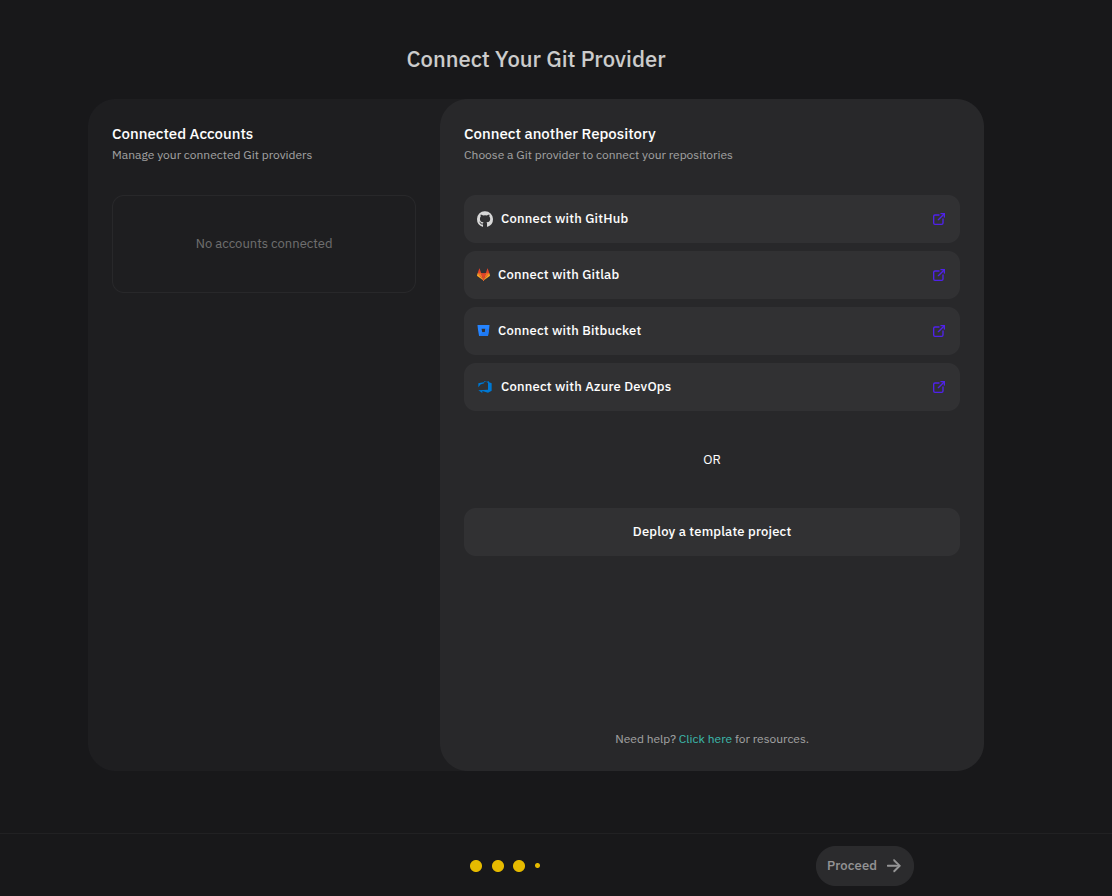
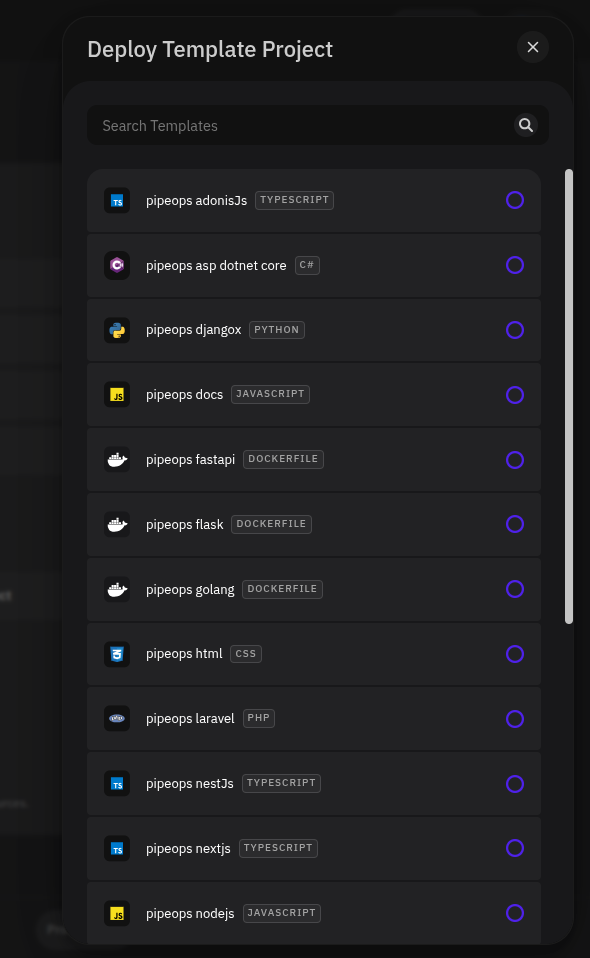
- In the Deploy Template Project modal, browse the available templates or use the search field to filter the list.
- Select the template you want to deploy.
- Click Proceed.
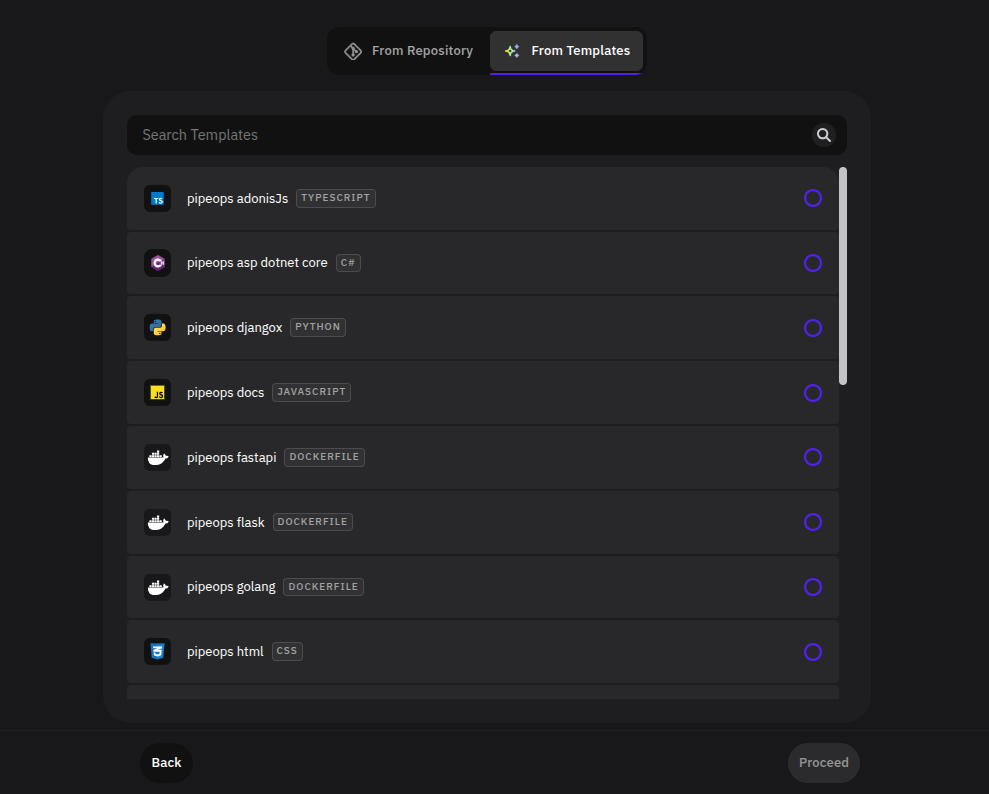
Option 2: From the Dashboard
Use this path if you already have access to the PipeOps dashboard.
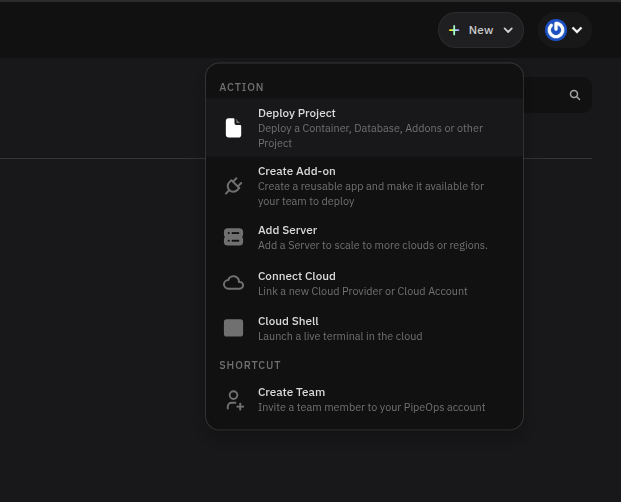
- Click + New in the top-right corner of the dashboard.
- Select Deploy Project from the menu.
- On the Deploy Project page, choose Web as the project type.
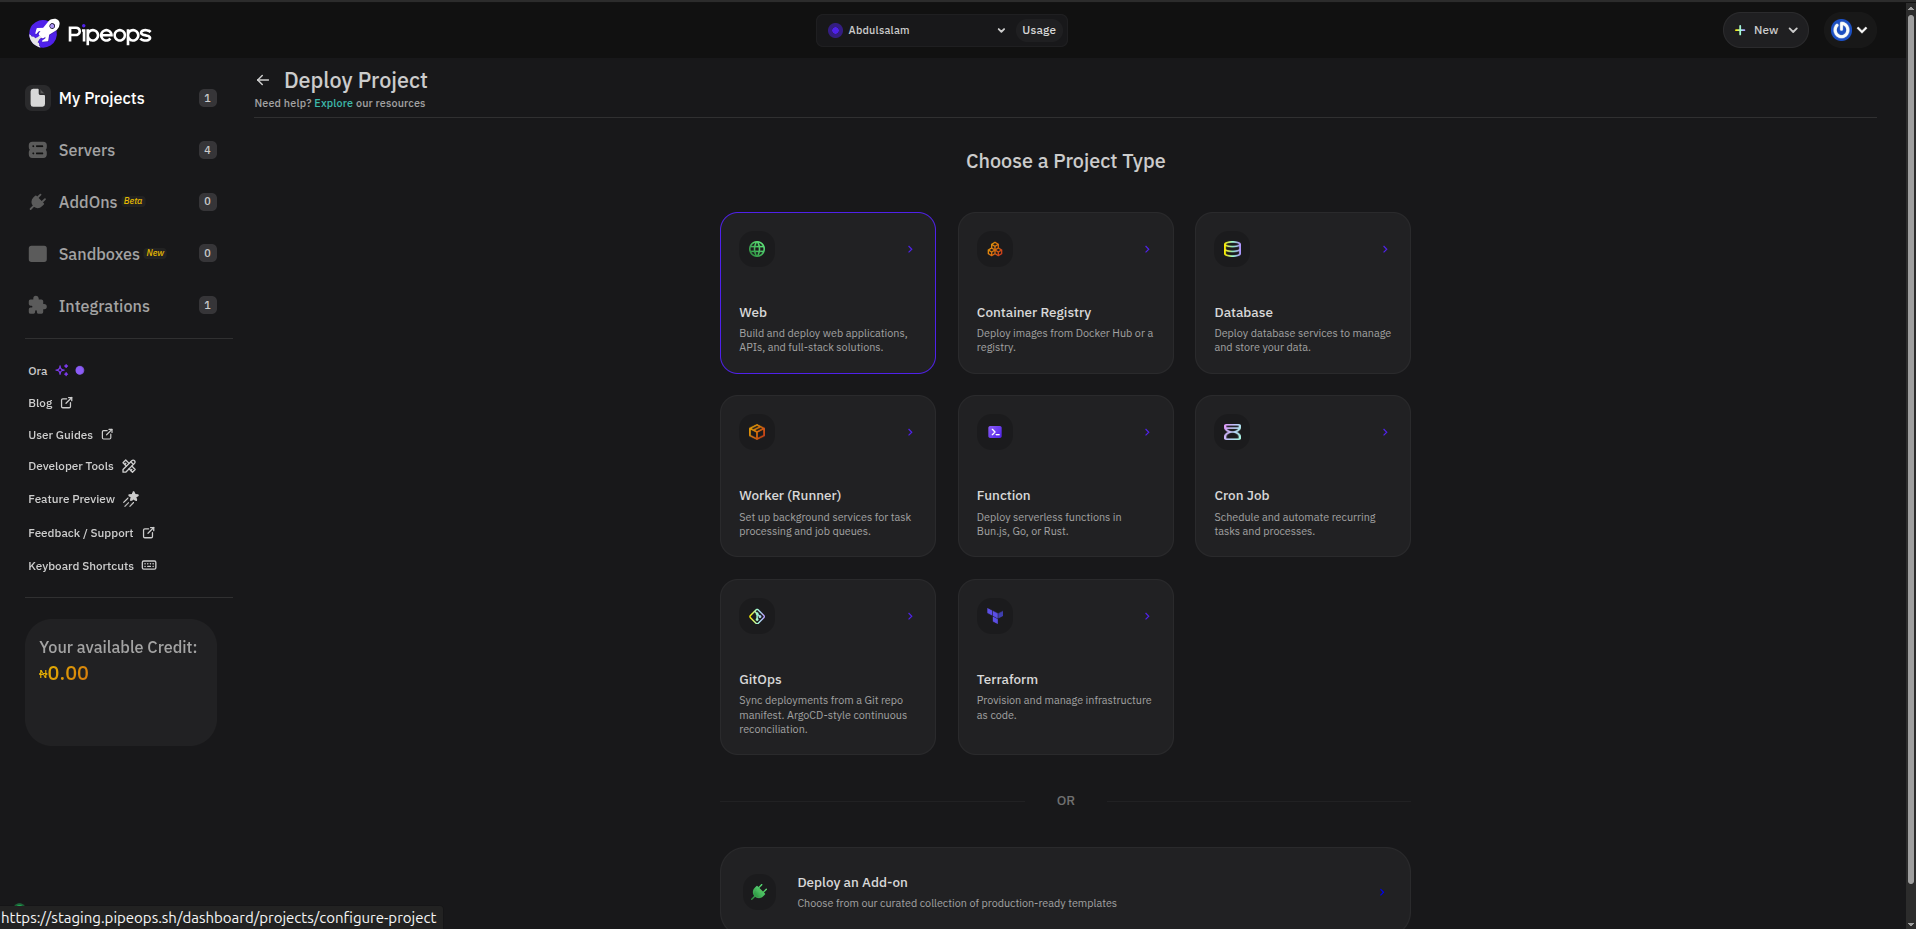
- Select the From Templates tab.
- Browse the templates or use the search field to find a specific framework or language.
- Select the template you want to deploy.
- Click Proceed.
Configure the Project
After choosing a template, review the project summary before deployment.
- In Project Name, keep the generated name or enter a new one. Choose a clear name that helps you identify the project later.
- In Environment, select the environment where the project should run, e.g Production or Beta.
- In Server, confirm the server that will host the project.
- Under General Resources, review the CPU and memory allocation. Adjust the values if your template needs more resources.
- Under Project Source, confirm that the selected template is correct.
- Click Proceed.
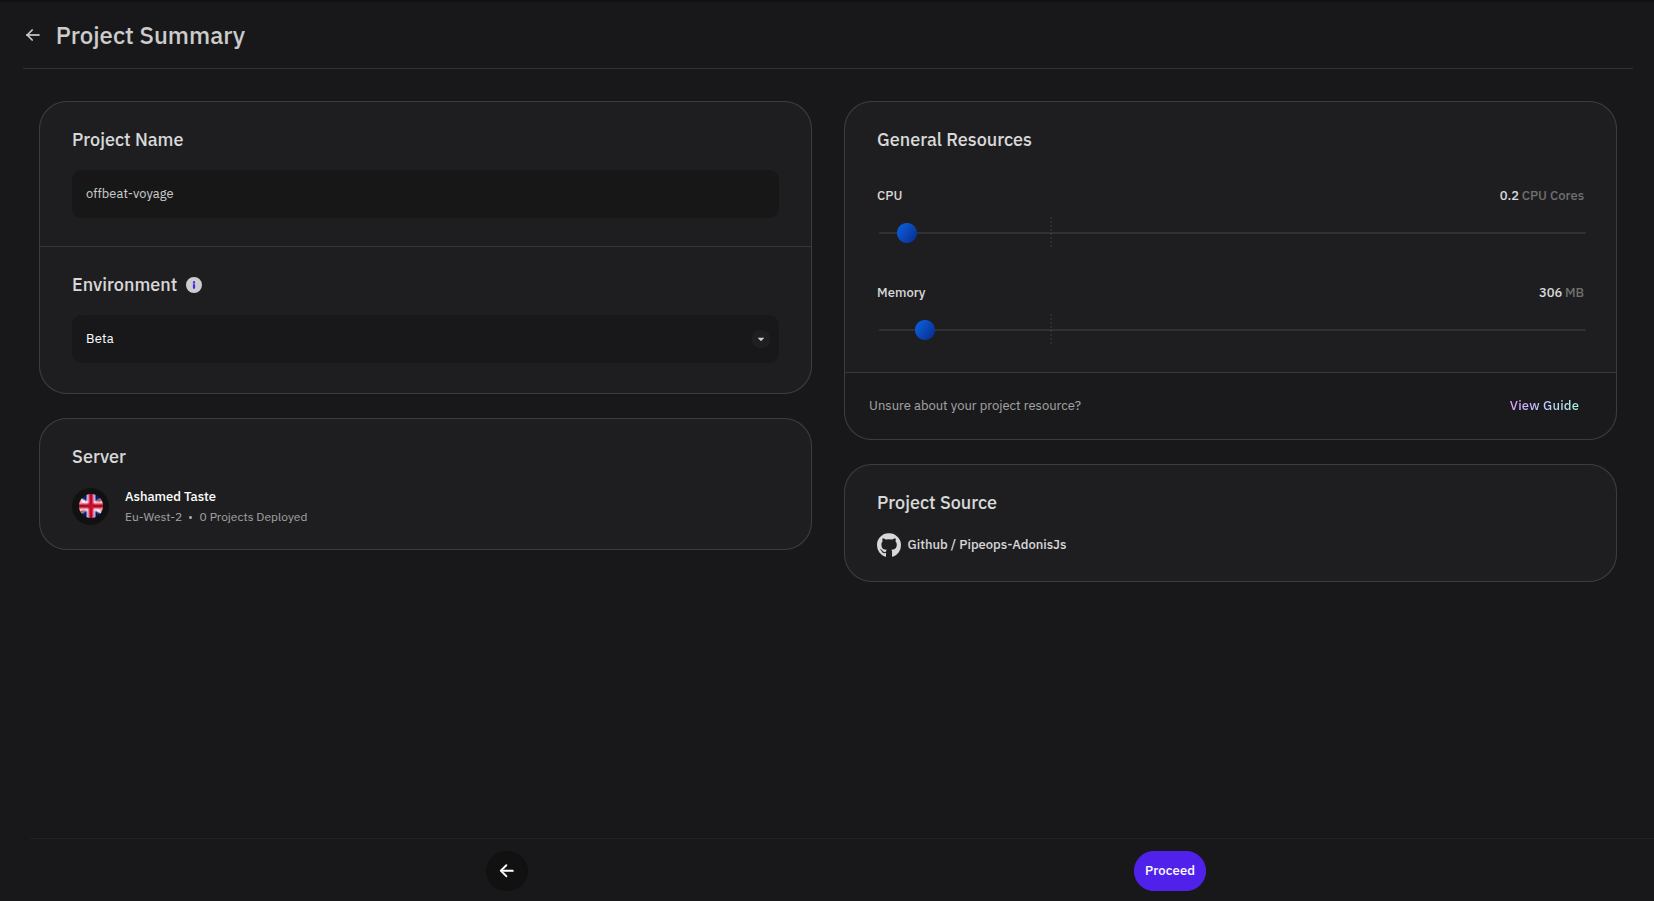
For a first test deployment, the default resource values are usually enough. Increase CPU or memory when the project requires more capacity or if the app becomes slow under load.
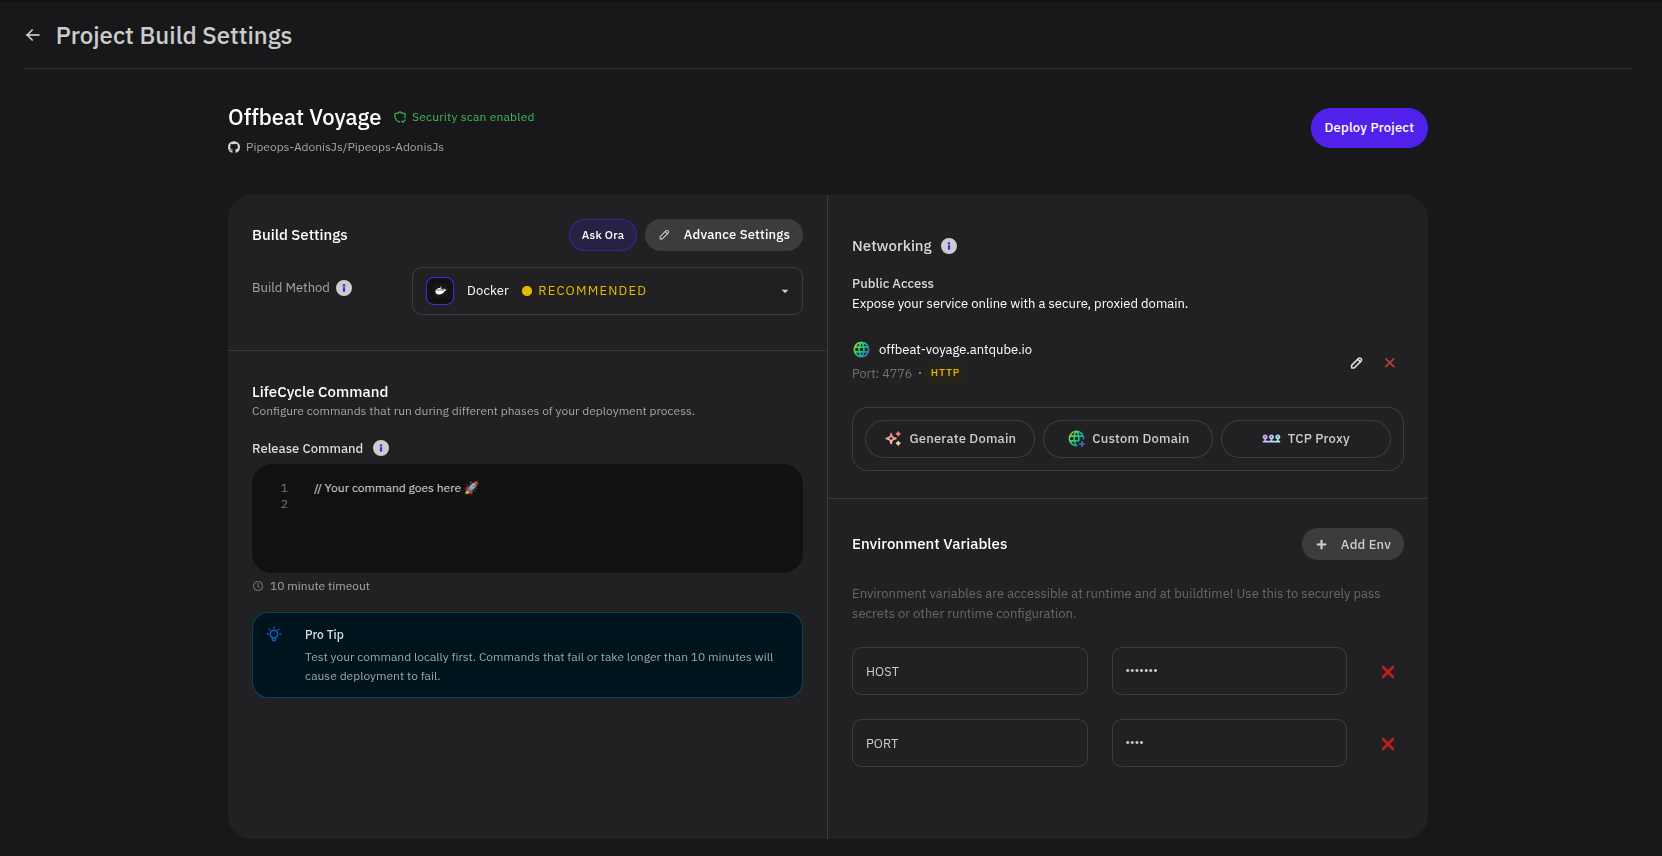
Review Build Settings
PipeOps prepares build settings based on the selected template. Review these settings before starting the deployment.
- Confirm the Build Method selected by PipeOps.
- If the project has a release command, add it under Release Command.
- Under Networking, review the generated public domain and the exposed port.
- To use a different domain, select Custom Domain and configure your domain settings.
- Add any required Environment Variables. For example, some
templates may require variables such as
HOST,PORT, database URLs, API keys, or application secrets. - Click Deploy Project.
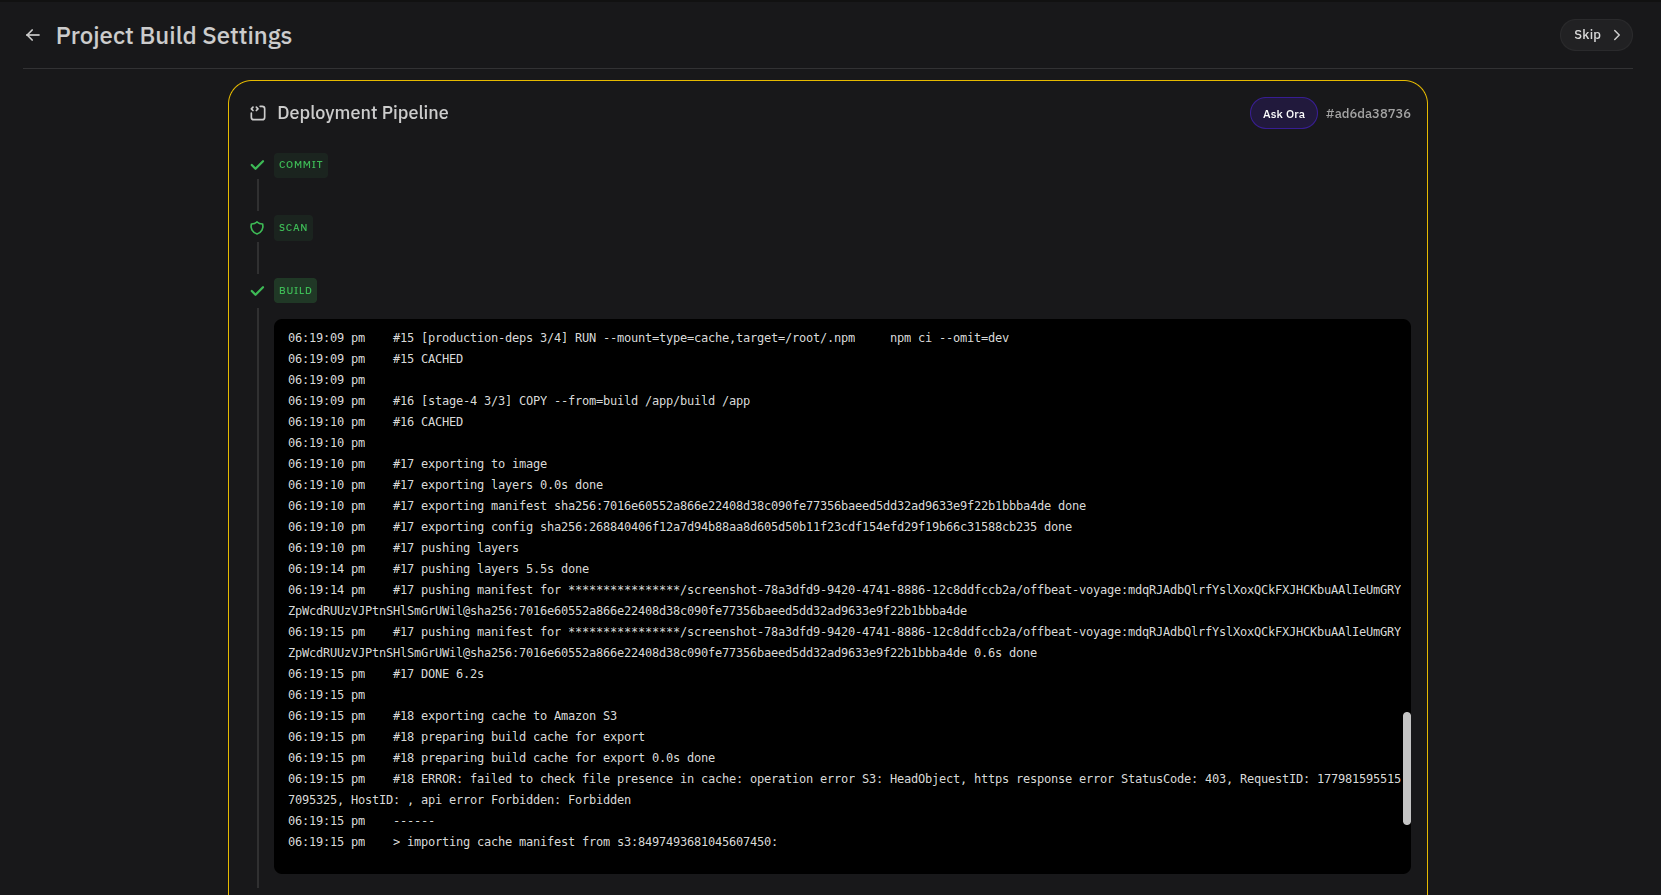
Monitor the Deployment
After you click Deploy Project, PipeOps opens the deployment pipeline. The pipeline shows each stage of the deployment process, including commit preparation, security scan, build, and deploy.
Wait for the pipeline to complete. If a stage fails, review the logs shown in the pipeline output and update the build settings or environment variables as needed.
When the deployment is successful, PipeOps displays a Project Deployed! confirmation message.
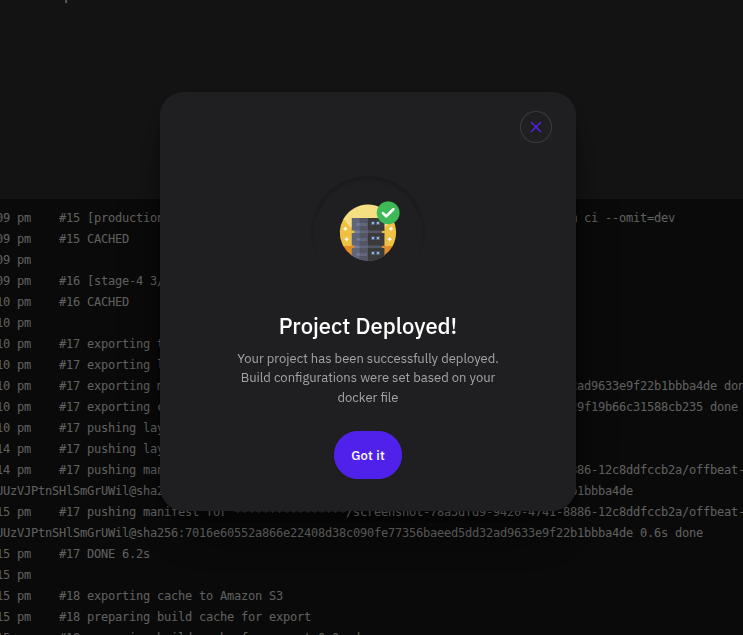
Click Got it to open the project page.
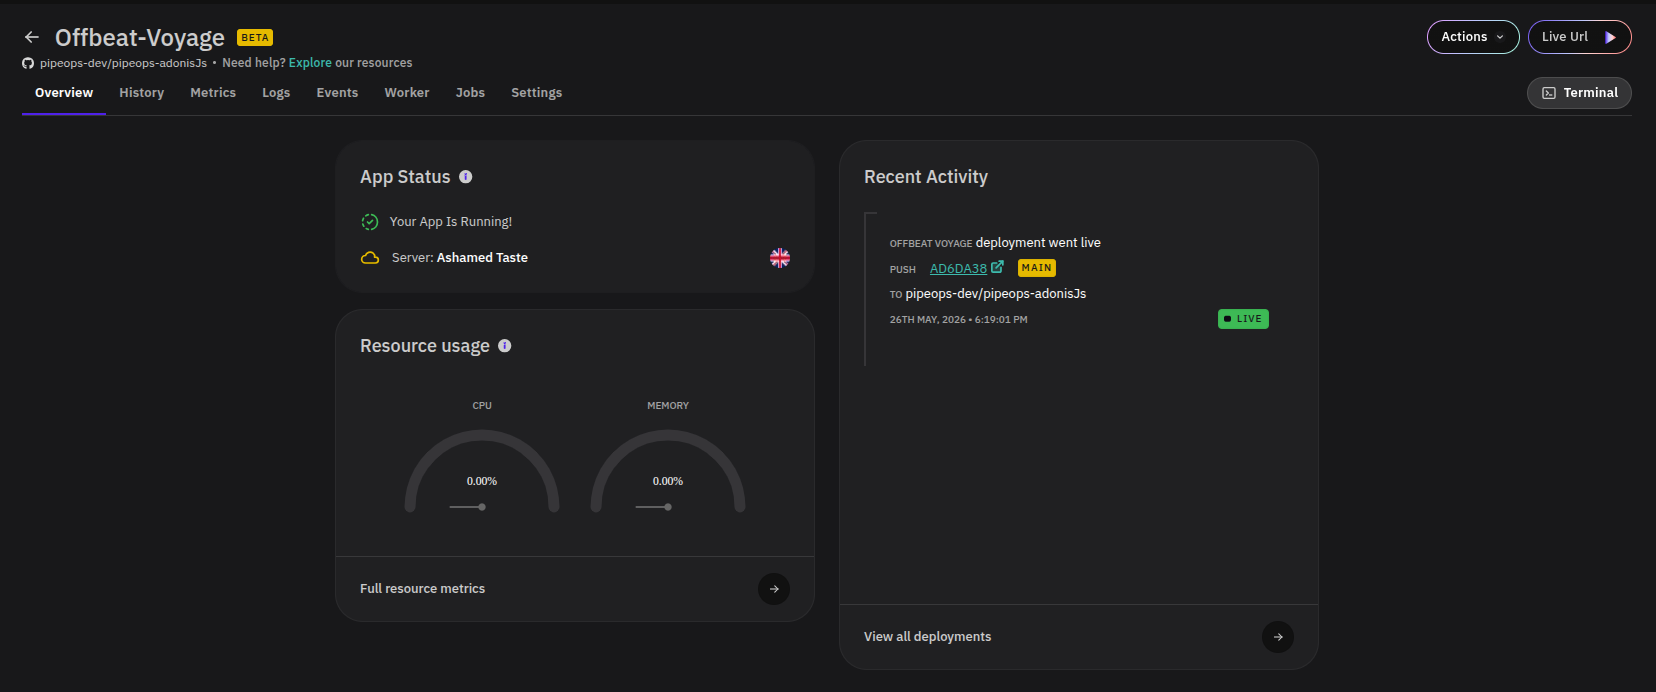
Verify the Running Project
On the project overview page, confirm that the application is running.
- Check App Status. It should show that your app is running.
- Review Recent Activity to confirm that the latest deployment went live.
- Click Live Url to open the deployed application in your browser.
- Use the project tabs to inspect deployment history, metrics, logs, events, workers, jobs, and settings.
Next Steps
After your template project is running, you can:
- Open the live URL and test the application.
- Review logs and metrics from the project page.
- Add environment variables for template-specific configuration.
- Connect a Git provider when you are ready to deploy your own repository.