Deploy on Cloud Provider
PipeOps supports a Bring Your Own Cloud (BYOC) deployment model. Connect an existing cloud account, provision a server through PipeOps, and deploy projects directly to that infrastructure without leaving your own cloud environment.
AWS is used as the example provider in the steps below. The flow is the same for Google Cloud, Azure, and DigitalOcean, though the connection fields differ. See the Integrations guide for provider-specific setup instructions.
Before You Begin
Ensure the following are in place before starting:
- A PipeOps account
- An existing account with AWS, Google Cloud, Azure, or DigitalOcean
- A repository hosted on GitHub, GitLab, Bitbucket, or Azure DevOps
- Permission to install the PipeOps Git app on your organization
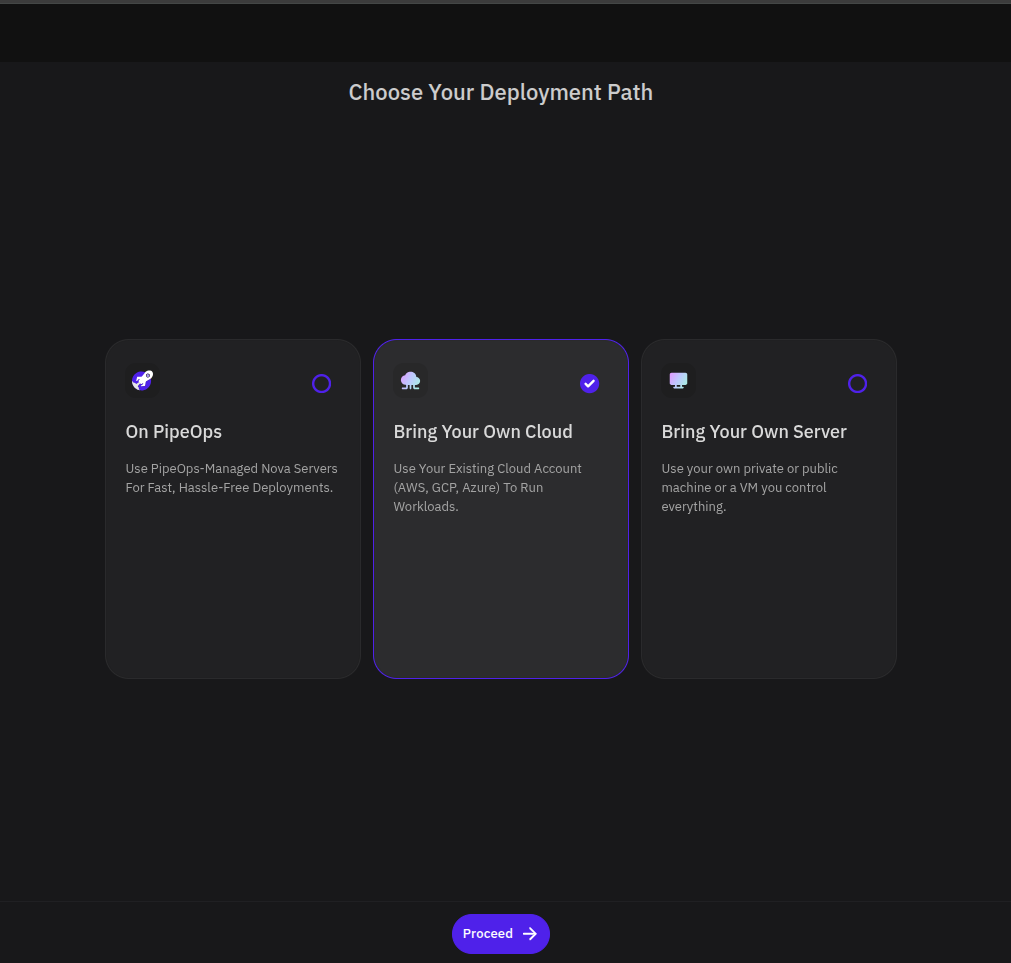
Step 1: Choose Bring Your Own Cloud
On the Choose Your Deployment Path page, select Bring Your Own Cloud, then click Proceed.
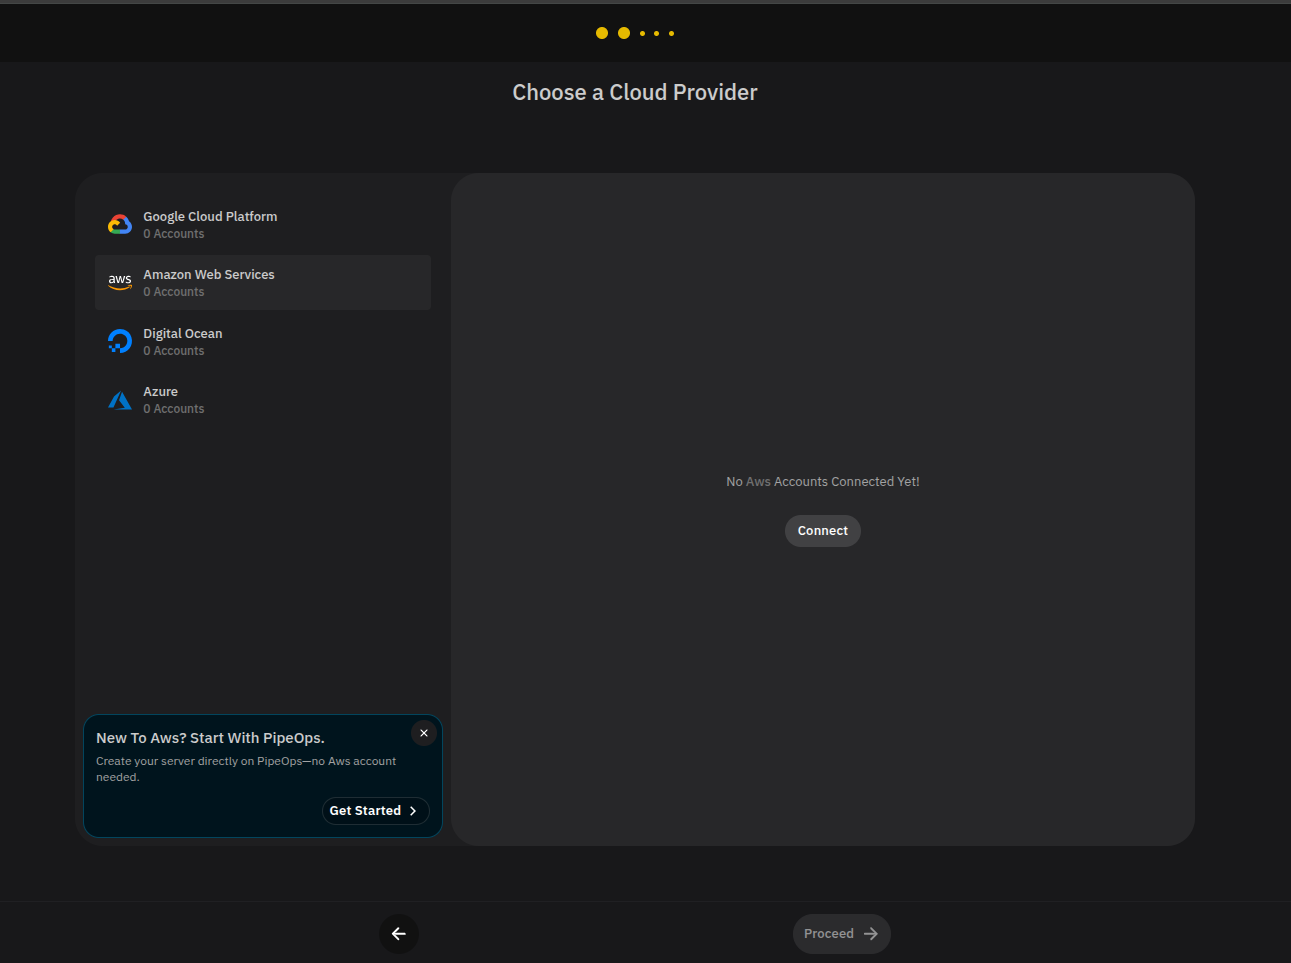
Step 2: Choose a Cloud Provider
Select the cloud provider to connect. PipeOps supports:
- Amazon Web Services (AWS)
- Google Cloud Platform
- Microsoft Azure
- DigitalOcean
If no account has been connected for the selected provider, click Connect.
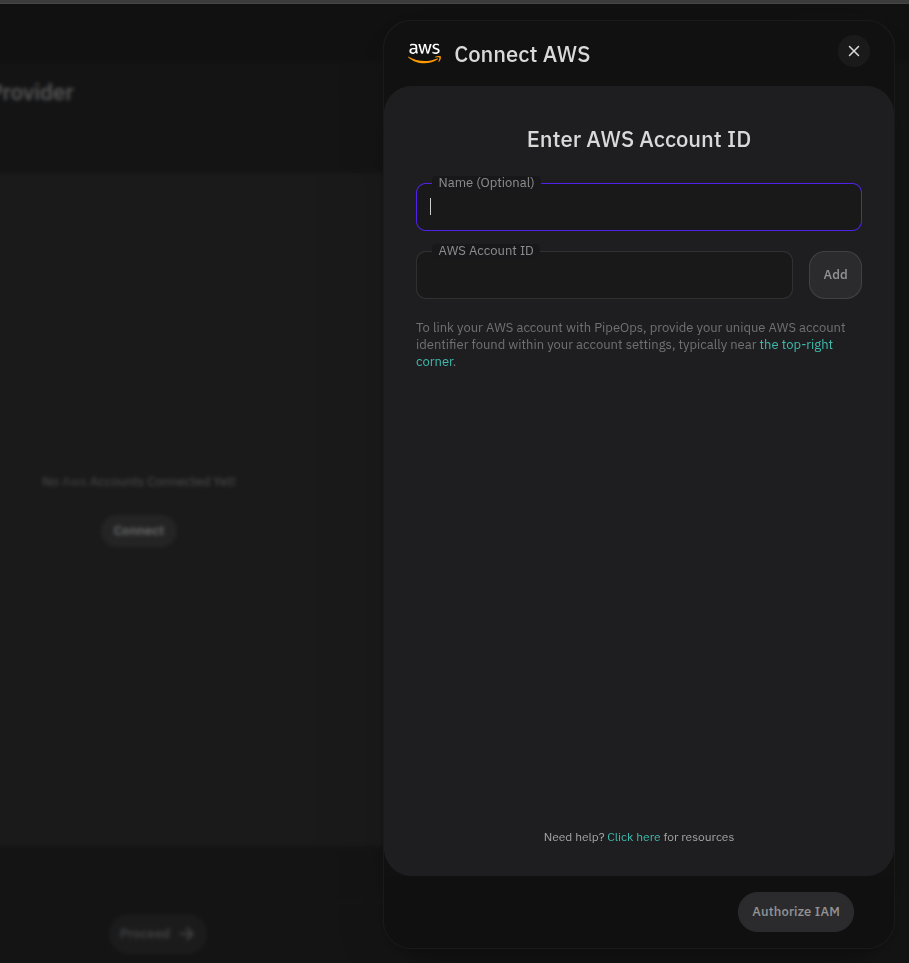
Step 3: Connect Your Cloud Account
The connection fields vary by provider. For AWS, enter an optional account name and your AWS Account ID, then click Add. PipeOps uses this to initiate the IAM authorization flow for your account.
For setup instructions specific to your provider, see the Integrations guide.
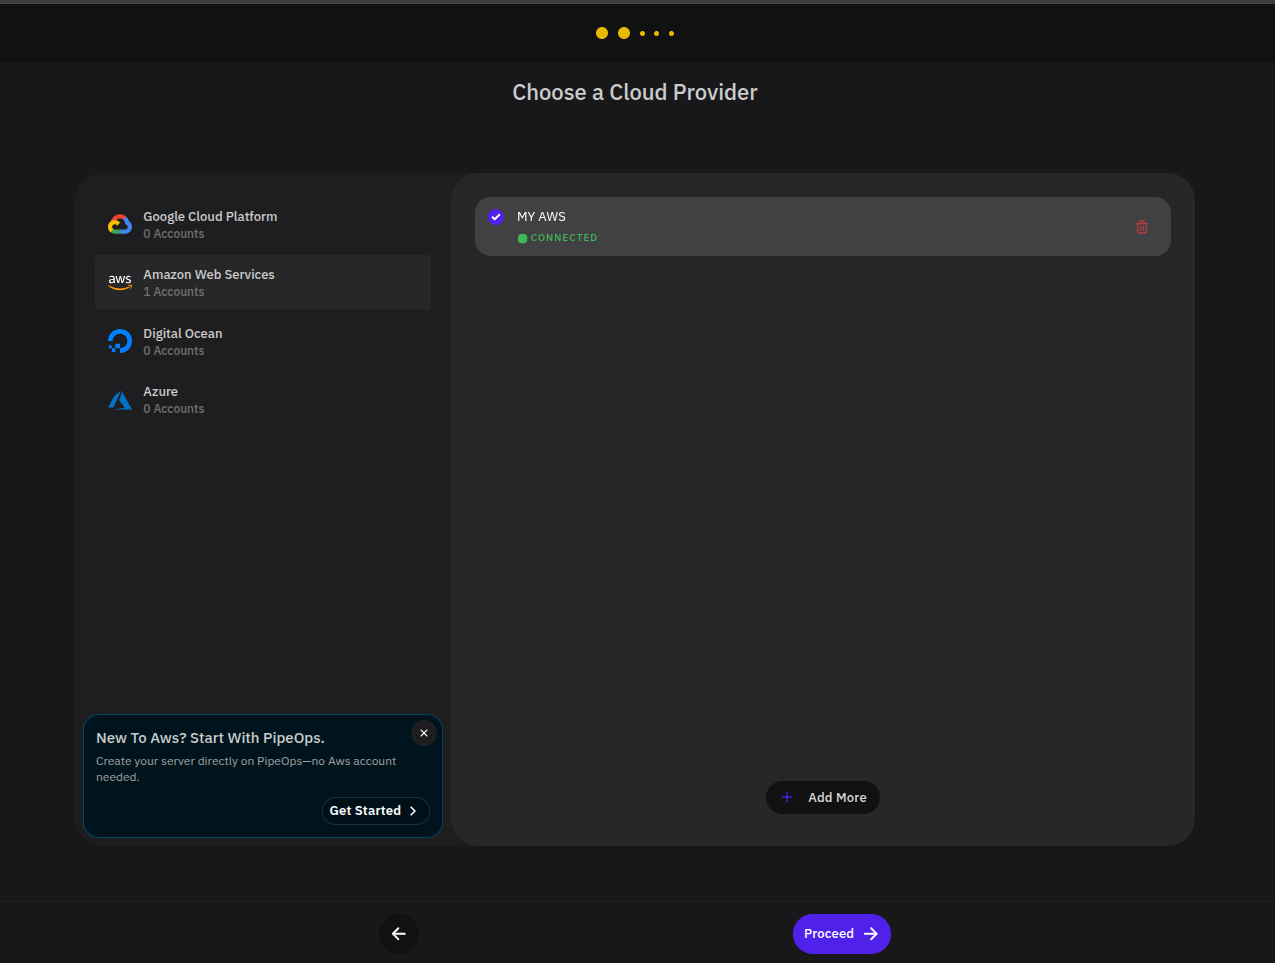
Once connected, the account appears under your selected provider. Select it, then click Proceed.
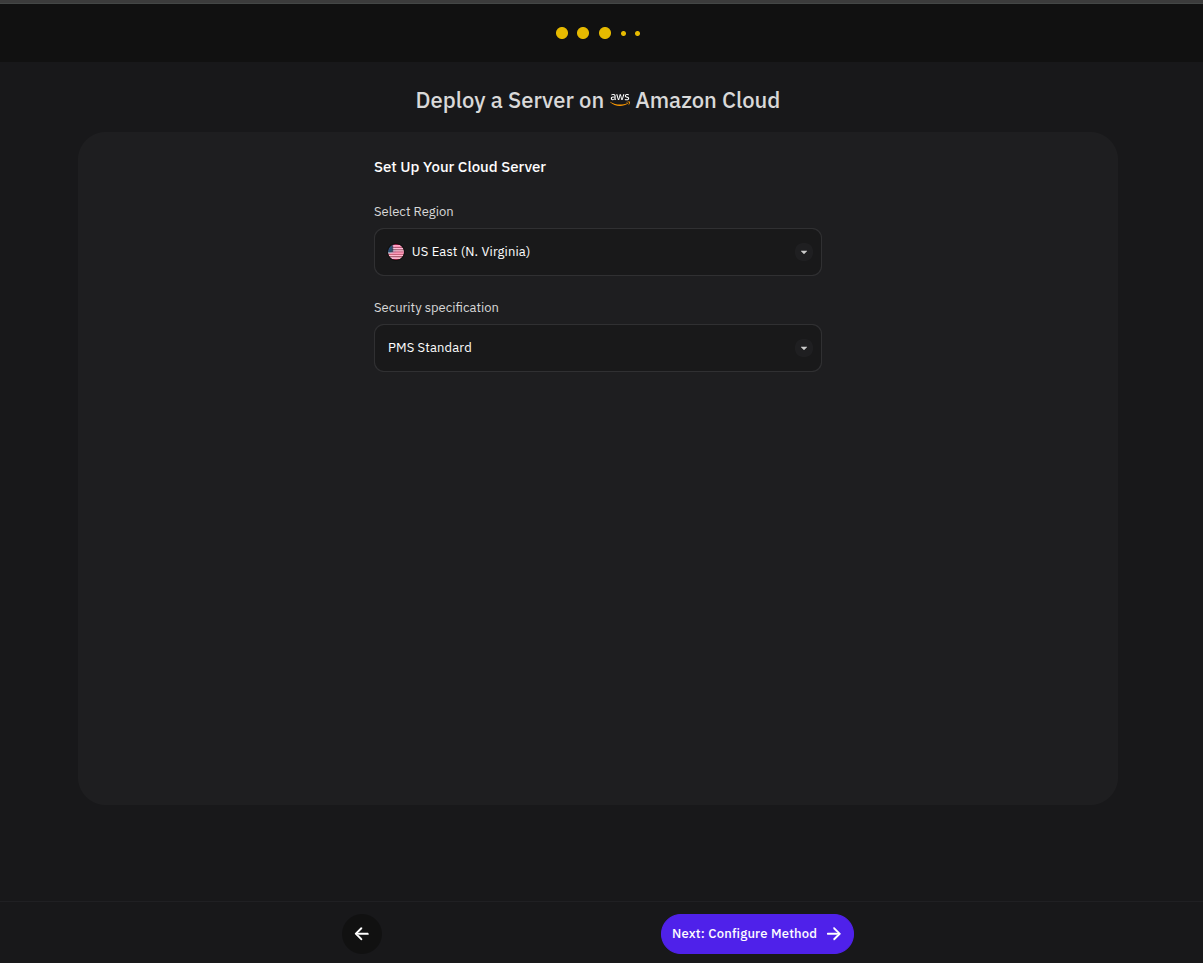
Step 4: Set Up Your Cloud Server
Select the region where the server should be created, then choose a security specification. Click Next: Configure Method to continue.
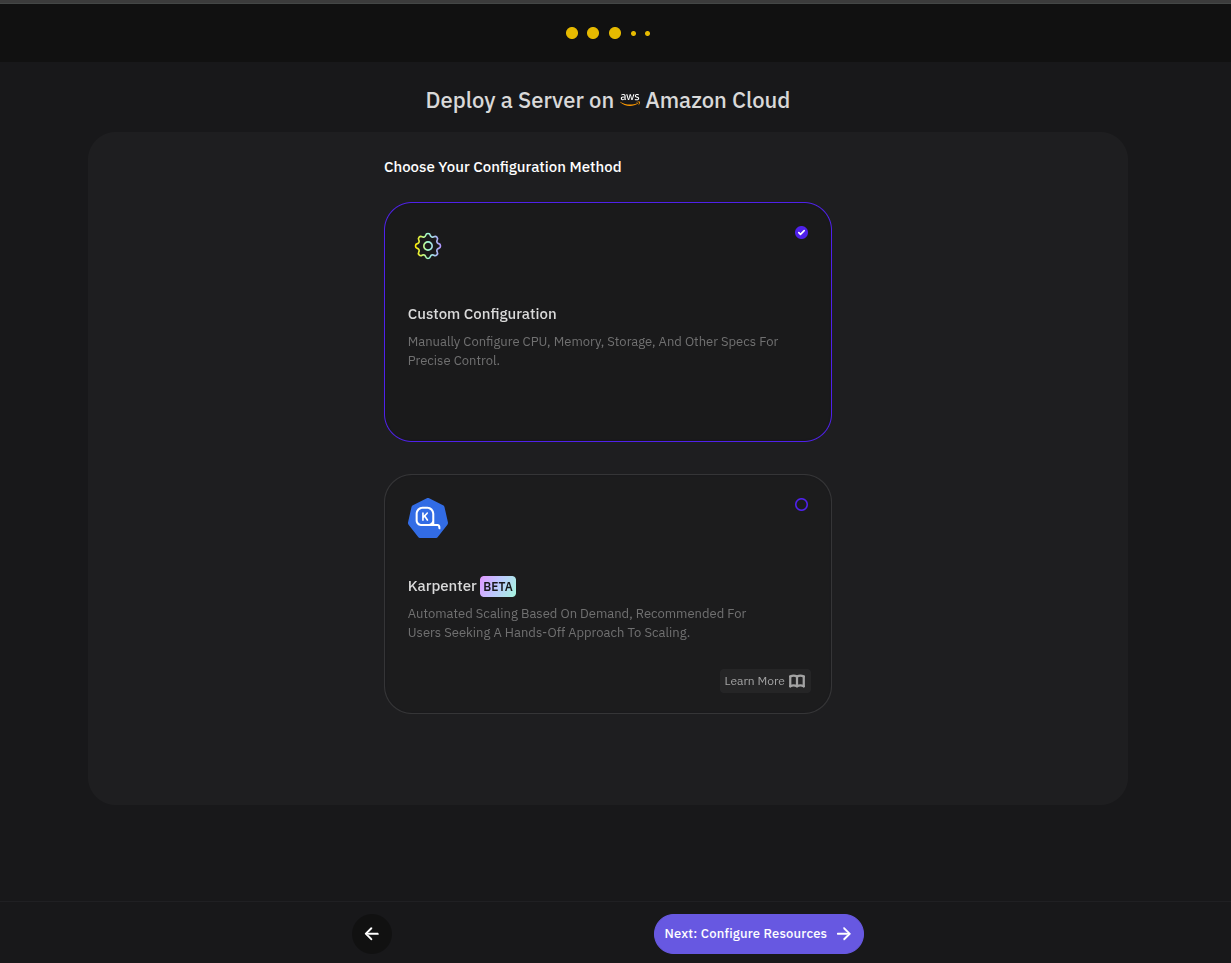
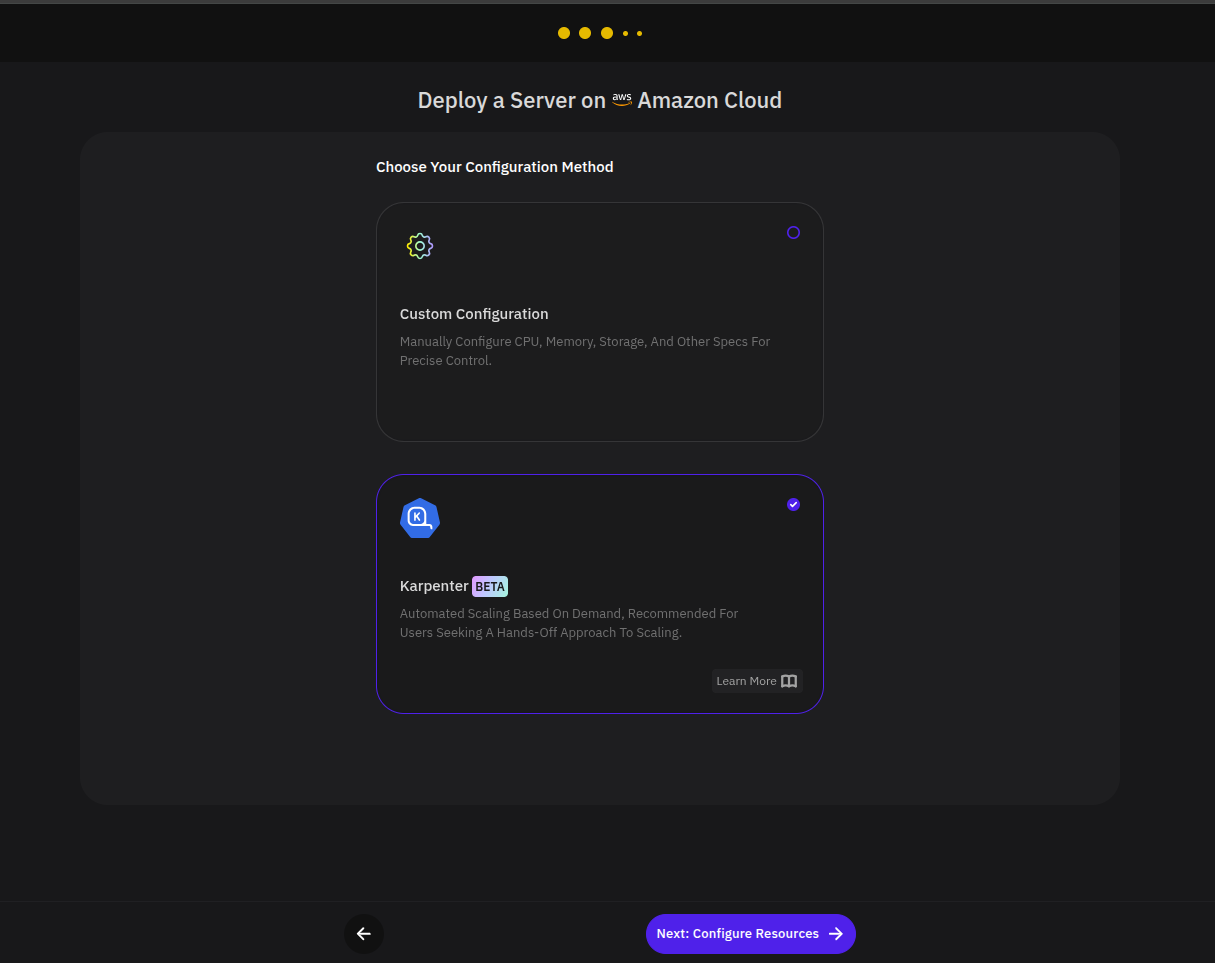
Step 5: Choose a Configuration Method
Choose how to configure server resources:
- Custom Configuration — Manually define CPU, memory, storage, and other server settings.
- Karpenter — Use automated, demand-based scaling.
Click Next: Configure Resources after making your selection.
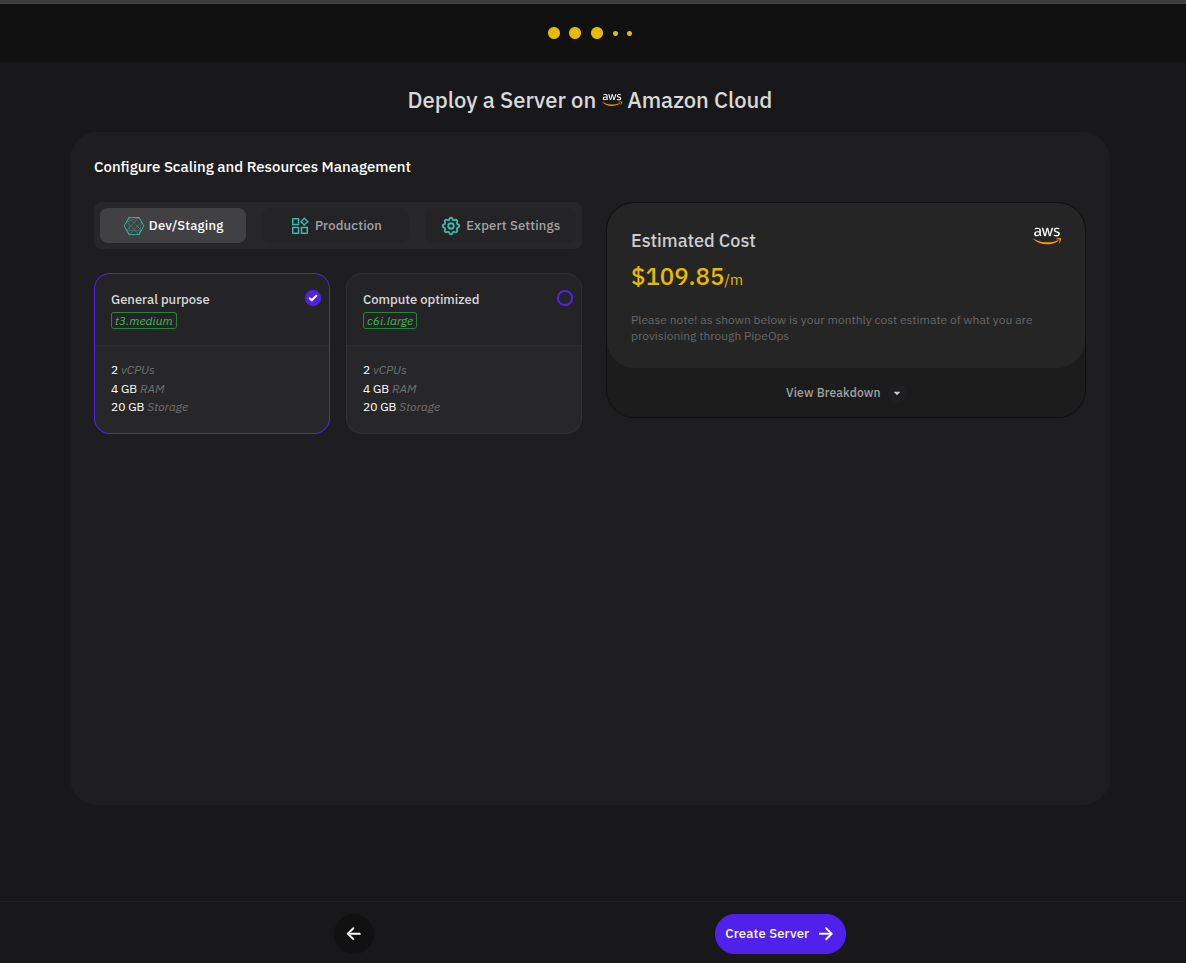
Step 6: Configure Resources
How resources are configured depends on the method selected in Step 5.
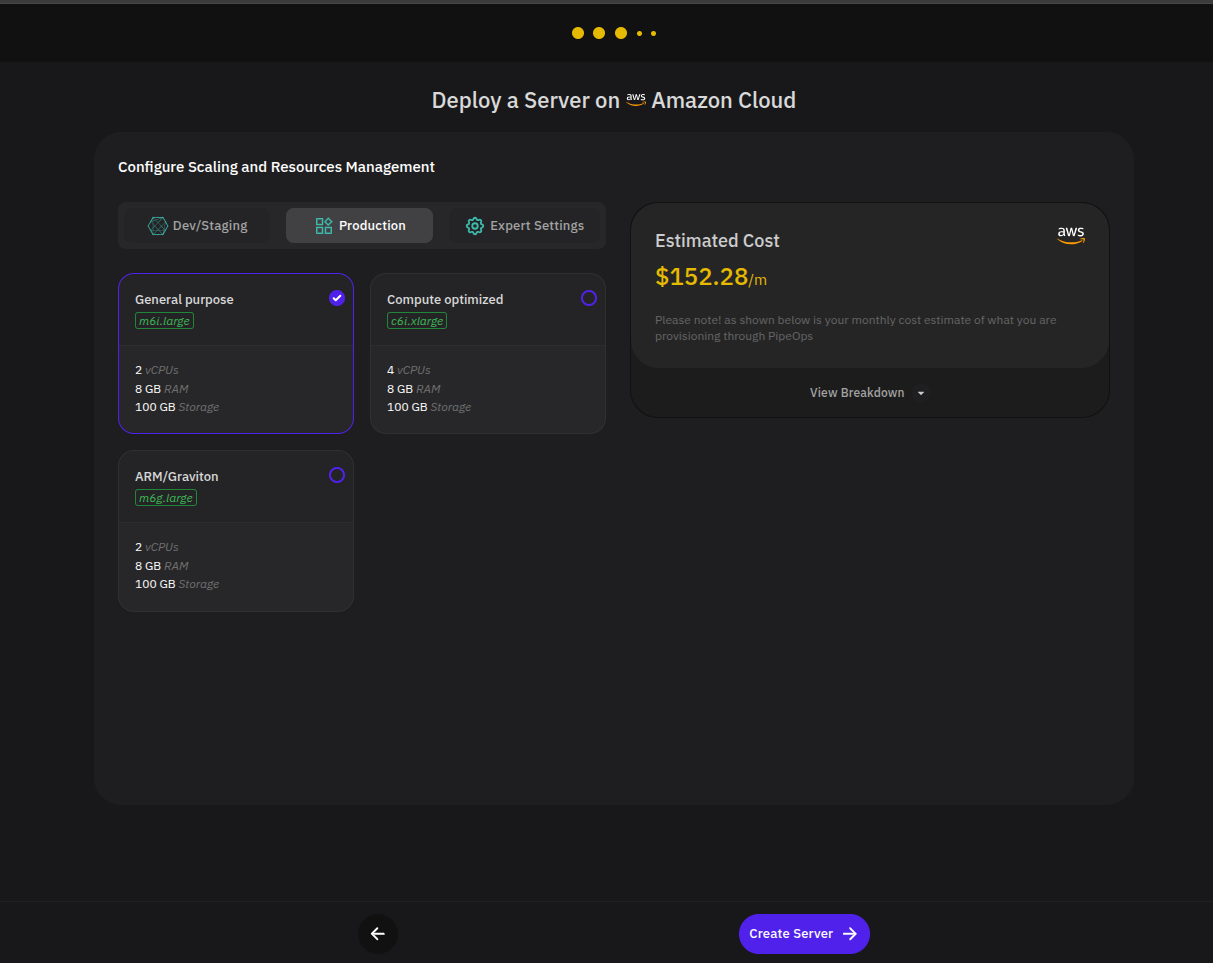
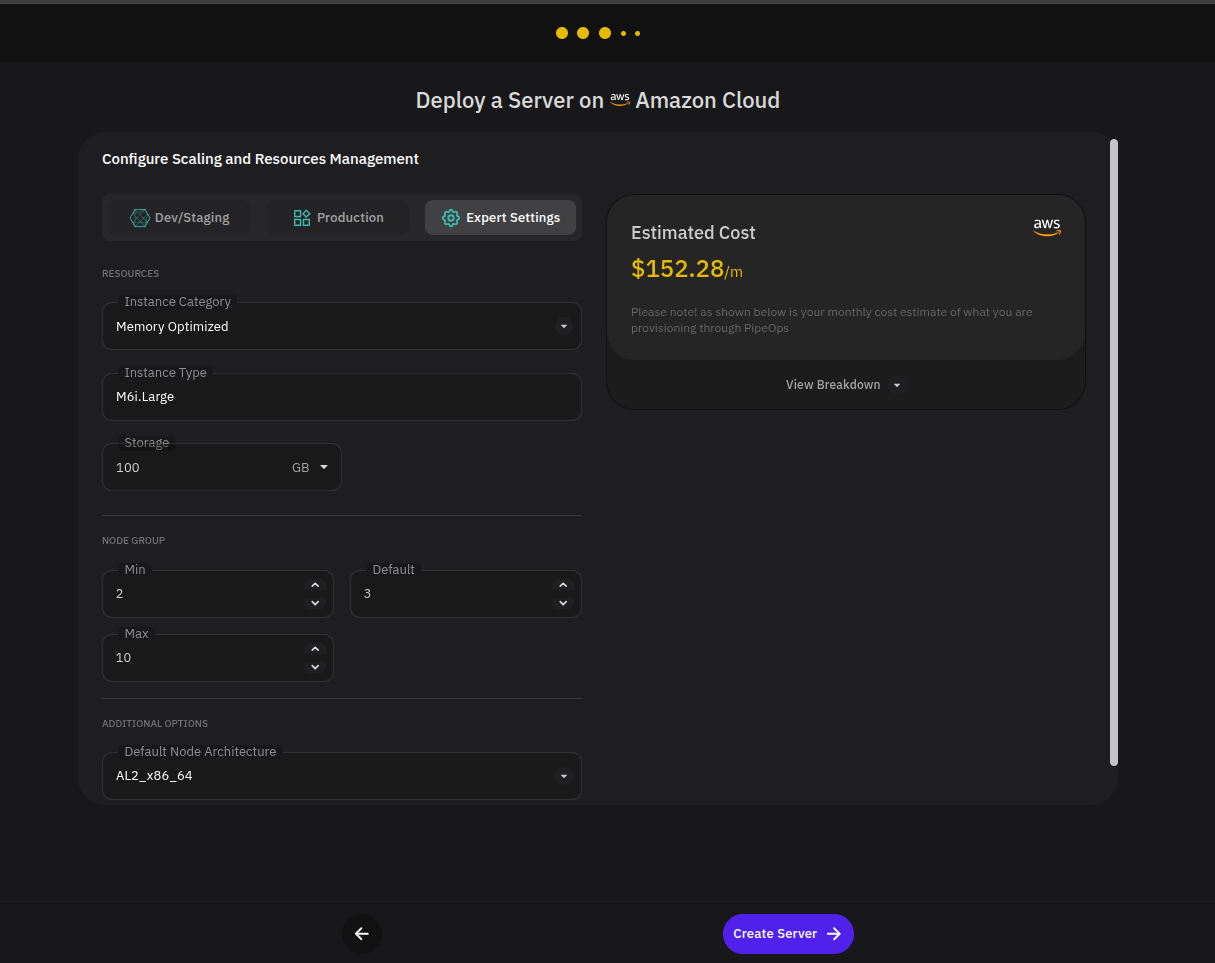
If you selected Custom Configuration:
Choose a resource profile for your workload. Preset environments — Dev/Staging and Production — offer curated instance options with estimated monthly costs. For more granular control, switch to Expert Settings to configure instance category, instance type, storage, node group limits, and default node architecture.
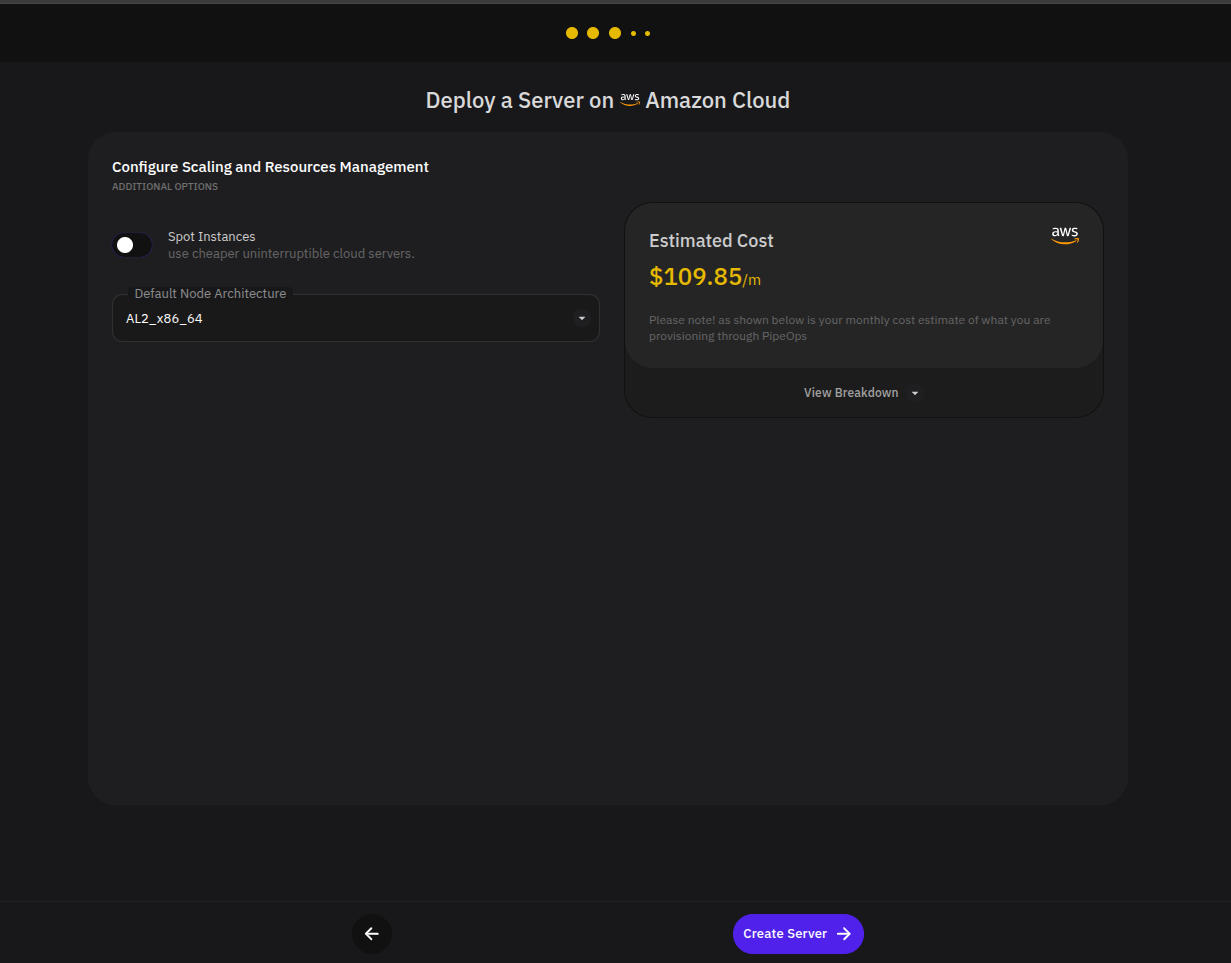
If you selected Karpenter:
Configure the available scaling options. Spot Instances can be enabled and the default node architecture can be selected.
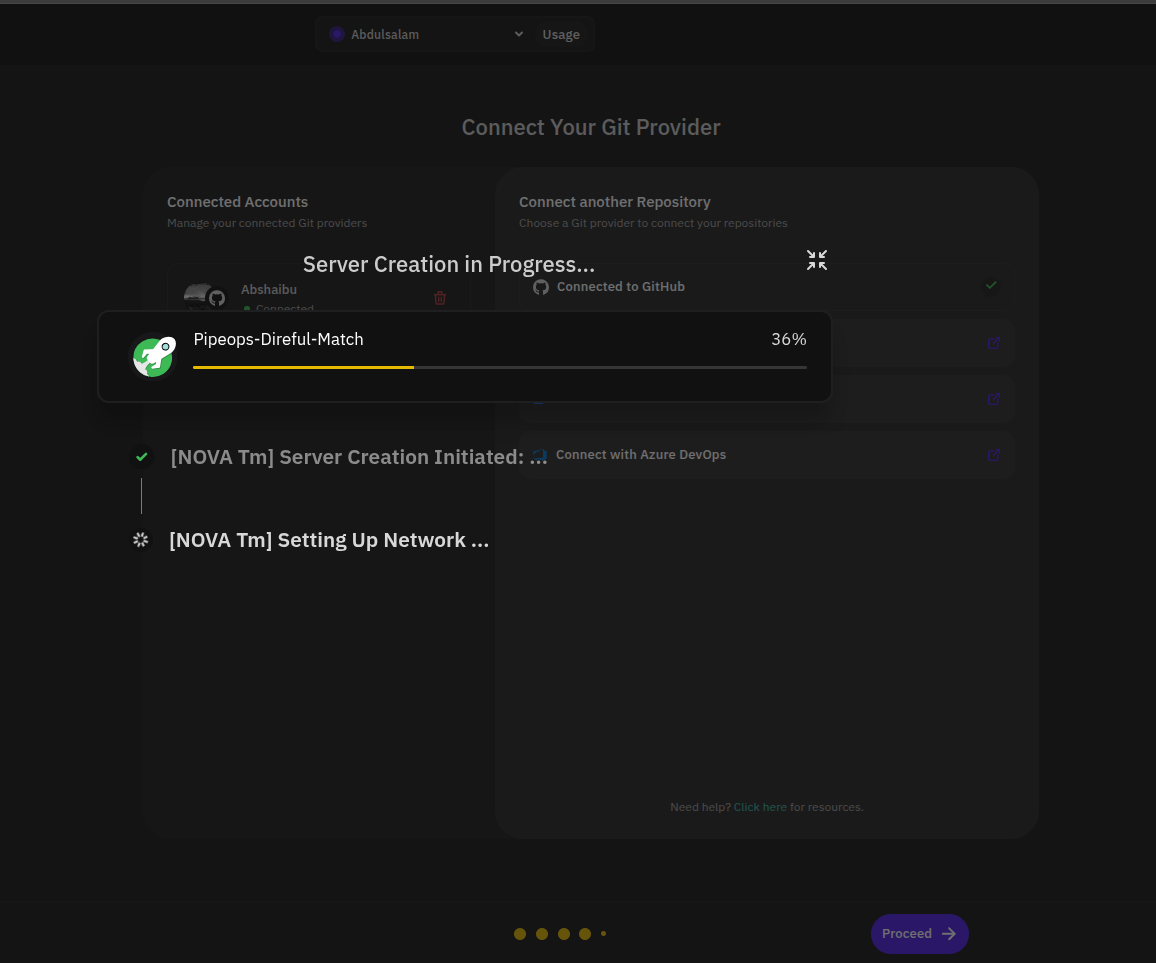
Step 7: Create the Server
Click Create Server. PipeOps displays a progress indicator while provisioning the server in your cloud account.
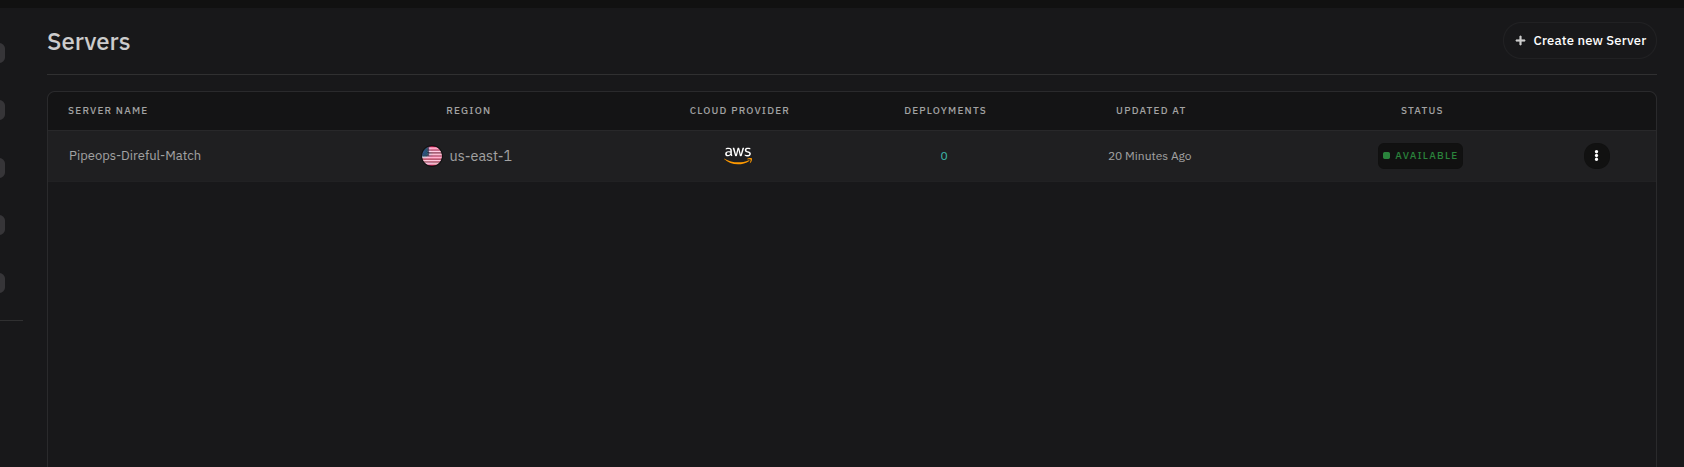
Step 8: View Your Server
When setup completes, the new server appears on the Servers page showing its region, cloud provider, deployment count, last updated time, and status. It is now ready to receive deployments.
Step 9: Connect a Git Provider and Select a Source
On the project deployment page, select From Repository or From Templates.
To deploy from a repository, select your Git provider. If the repository is not yet connected, click Link New Repo and follow the prompts.
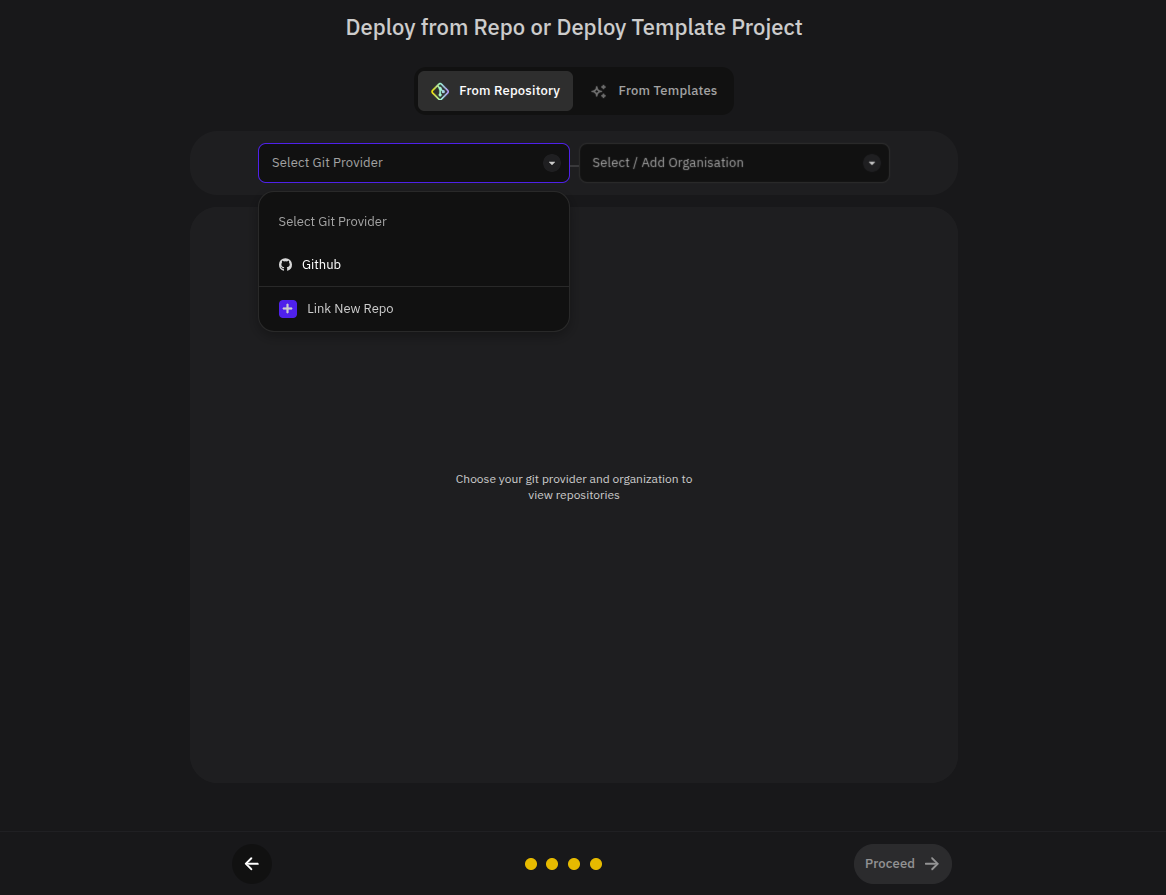
Then select or add the organization that owns the repository. If prompted, install the PipeOps Git app to grant access to your repositories.
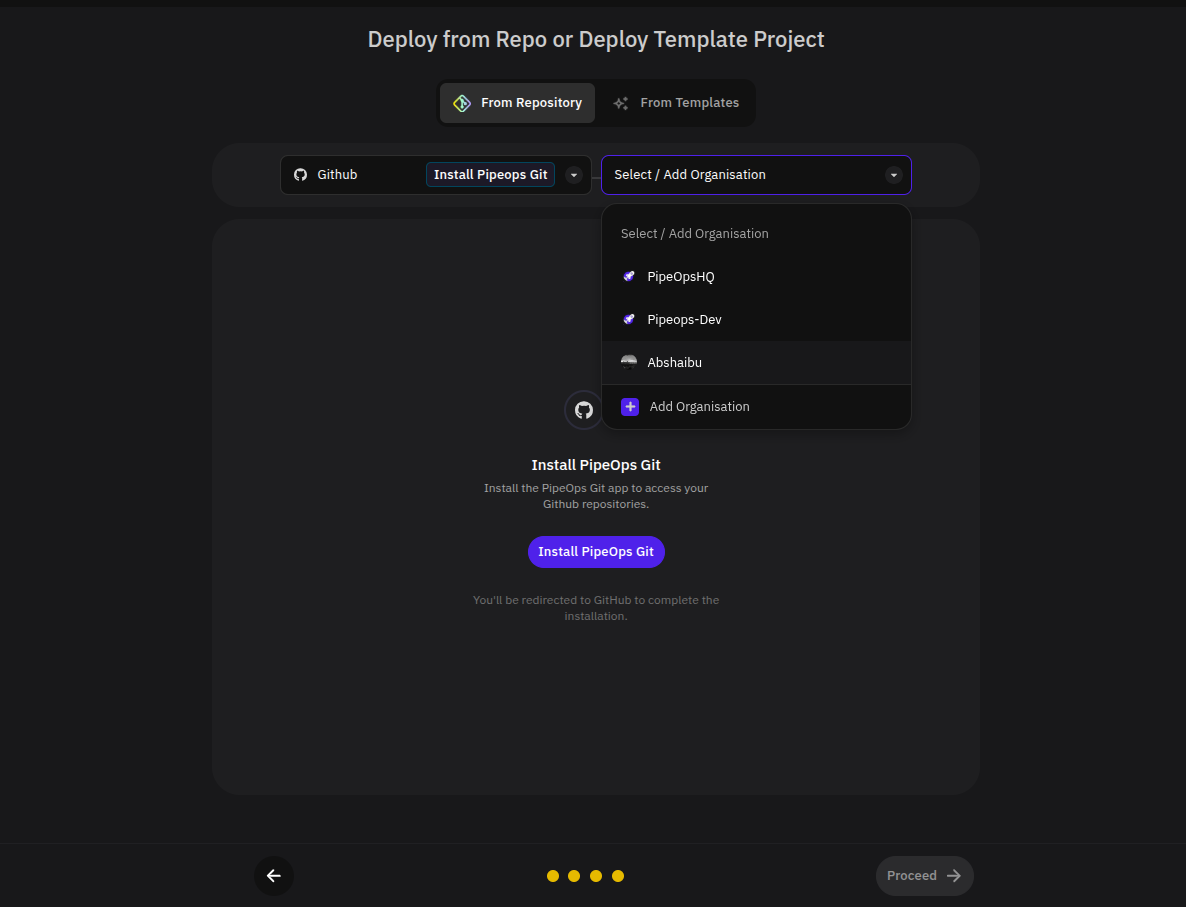
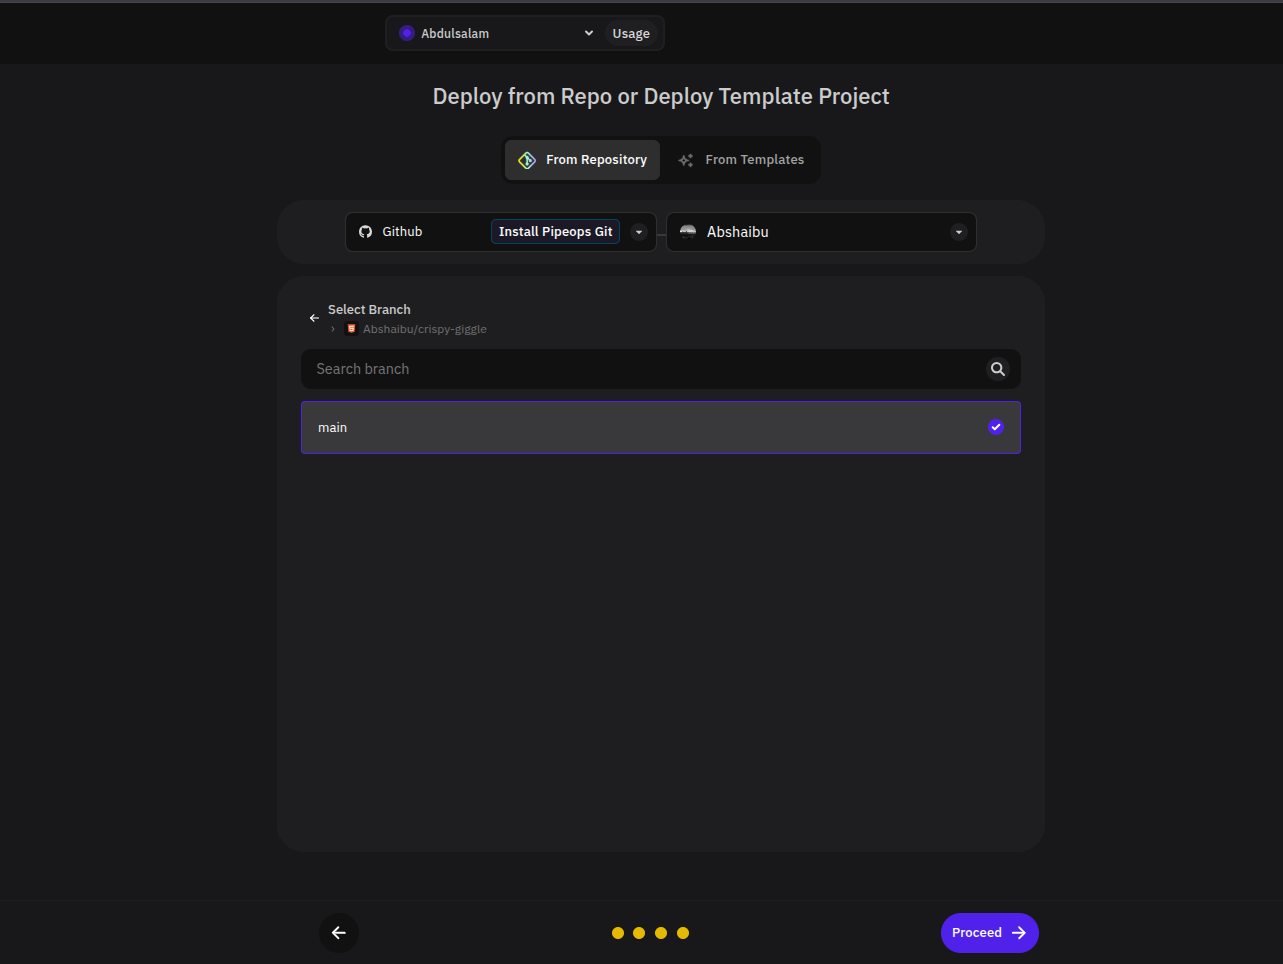
Step 10: Select a Repository and Branch
Choose the repository to deploy,
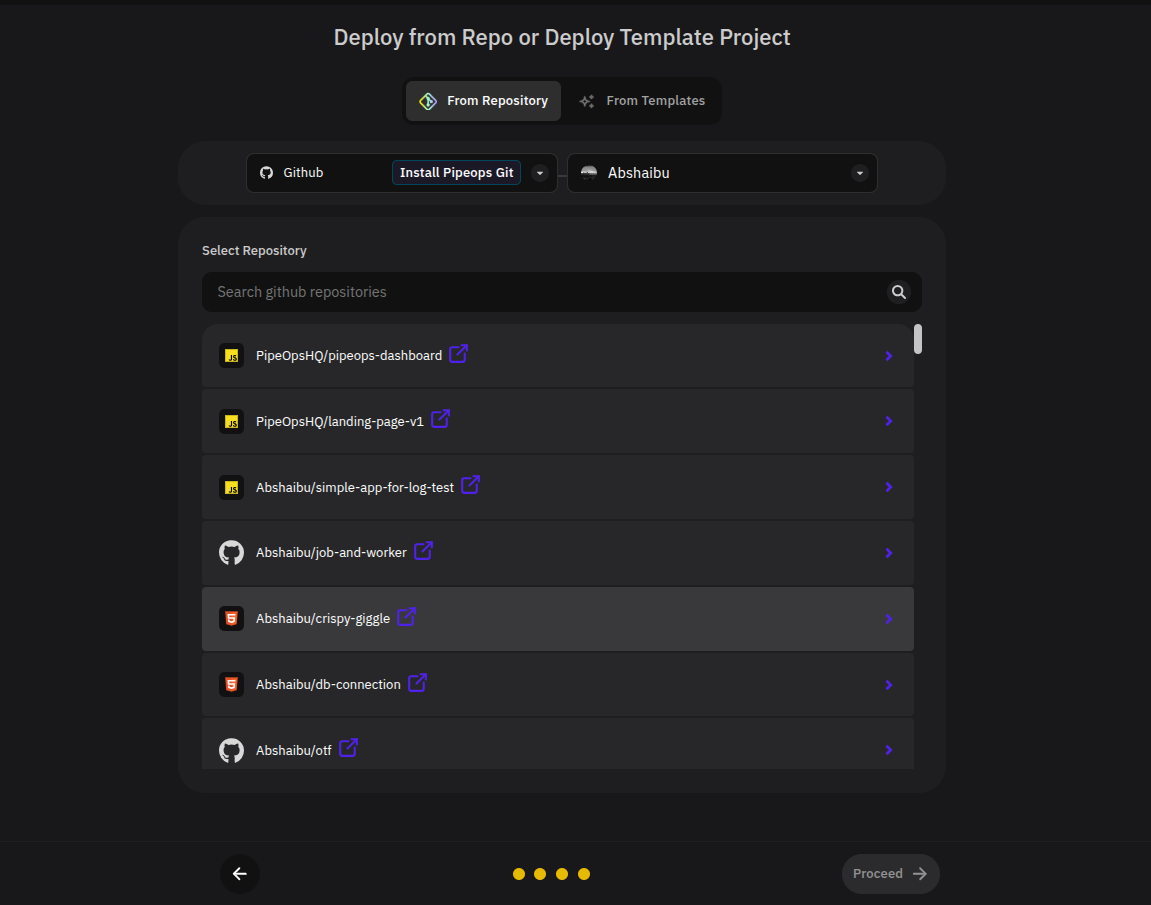
then select the branch PipeOps should build from. Click Proceed.
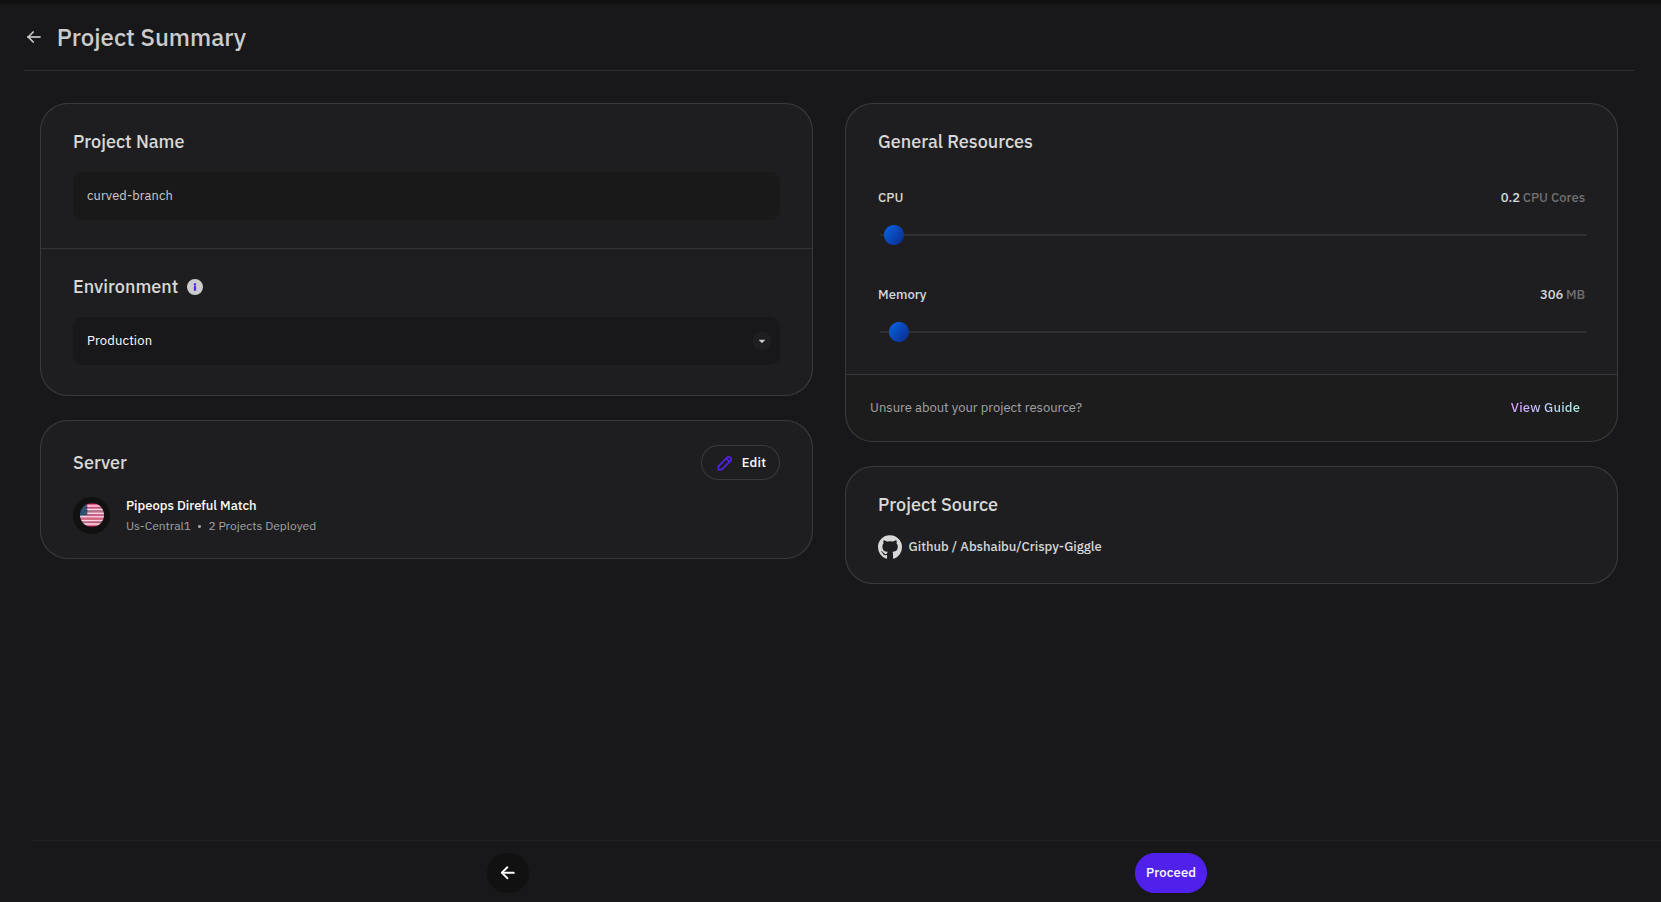
Step 11: Review the Project Summary
Confirm the project configuration before proceeding:
- Project name — update as needed
- Deployment environment — select from available environments or create a new one. PipeOps includes Production and Beta by default; additional environments can be created up to the limit your plan allows
- Target server — the server provisioned in Step 7
- CPU and memory — adjust resource allocation as needed
- Project source — verify the correct repository and branch are selected
Click Proceed when the configuration is correct.
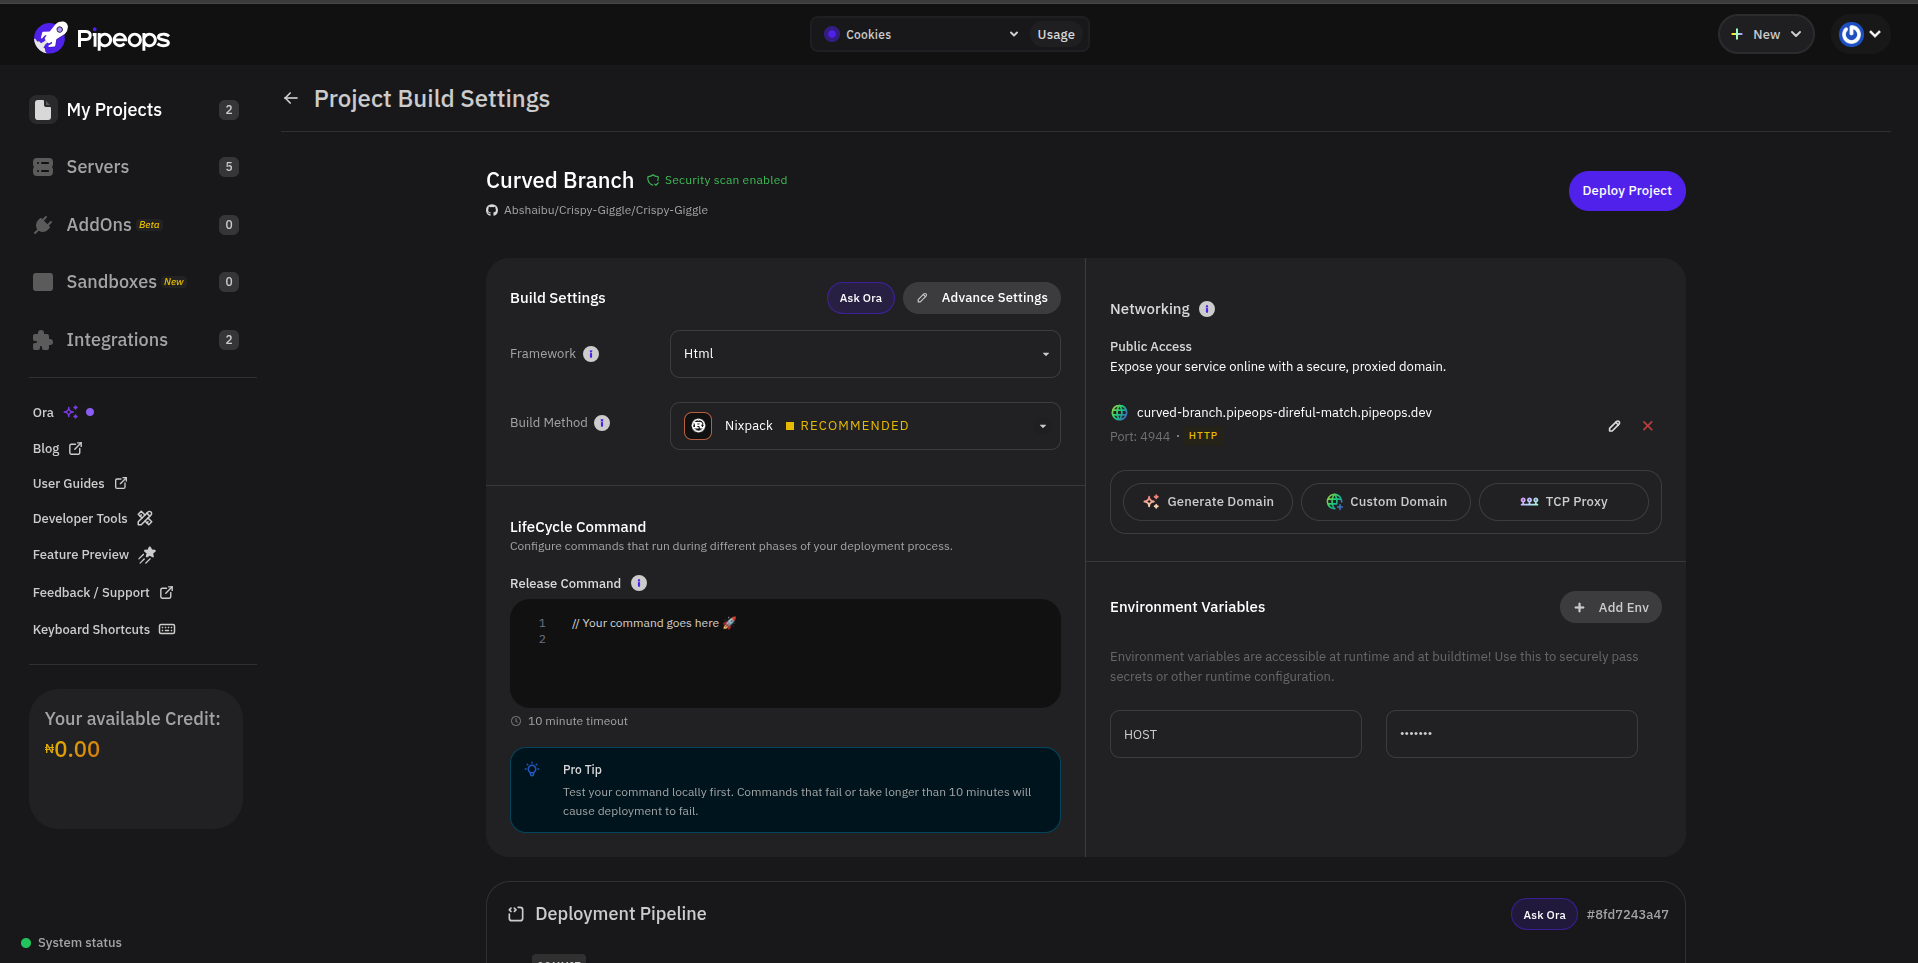
Step 12: Configure Build Settings
PipeOps detects your framework and recommends build settings automatically. Review and adjust the following as needed before deploying:
- Framework, build method, and release command
- Networking — enable public access, configure custom domains, or set up TCP proxy settings
- Environment variables — add any variables the application requires at runtime
Click Deploy Project to start the deployment.
Step 13: Monitor the Deployment
Track progress in the deployment pipeline. Build logs and app logs update in real time.
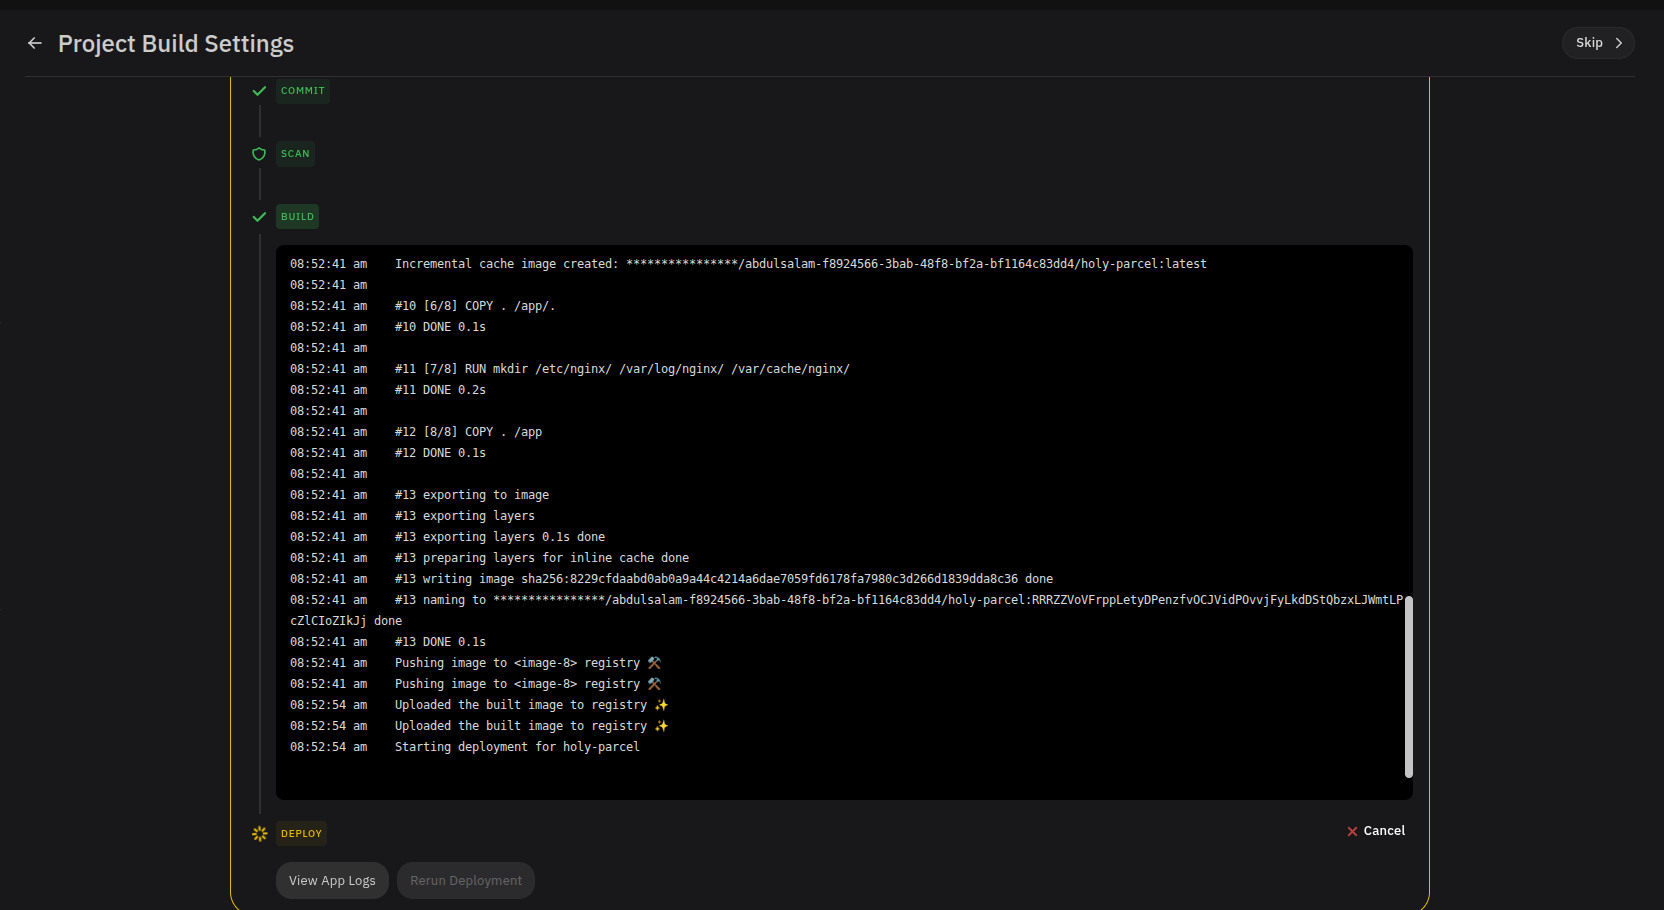
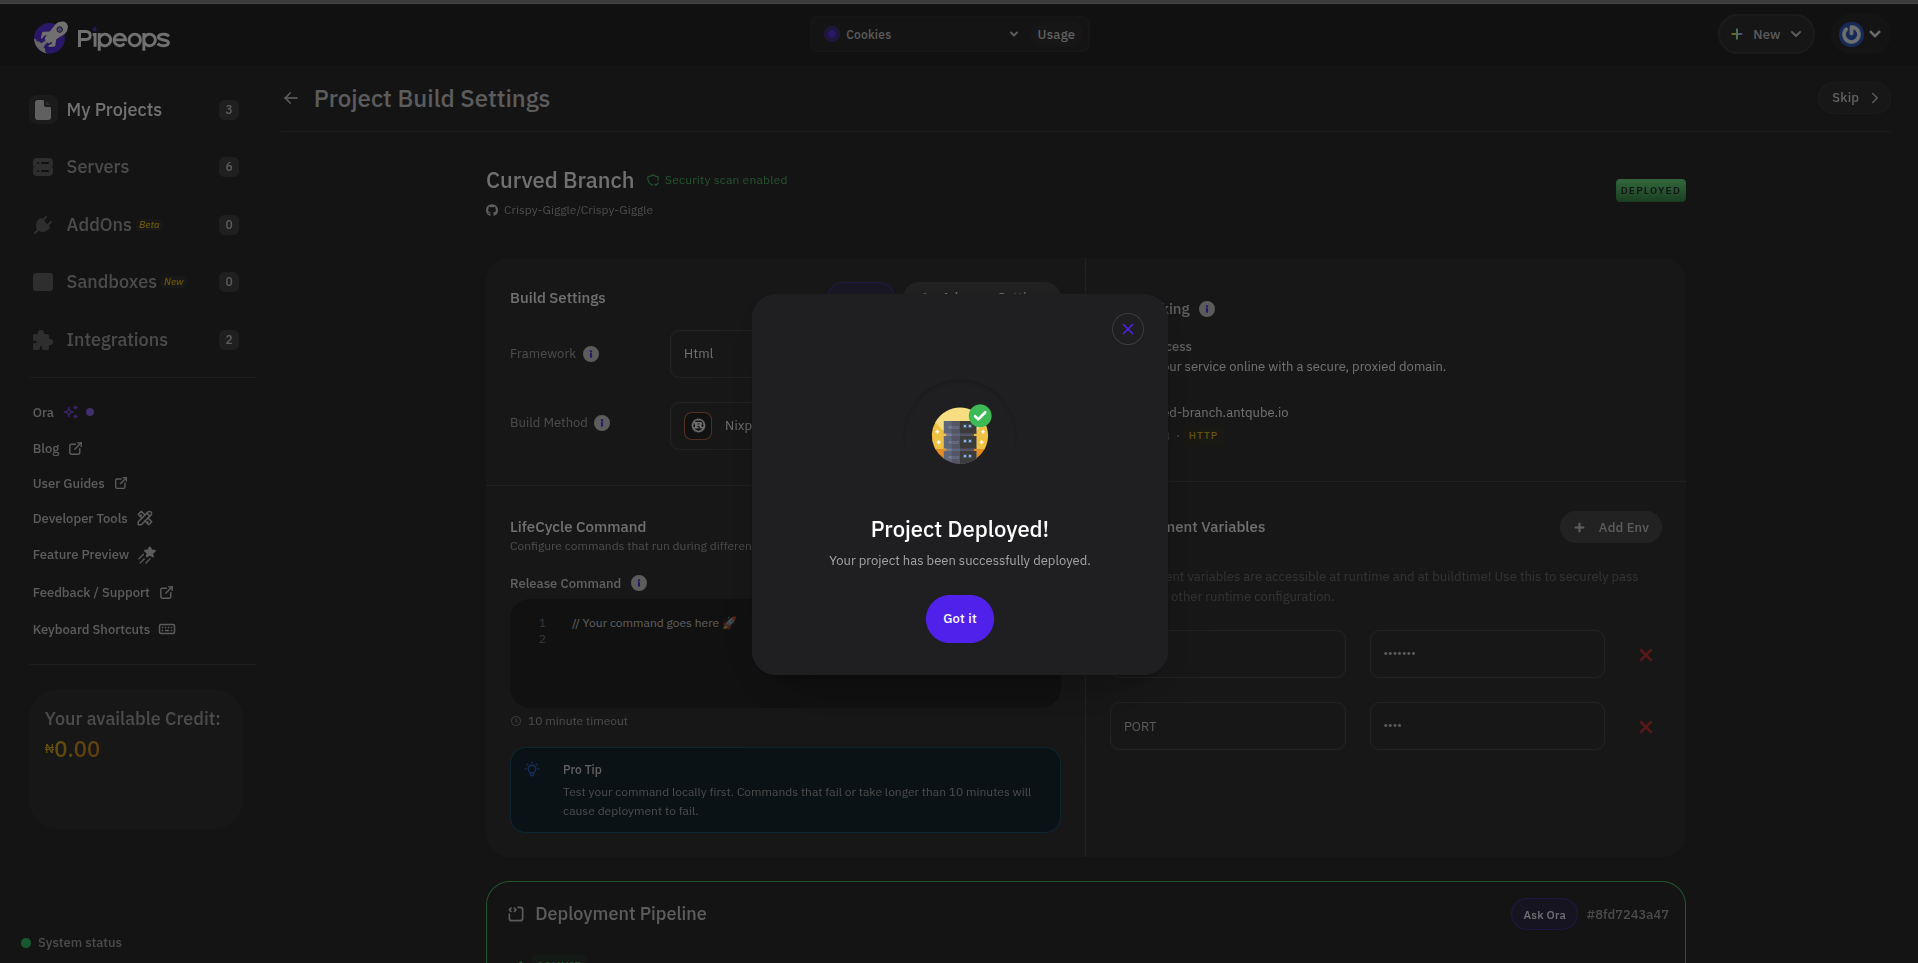
Step 14: Deployment Complete
When the deployment succeeds, PipeOps confirms that the project is live.
The project is now running on your BYOC server. To manage environments, configure custom domains, or set up CI/CD triggers, see the Project Overview page.