Deploy on PipeOps
The following steps cover provisioning a PipeOps-managed server and deploying your first project — from choosing a plan to monitoring your live deployment.
Before You Begin
Ensure the following are in place before starting:
- A PipeOps account
- A repository hosted on GitHub, GitLab, Bitbucket, or Azure DevOps
- Permission to install the PipeOps Git app on your organization
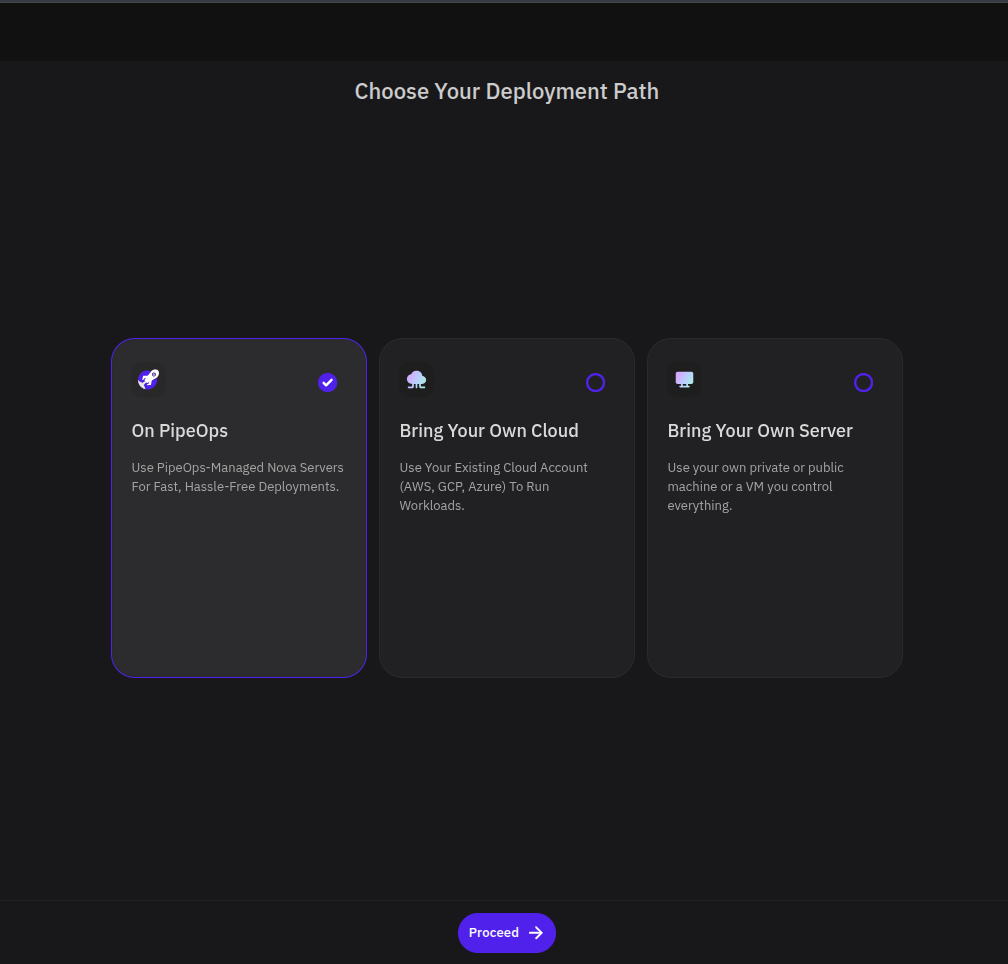
Step 1: Choose On PipeOps
On the Choose Your Deployment Path page, select On PipeOps, then click Proceed.
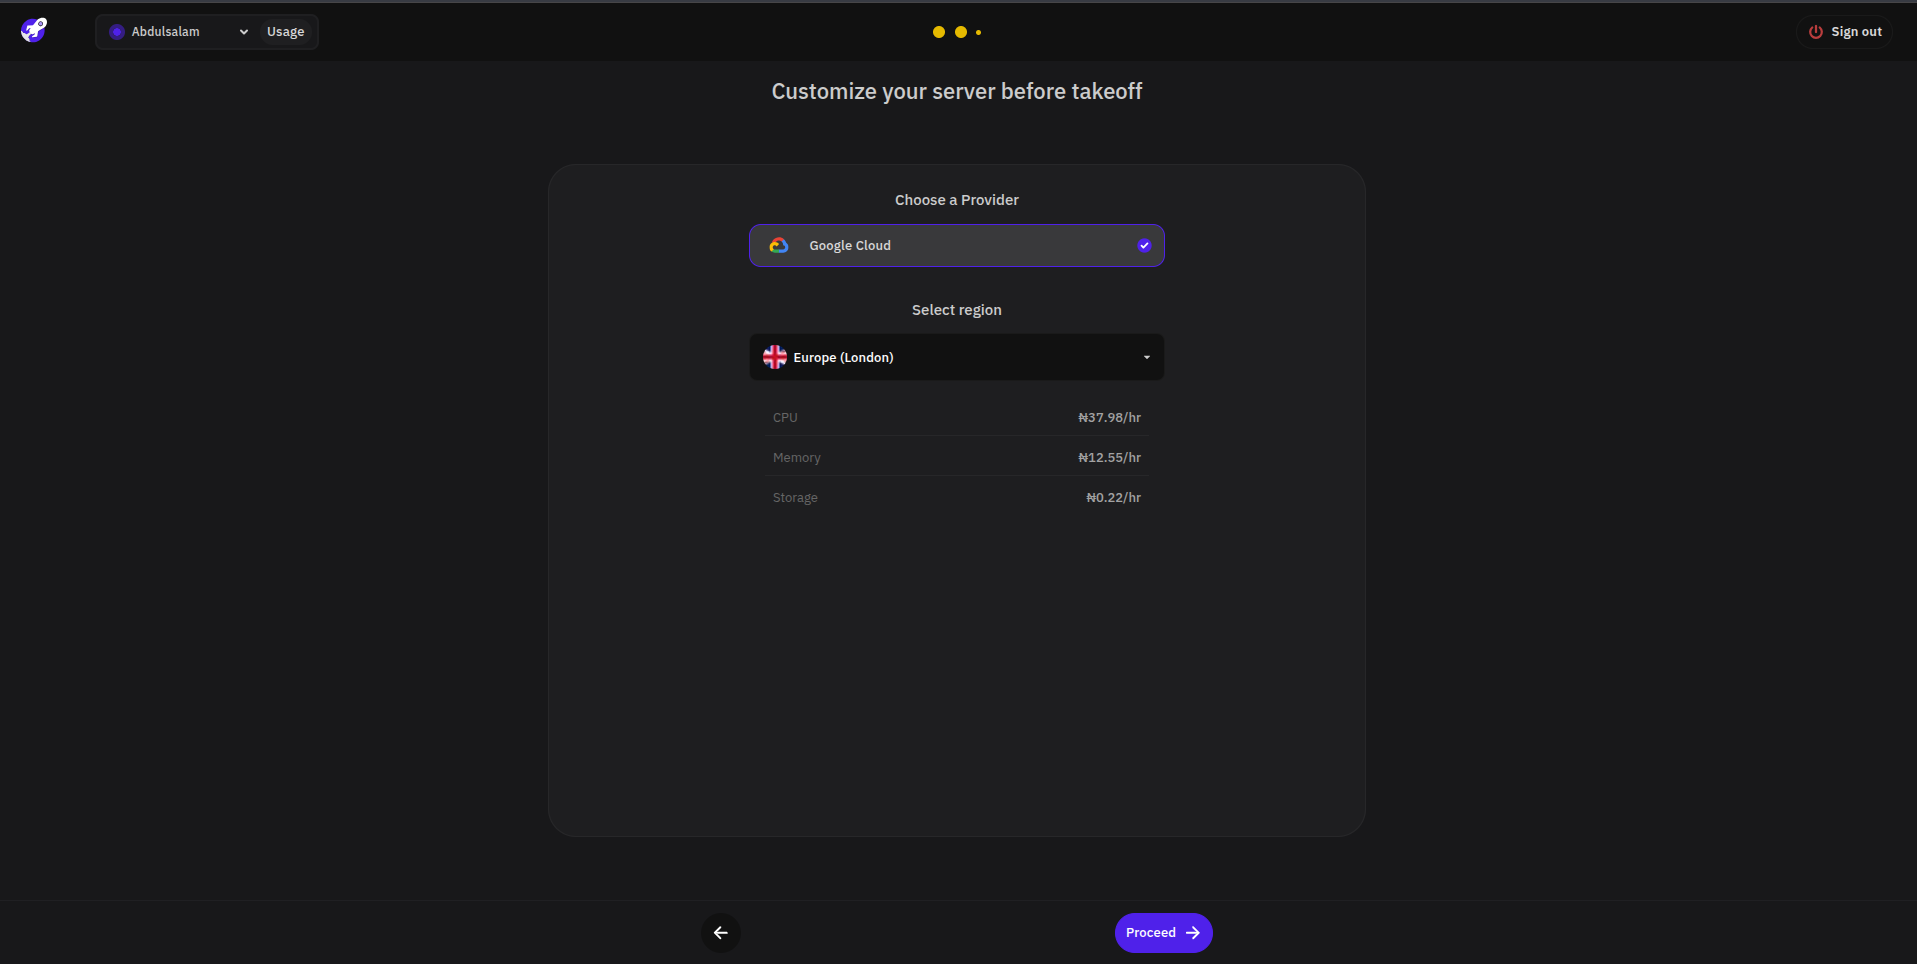
Step 2: Customize Your Server
Select the cloud provider and region where PipeOps will provision your server. The page displays hourly rates for CPU, memory, and storage for cost estimation.
Click Proceed once your provider and region are set.
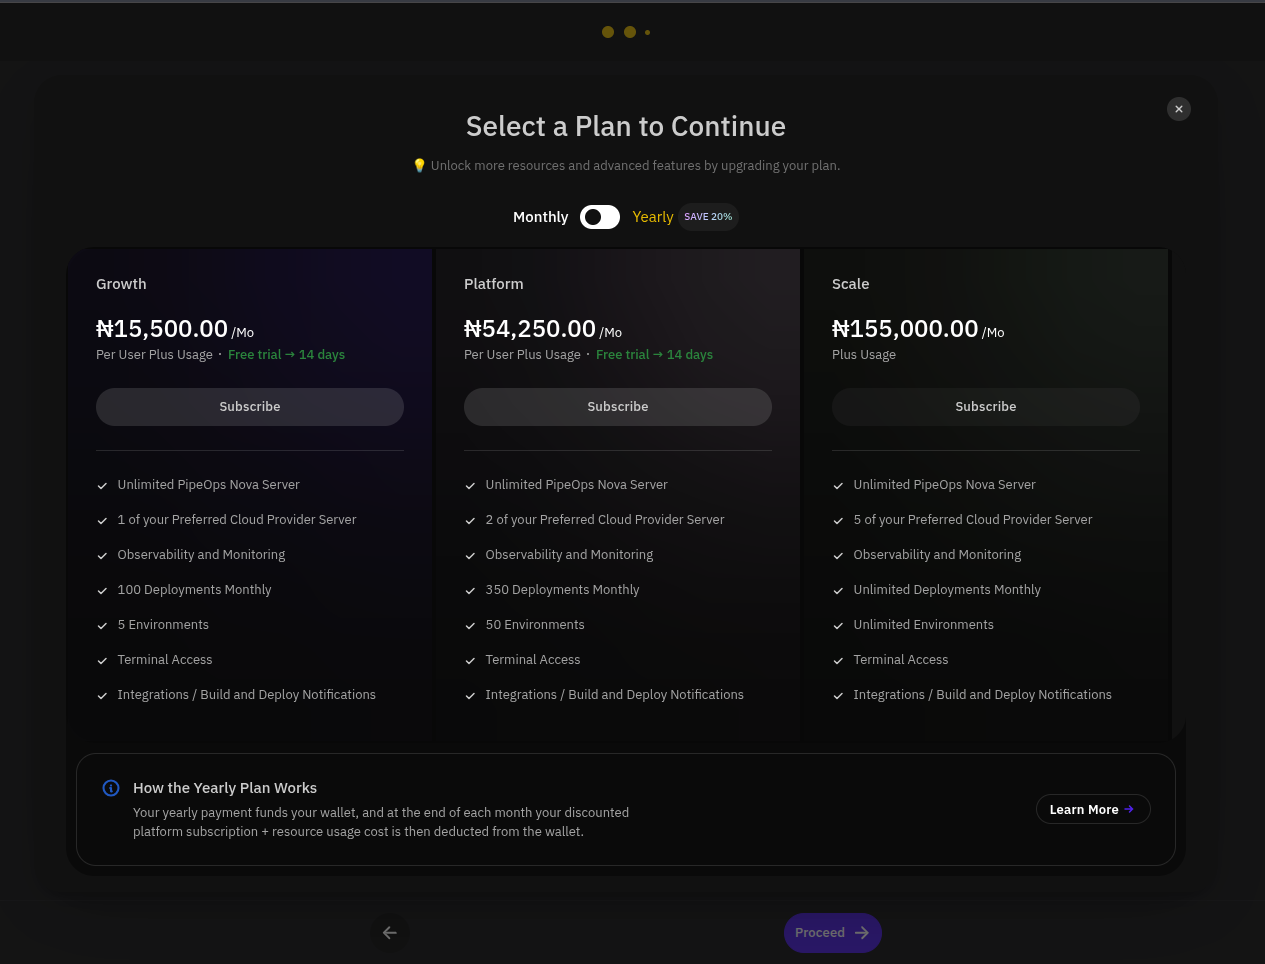
Step 3: Select a Plan
If you do not have an active subscription, PipeOps displays the plan selection paywall. Choose a plan, toggle between Monthly and Yearly billing to compare pricing, then click Subscribe on the preferred plan.
Each plan displays its included limits for reference.
Note: If you already have an active subscription, skip this step. Continue creating servers and deploying projects within the limits of your current plan.
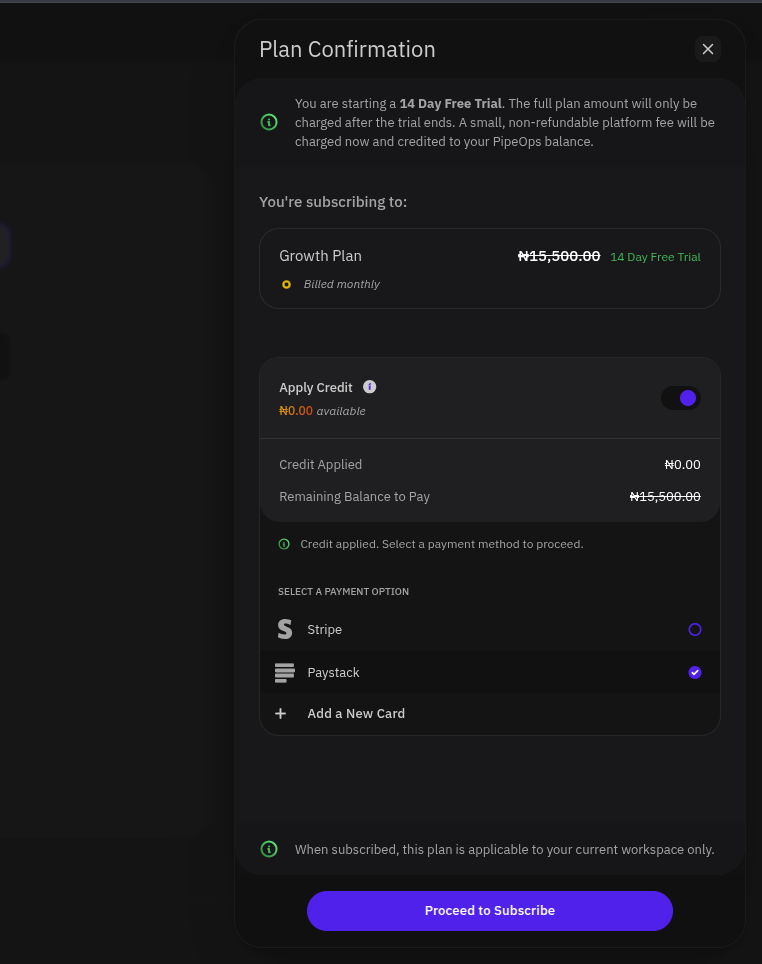
Step 4: Confirm and Subscribe
Review your plan details before completing the subscription. Any applicable free trial or workspace credit will appear on this page.
Select a payment method, then click Proceed to Subscribe.
Step 5: Access Your Dashboard
Once the subscription is confirmed — or if an active subscription already exists — PipeOps provisions your server and opens your dashboard. The server is now ready for deployments.
Step 6: Connect a Git Provider and Select a Source
PipeOps supports the following Git providers:
- GitHub
- GitLab
- Bitbucket
- Azure DevOps
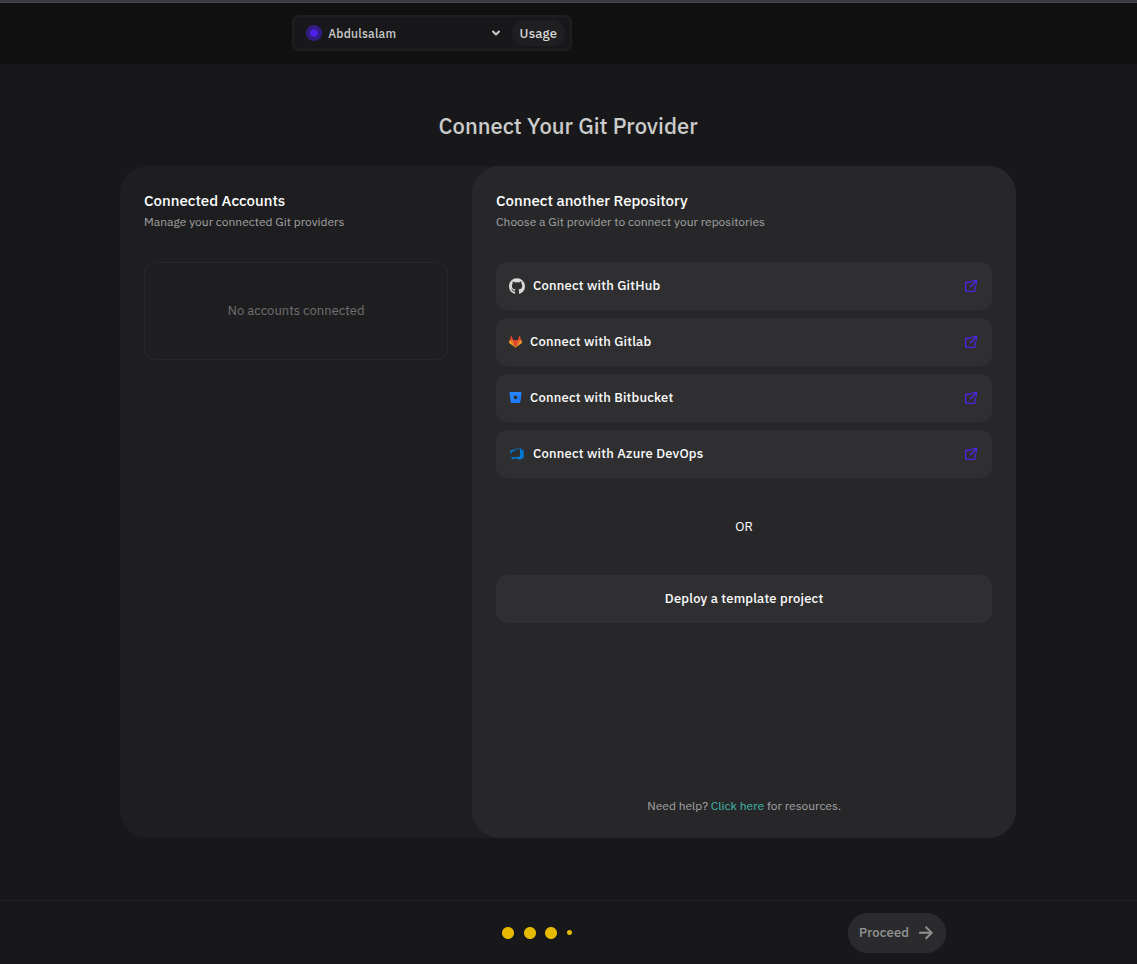
On the project deployment page, select From Repository, choose a Git provider,
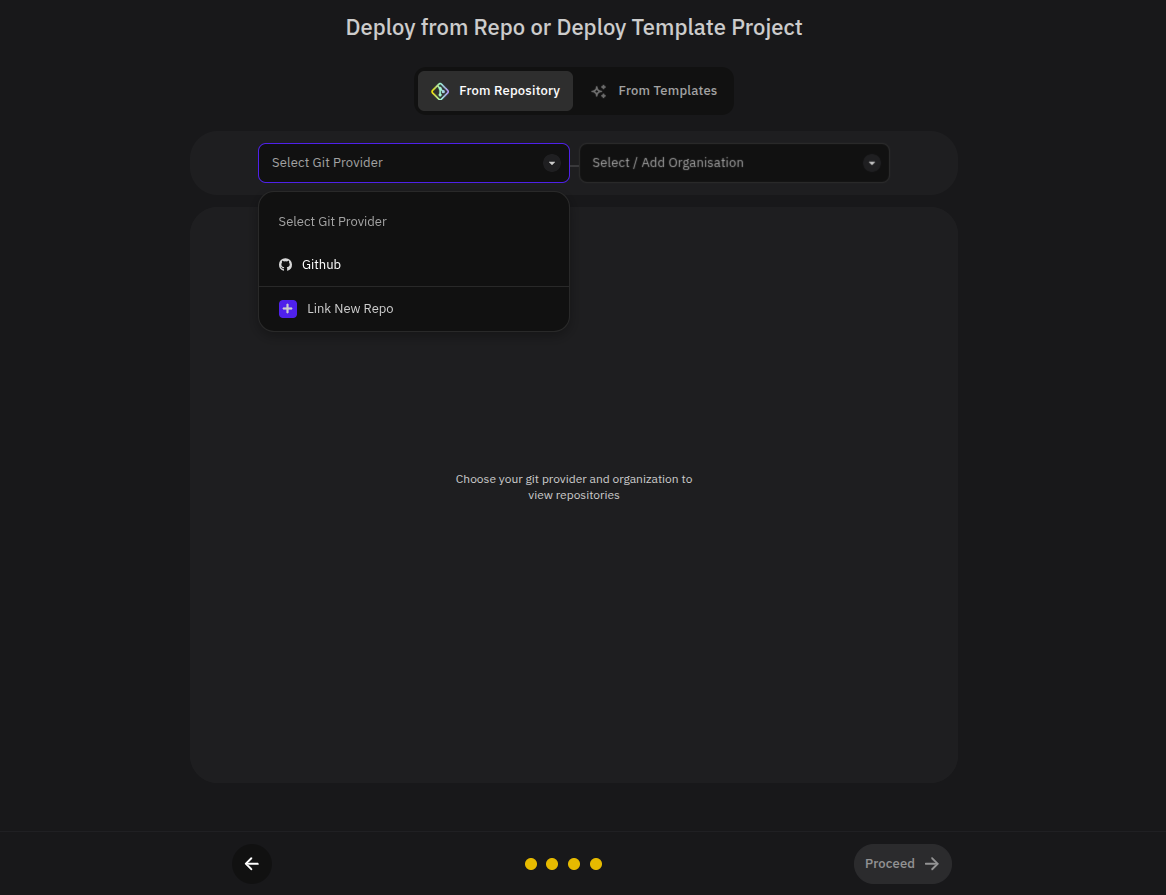
then select or add an organization. If prompted, install the PipeOps Git app to grant access to your repositories.
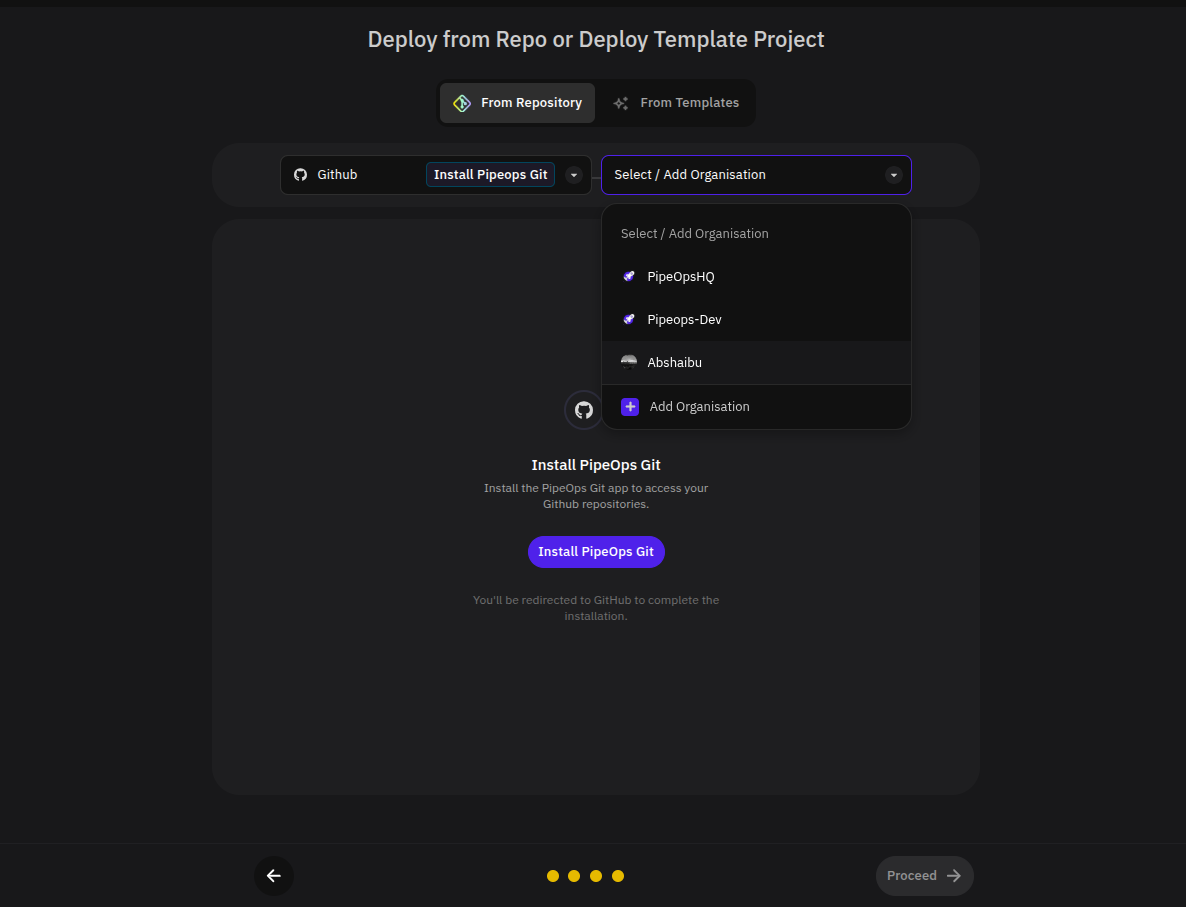
Alternatively, select From Templates to deploy a pre-built starter project.
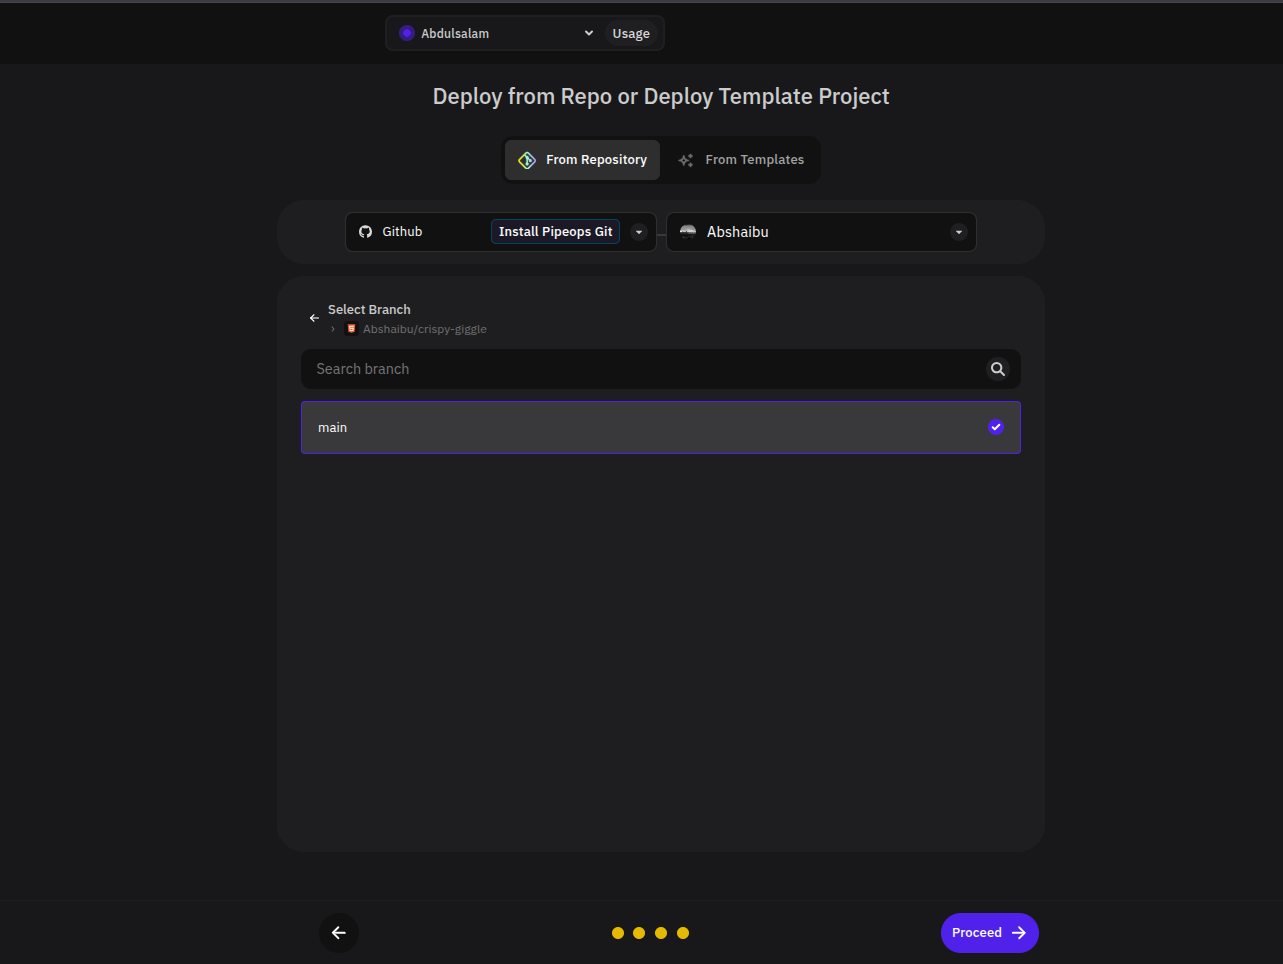
Step 7: Select a Repository and Branch
Choose the repository to deploy,
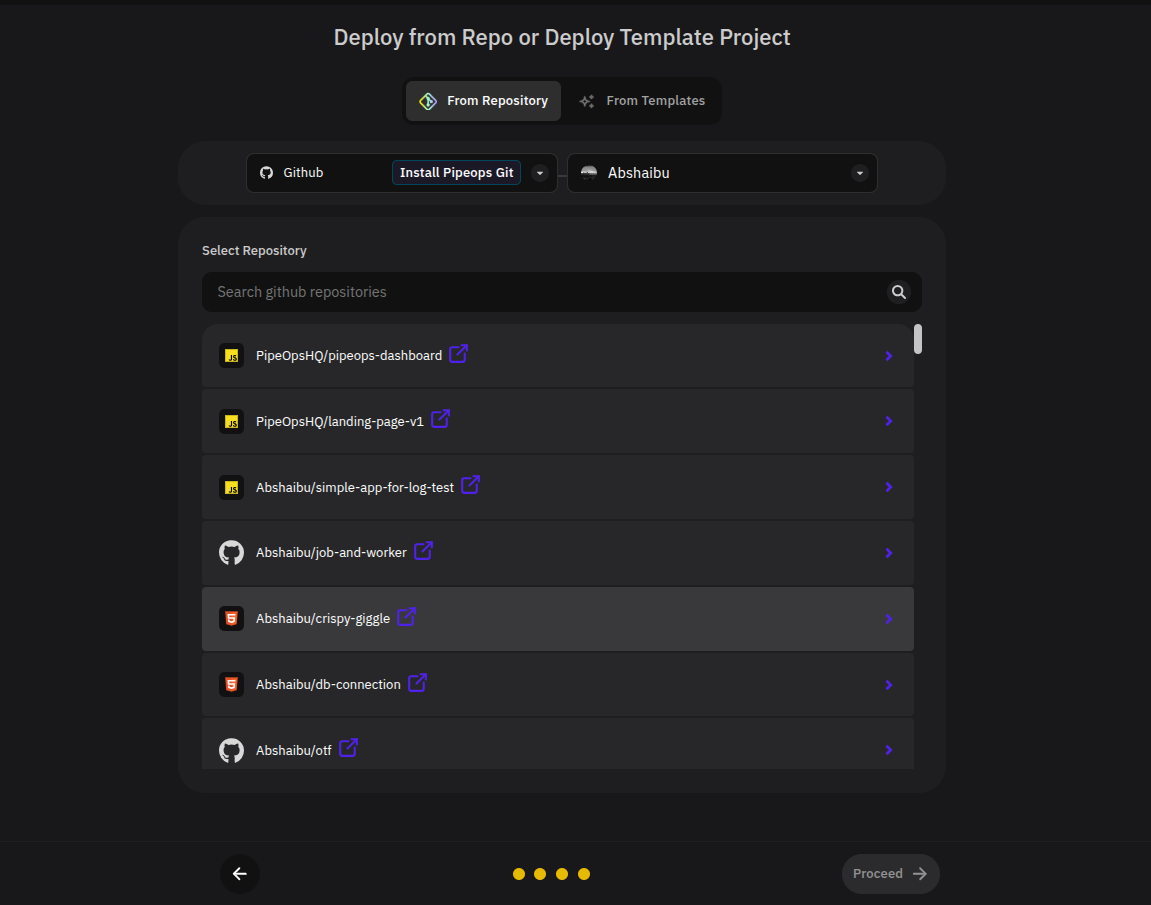
then select the branch PipeOps should build from. Click Proceed.
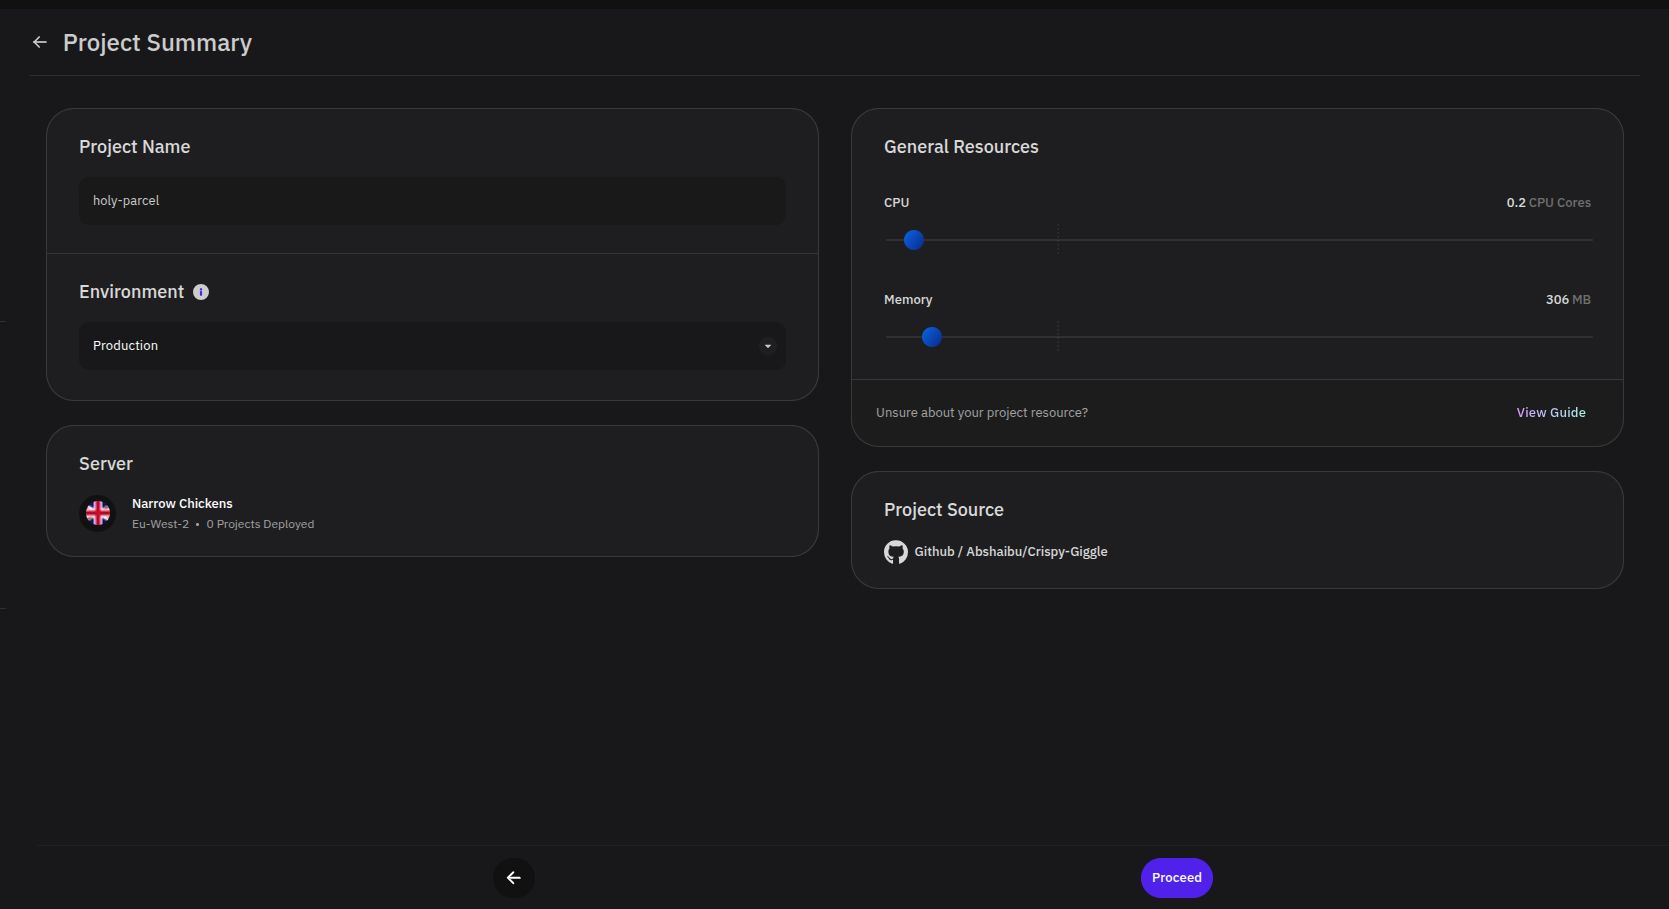
Step 8: Review the Project Summary
Confirm the project configuration before proceeding:
- Project name — update as needed
- Deployment environment — select from available environments or create a new one. PipeOps includes Production and Beta by default; additional environments can be created up to the limit your plan allows
- Target server — the server provisioned in Step 5
- CPU and memory — adjust resource allocation as needed
- Project source — verify the correct repository and branch are selected
Click Proceed when the configuration is correct.
Step 9: Configure Build Settings
PipeOps detects your framework and recommends a build method automatically. Review and adjust the following as needed before deploying:
- Build method and framework
- Networking — enable public access, configure custom domains, or set up TCP proxy settings
- Environment variables — add any variables the application requires at runtime
Click Deploy Project to start the deployment.
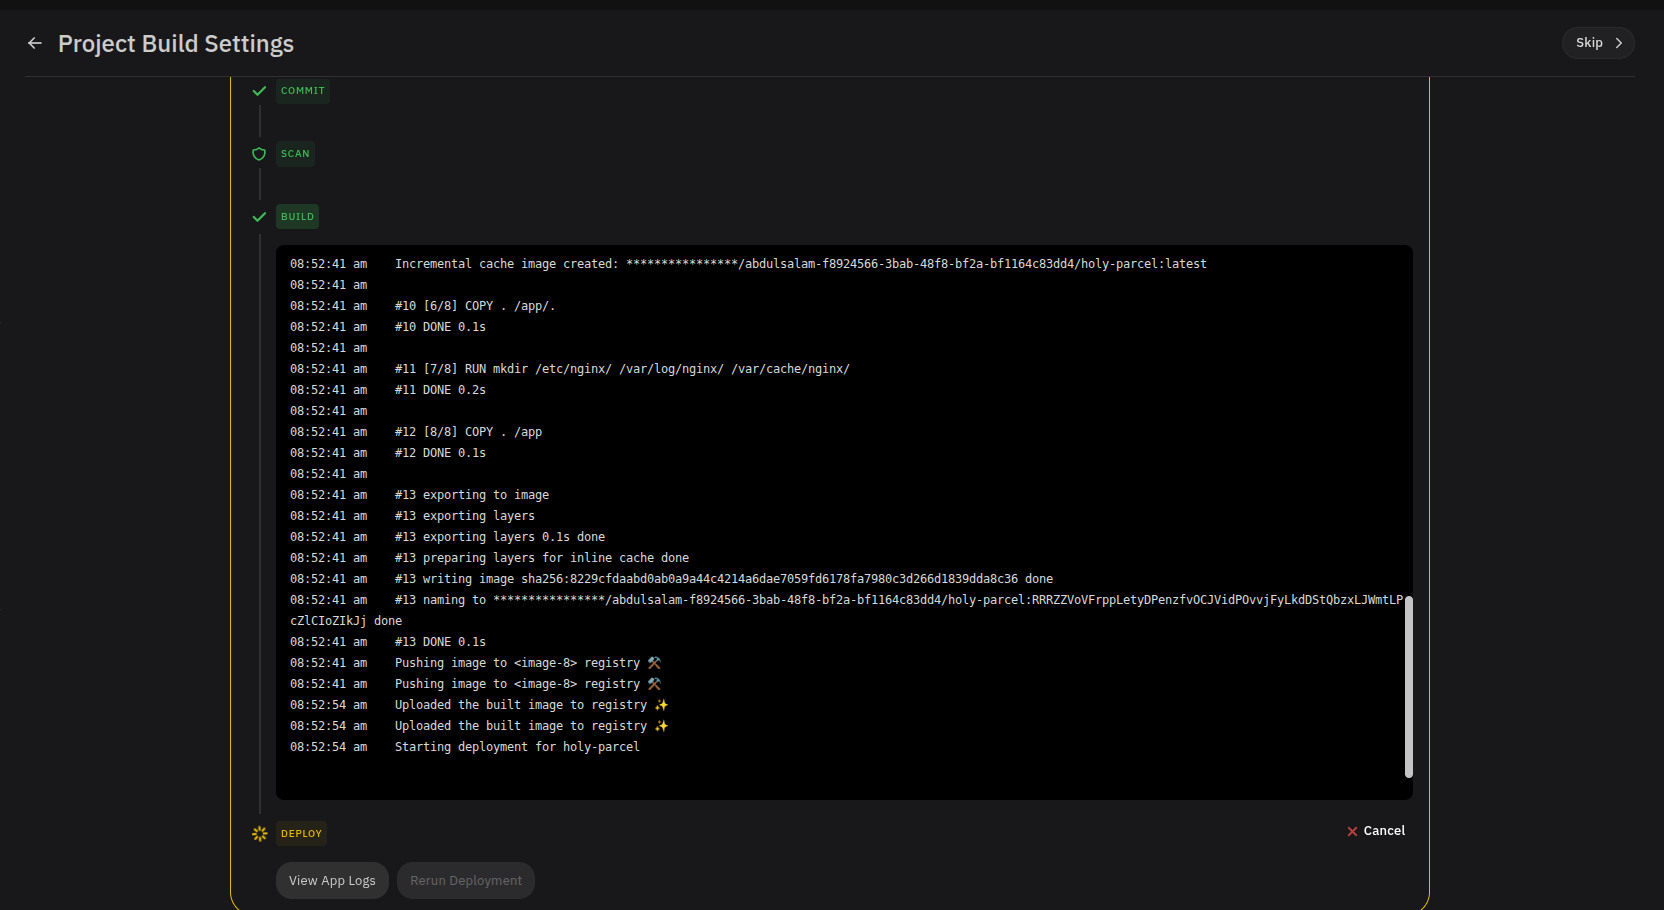
Step 10: Monitor the Deployment
Track progress in the deployment pipeline. Build logs and app logs update in real time.
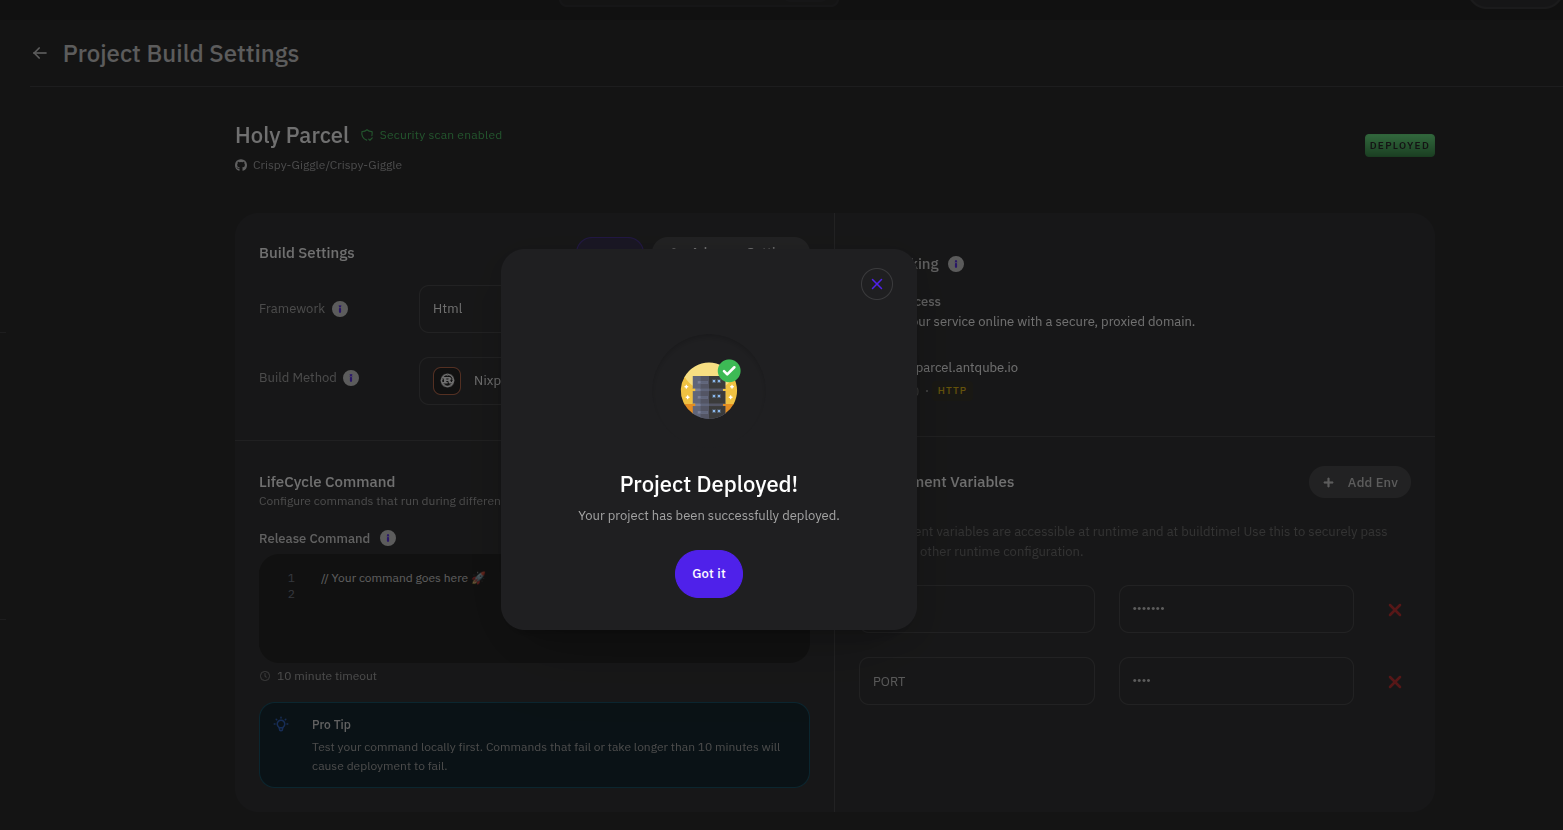
Step 11: Deployment Complete
When the deployment succeeds, PipeOps confirms that the project is live.
The project is now running on the newly created server. To manage environments, configure custom domains, or set up CI/CD triggers, see the Project Deployment guide.