Deploying a Project
Deploying a project on PipeOps involves selecting a project type, connecting your repository, and configuring your build settings. Before you begin, make sure you have:
- An active PipeOps workspace with a server provisioned.
- A connected Git provider (GitHub, GitLab, or Bitbucket), or an existing repository you want to deploy.
You can deploy from your own repository or use one of the provided templates.
Step 1: Navigate to Deploy Project
From your PipeOps dashboard, click + New in the top-right corner and select Deploy Project from the dropdown.

Step 2: Choose a Project Type
Select the type of project you want to deploy.
| Type | Description | Availability |
|---|---|---|
| Web | Build and deploy web applications, APIs, and full-stack solutions. | Available |
| Container Registry | Deploy images directly from Docker Hub or a private registry. | Available |
| Database | Deploy database services to manage and store your data. | Available |
| Worker (Runner) | Set up background services for task processing and job queues. | Available |
| Function | Deploy serverless functions in Bun.js, Go, or Rust. | Coming Soon |
| Cron Job | Schedule and automate recurring tasks and processes. | Coming Soon |
| GitOps | Sync deployments from a Git repo manifest with ArgoCD-style continuous reconciliation. | Coming Soon |
| Terraform | Provision and manage infrastructure as code. | Coming Soon |
At the bottom of the page, you can also select Deploy an Add-on to choose from PipeOps' curated collection of production-ready add-on templates.

For this guide, select Web to proceed.
Step 3: Select a Source
The Deploy from a Repository or a Template Project page offers two options. Choose the tab that matches your situation:
- From Repository — if you want to deploy code from your own GitHub, GitLab, or Bitbucket repository.
- From Templates — if you want to start from a pre-built PipeOps template.
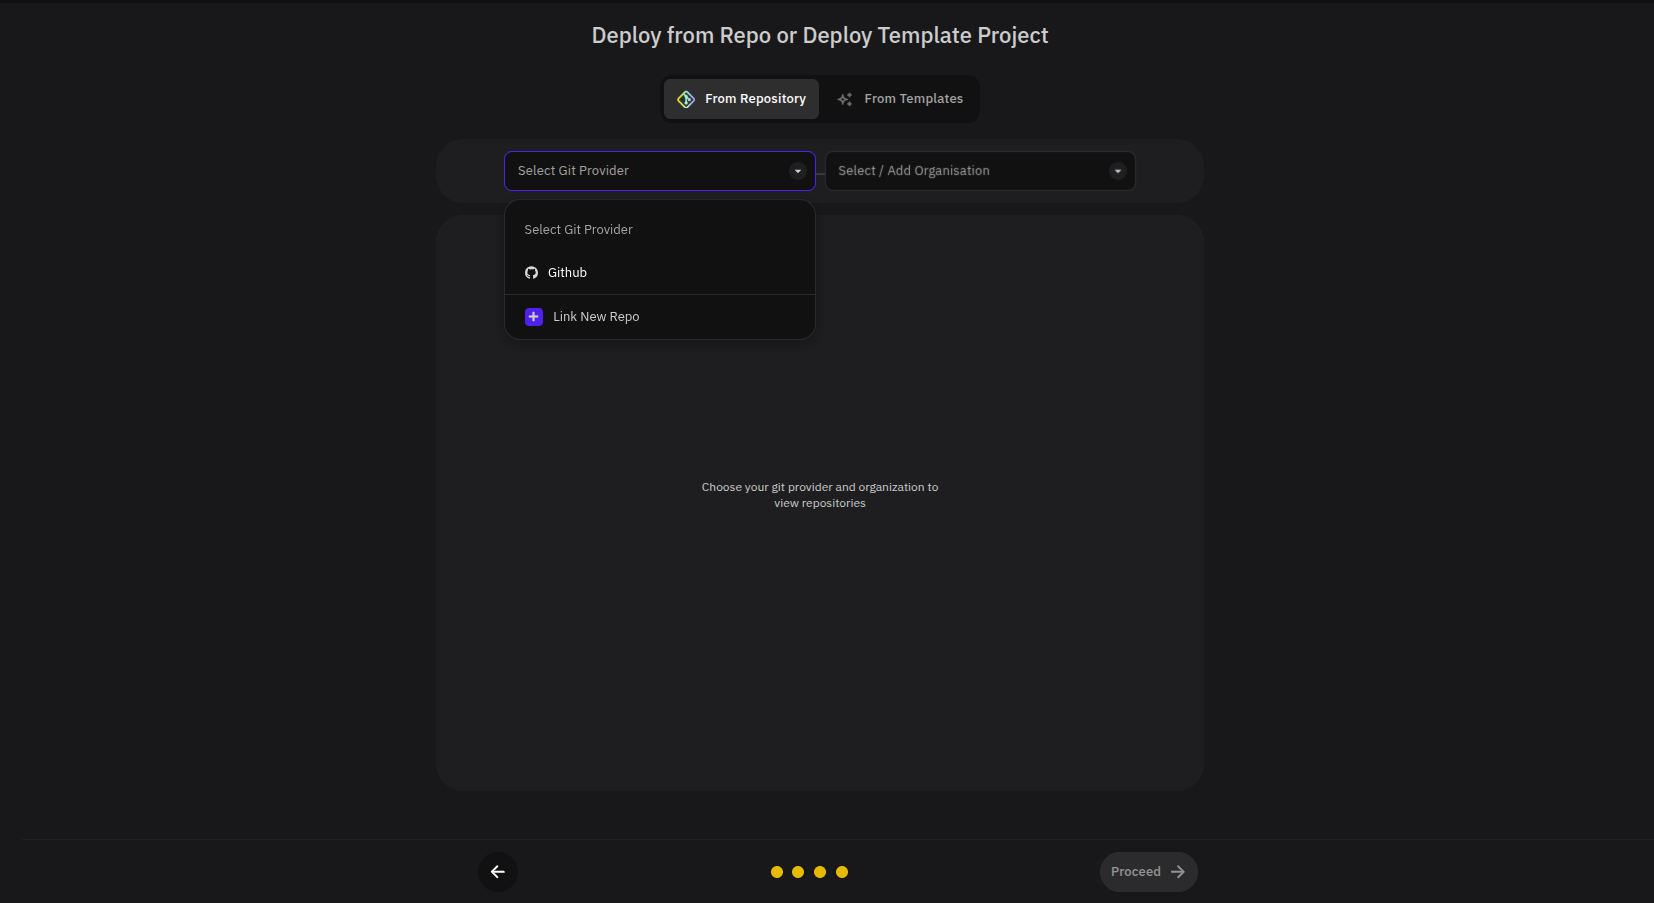
From Repository
-
Click the Select Git Provider dropdown and choose your provider (e.g. GitHub).
-
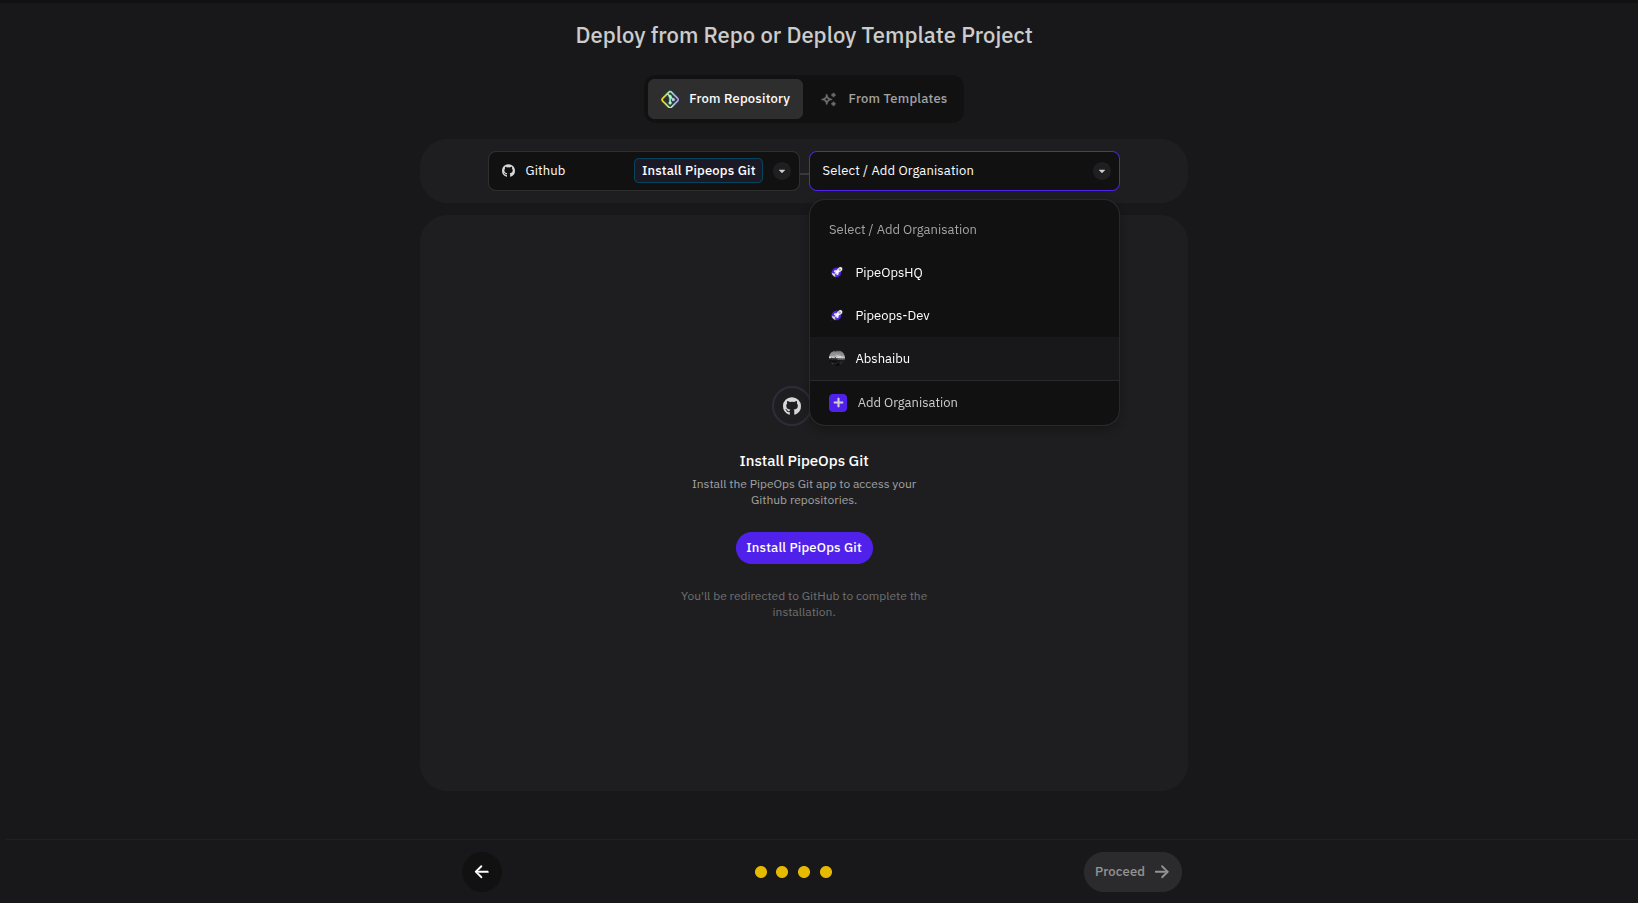
If this is your first time connecting GitHub, click Install PipeOps Git to install the PipeOps GitHub app. This grants PipeOps access to your repositories so it can read your code, detect branches, and trigger deployments on push. You'll be redirected to GitHub to complete the installation and then returned to PipeOps automatically.
-
Select your Organisation from the dropdown. If your organisation isn't listed, click Add Organisation.
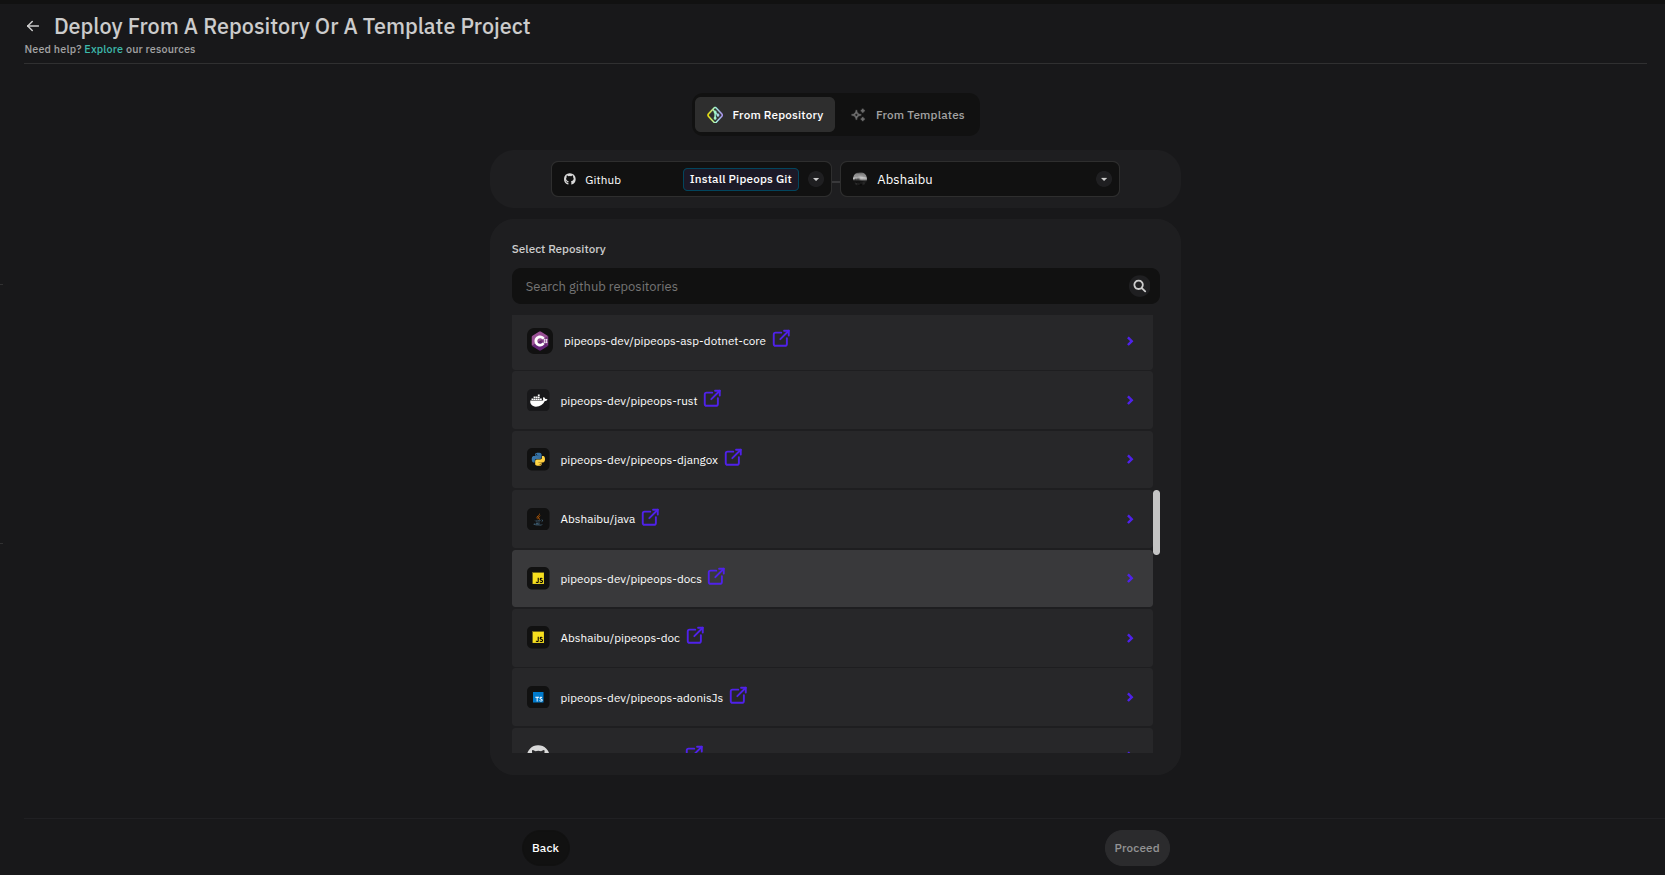
-
Search for and select the repository you want to deploy from the list of accessible repositories.
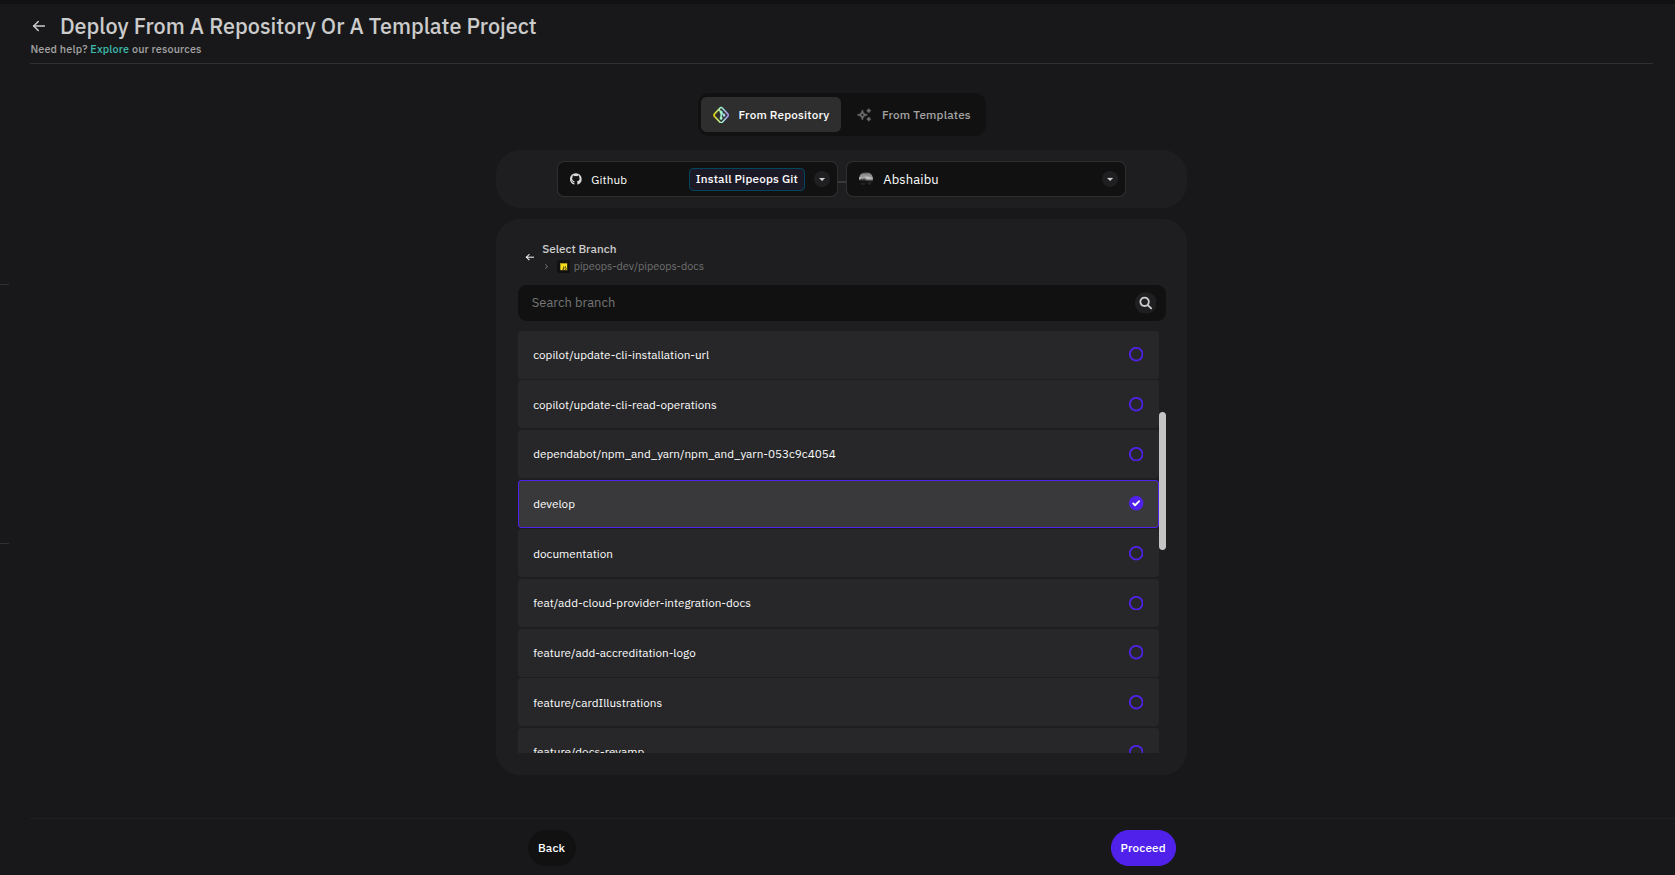
-
Select the Branch you want to deploy from, then click Proceed.
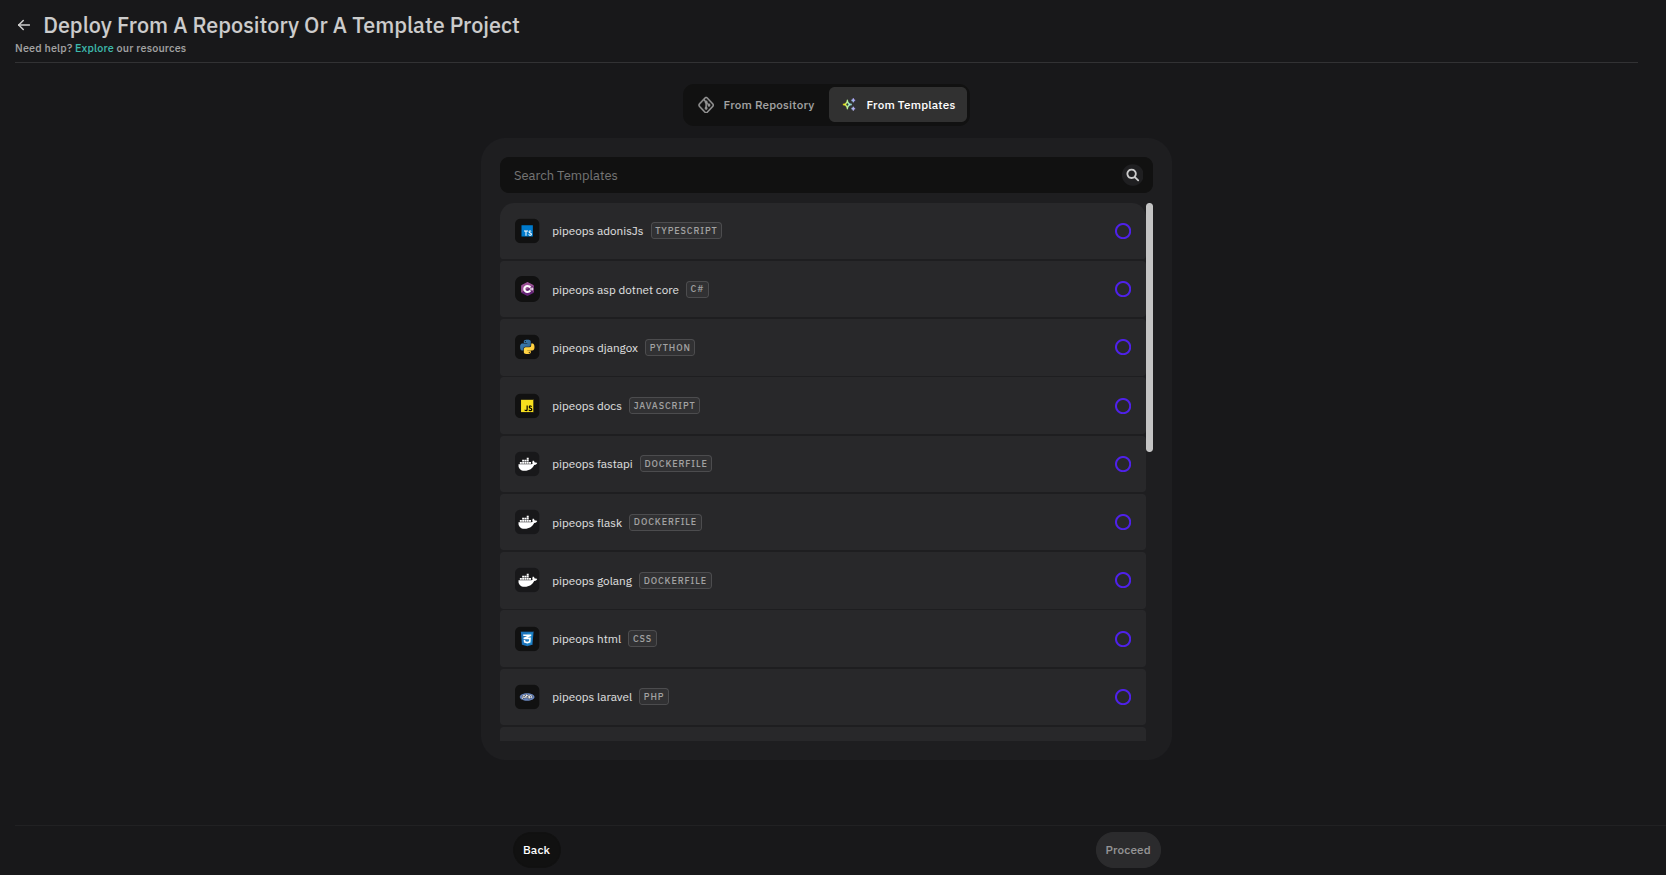
From Templates
Switch to the From Templates tab to browse PipeOps template projects. Click any template to use it as your project source and proceed directly to configuration.
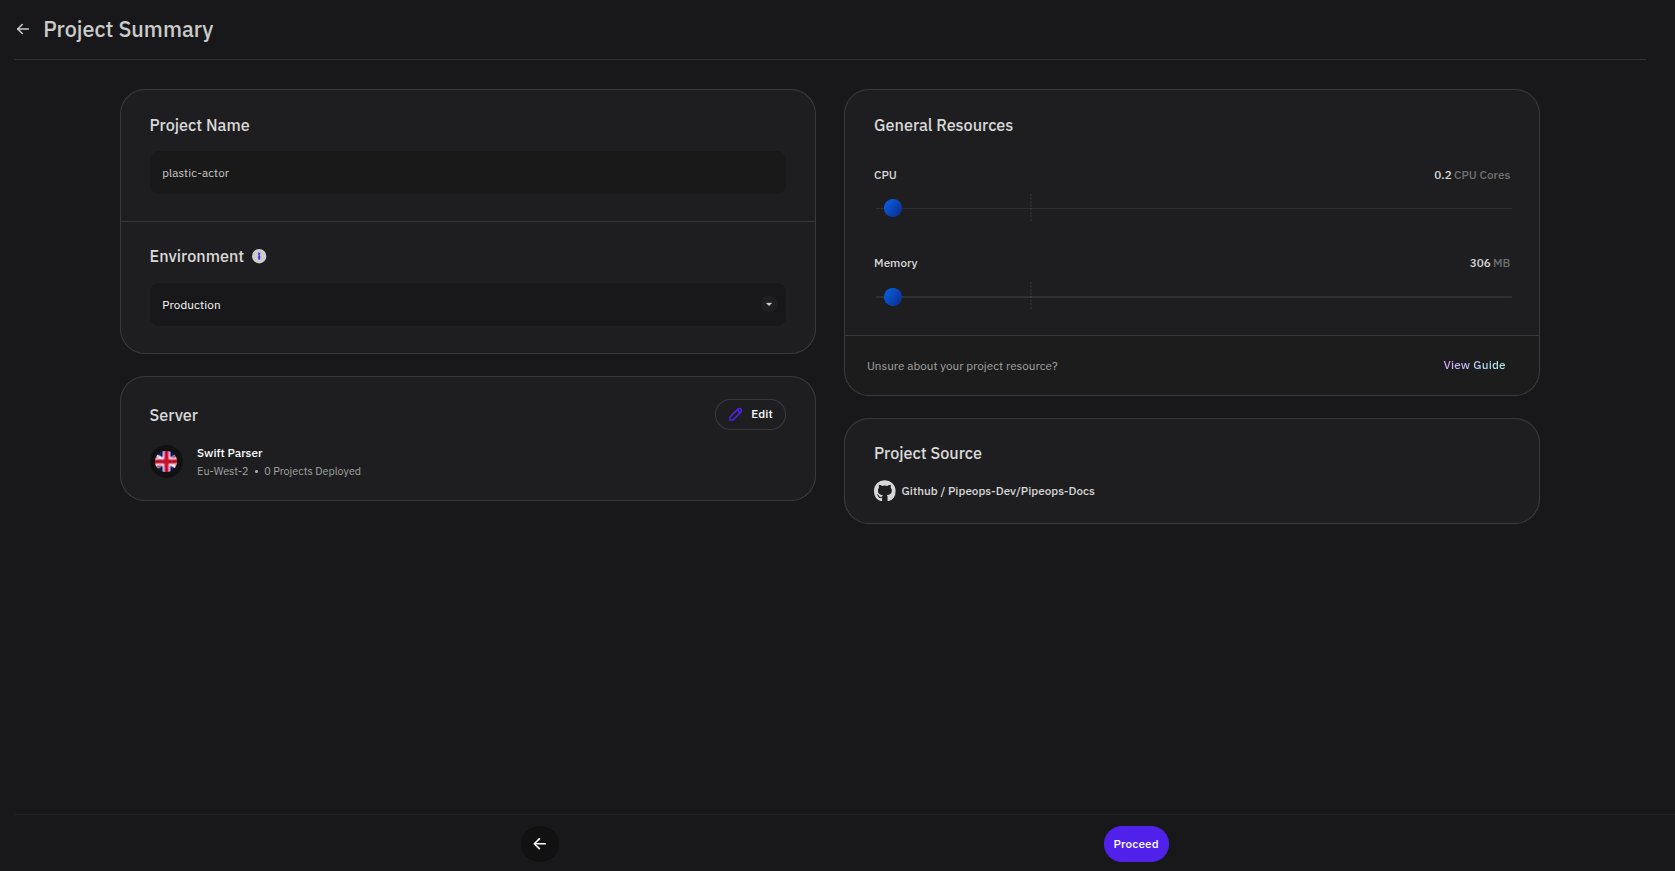
Step 4: Configure Project Summary
After selecting your source, you'll land on the Project Summary page. Review and configure the following fields before proceeding.
| Field | Description |
|---|---|
| Project Name | Auto-generated by PipeOps. Edit it to something meaningful. |
| Environment | Select the deployment environment (e.g. Production, Staging, Beta). |
| Server | Choose which server to deploy to. Click Edit to change the selection. |
| General Resources | Adjust CPU and Memory sliders to allocate resources. Click View Guide for recommendations. |
| Project Source | Confirms the repository being deployed. |
You can create additional environments up to your plan's limit. During deployment, all available environments are selectable — you are not limited to the default options.
Click Proceed to continue.
Step 5: Configure Build Settings
On the Project Build Settings page, configure how your project is built and run.
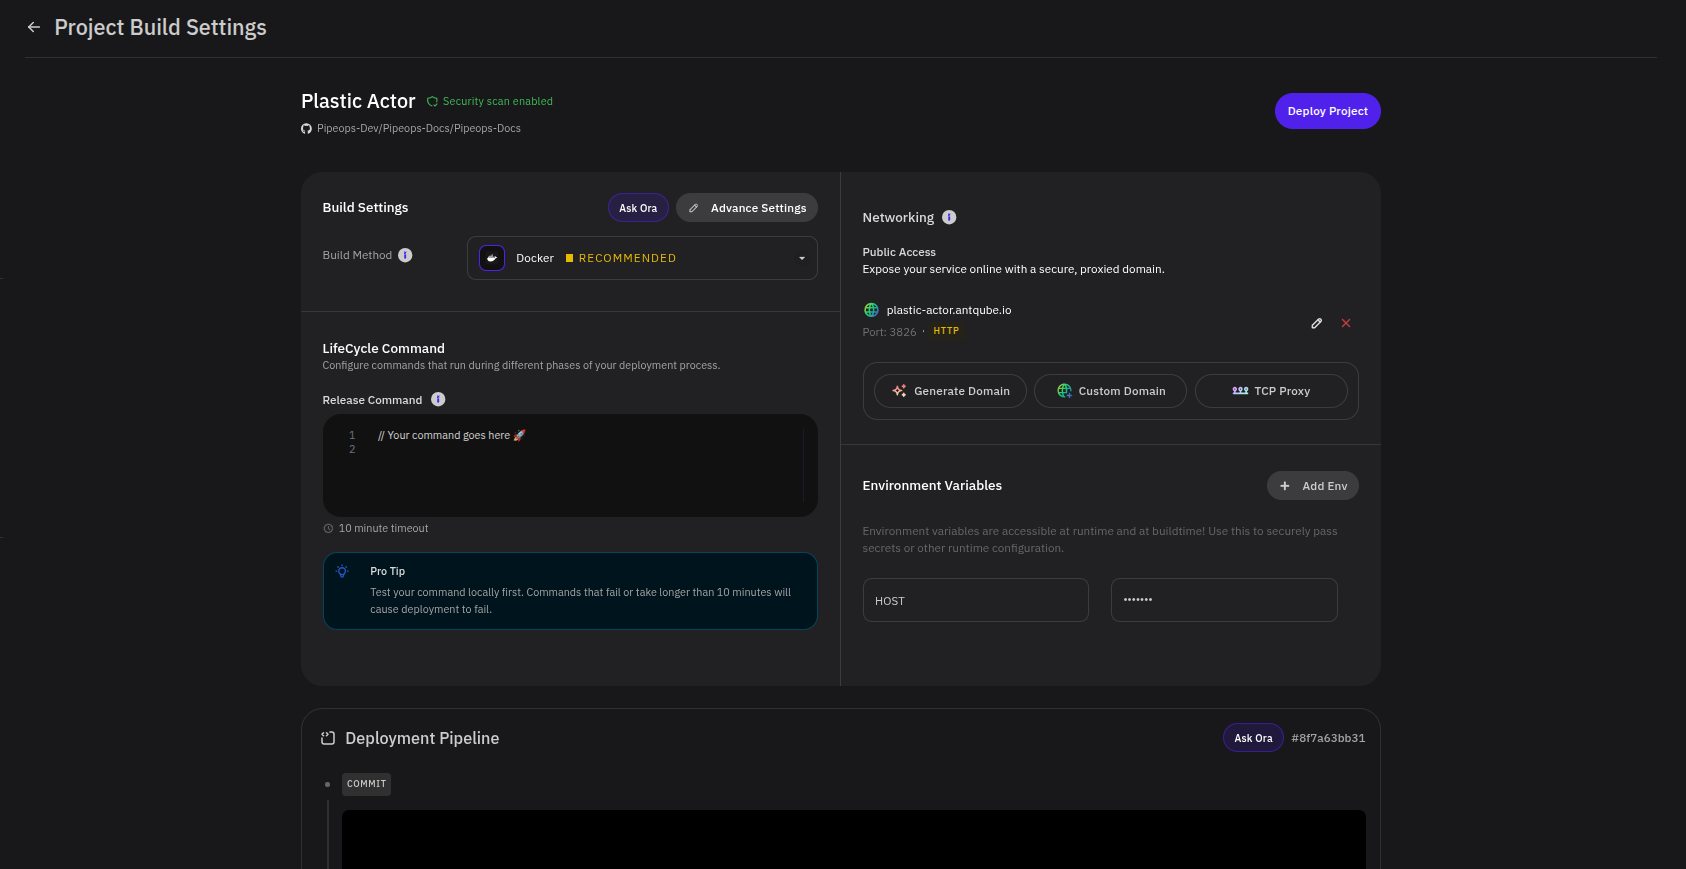
Build Method
PipeOps automatically detects your project's framework and recommends a build method (e.g. Docker, Nixpack). If a build method is not detected, you can fill it in manually. Use Advanced Settings to expand additional build configuration options.
Ask Ora opens Ora, PipeOps' built-in AI assistant. Ora can help with build configuration questions as well as broader questions about your project and the platform.
Lifecycle Command
Enter a Release Command that runs just before your project goes live on each deployment. This is typically used for tasks such as database migrations.
Commands that fail or take longer than 10 minutes will cause the deployment to fail. Test your command locally before adding it here.
Networking
Configure how your project is exposed publicly.
- An auto-generated domain is shown with its port and protocol
(e.g.
plastic-actor.antqube.io · Port 3826 · HTTP). - Use Generate Domain, Custom Domain, or TCP Proxy to manage access to your project.
Environment Variables
Add any variables your project needs at build or runtime using + Add Env.
Once you have reviewed all settings, click Deploy Project in the top-right corner to start the deployment.
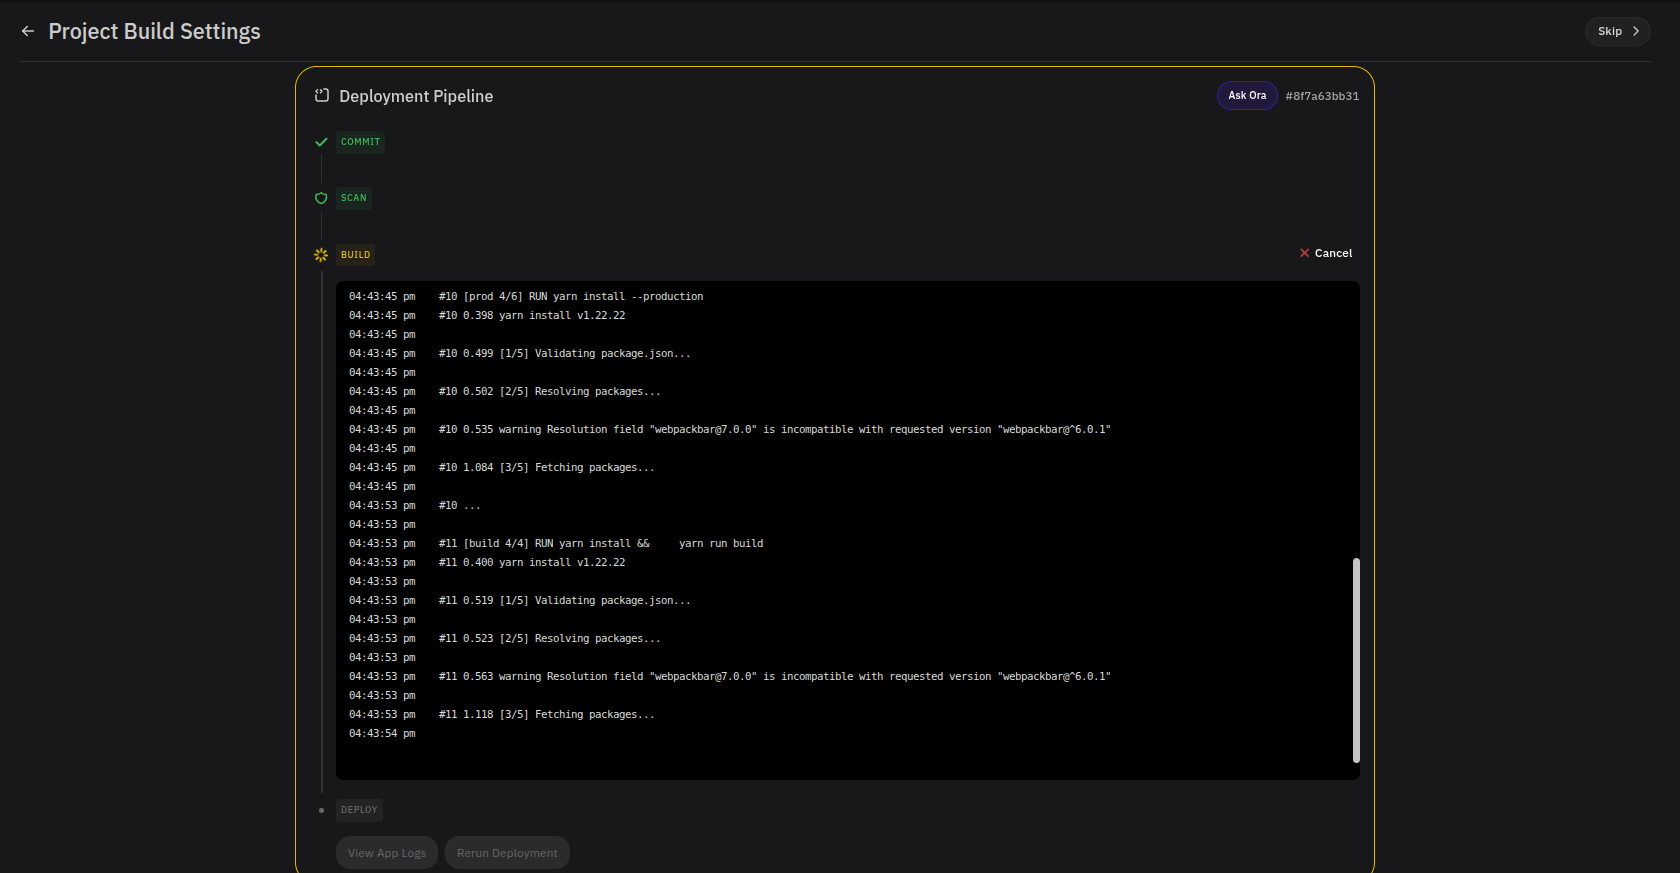
Step 6: Monitor the Deployment Pipeline
After clicking Deploy Project, the Deployment Pipeline panel shows real-time progress across four sequential stages.
| Stage | Description |
|---|---|
| Commit | Confirms the source commit being built. |
| Scan | Runs a security scan on your code (shown as Security scan enabled in the project header). |
| Build | Compiles and builds your project. Live logs stream in real time. |
| Deploy | Deploys the built image to your server. |
You can click Cancel during the Build stage to abort the deployment.
If any stage fails, the pipeline stops and displays an error. Check the live logs in the Build stage for details on what went wrong before retrying.
Once all stages complete successfully, a Project Deployed! modal confirms your deployment.
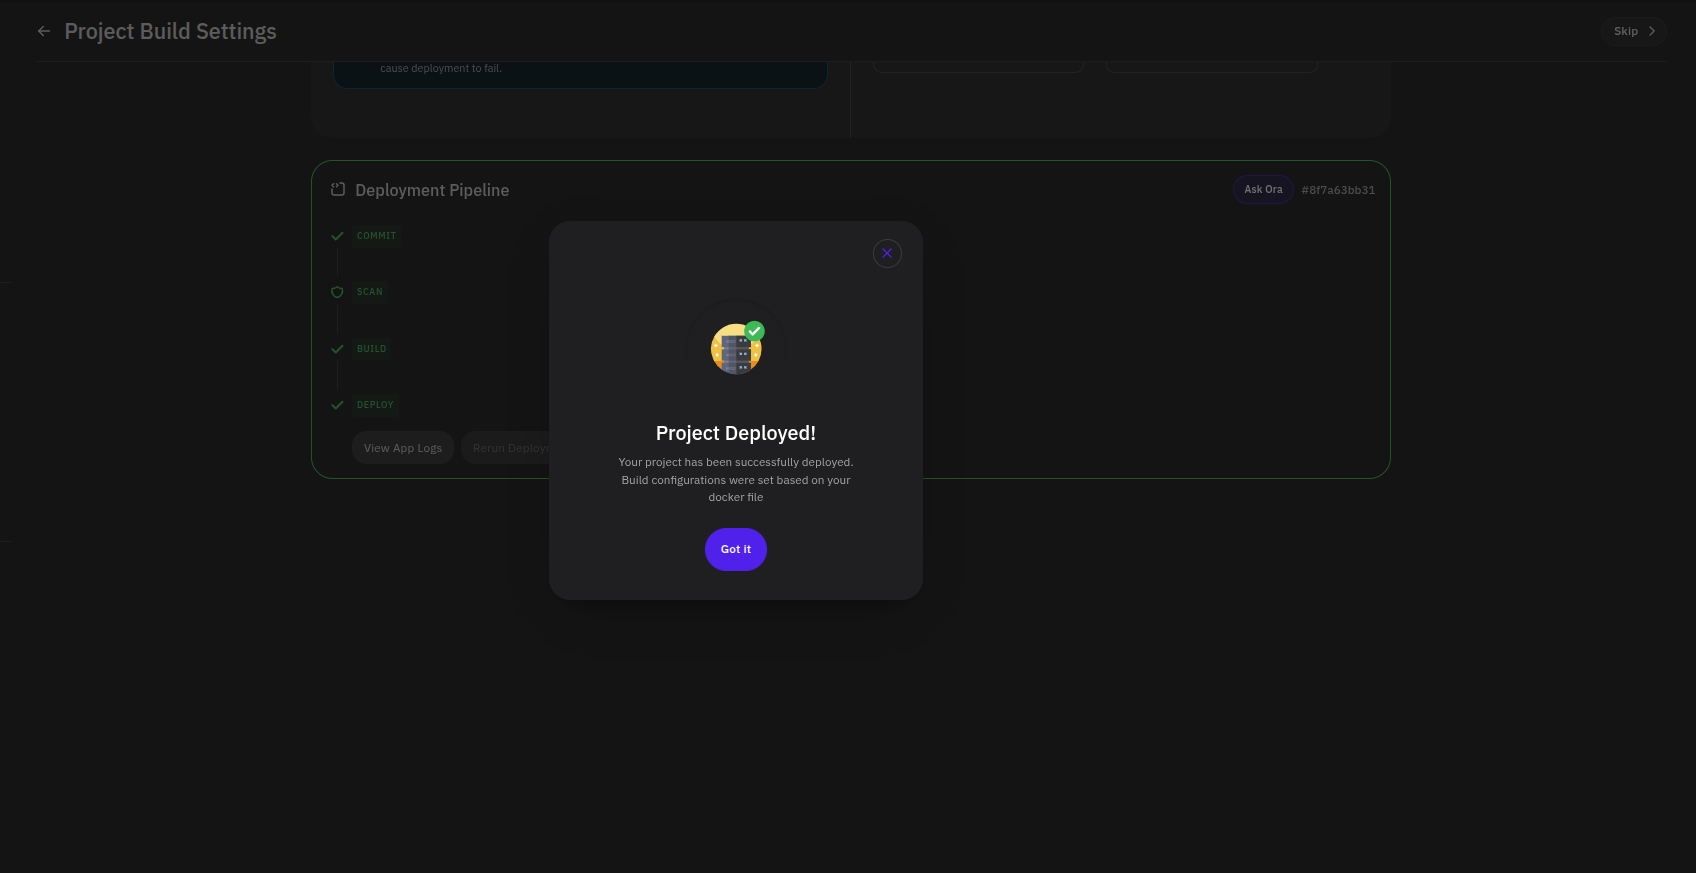
Click Got it to go to your project dashboard.
Step 7: View Your Deployed Project
After dismissing the success modal, you'll land on the Project Overview page.
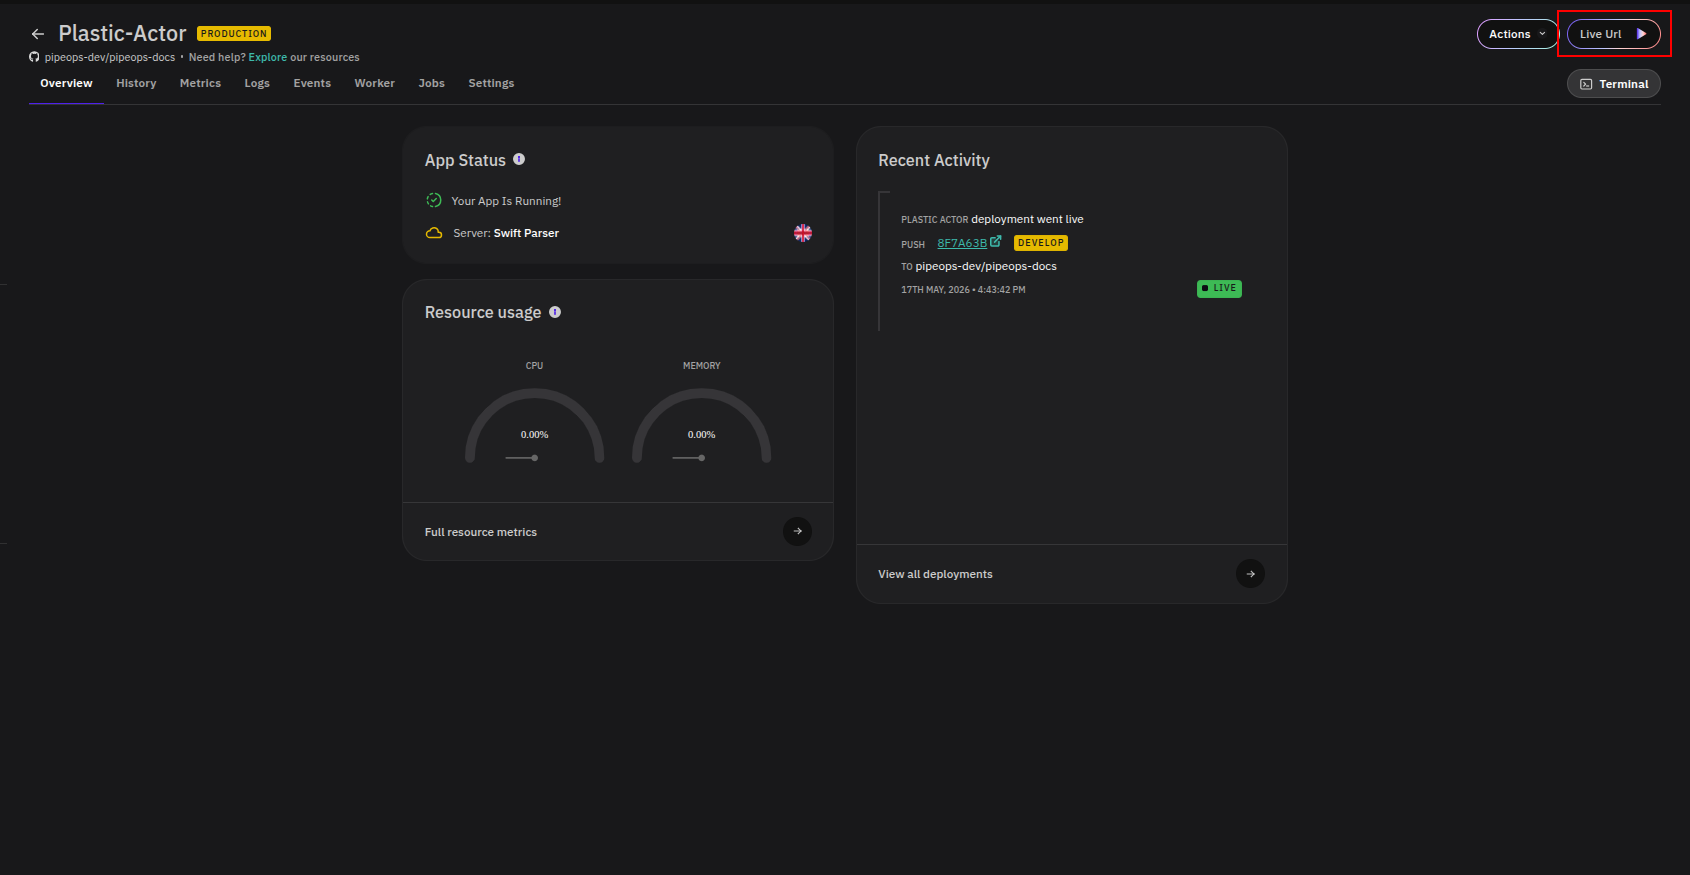
From here you can confirm your app is running, check resource usage, and see recent deployment activity. Click Live Url in the top-right corner to open your application in a new tab.
Explore the rest of your project from the tabs below:
| Tab | Description |
|---|---|
| History | Full deployment history with logs and statuses. |
| Metrics | CPU, memory, and network usage over time. |
| Logs | Real-time and historical application log output. |
| Events | Infrastructure-level events such as pod scheduling. |
| Worker | Background worker process management. |
| Jobs | Scheduled and on-demand job management. |
| Settings | Full project configuration. |
To delete a project, see the Delete Project guide.
Monitoring via CLI
If you prefer working from the terminal or are integrating PipeOps into a CI/CD pipeline, you can monitor your deployed projects using the PipeOps CLI.
# List all projects
pipeops list

# Check project status
pipeops status proj-123

# View project logs in real-time
pipeops logs proj-123 --follow

# List addon deployments
pipeops list --deployments --project proj-123
The CLI is currently focused on monitoring and viewing project information. For creating projects and deploying application code, use the Web UI.
For detailed CLI usage, see: