Project Migration
PipeOps allows you to move a project to a different server or promote it to a different environment without recreating it from scratch. Both options are accessible from the Actions menu on your project page.
Accessing Project Migration
- Navigate to your project's main page in PipeOps.
- Click the Actions button in the top-right corner.
- Select Migrate Project from the dropdown.
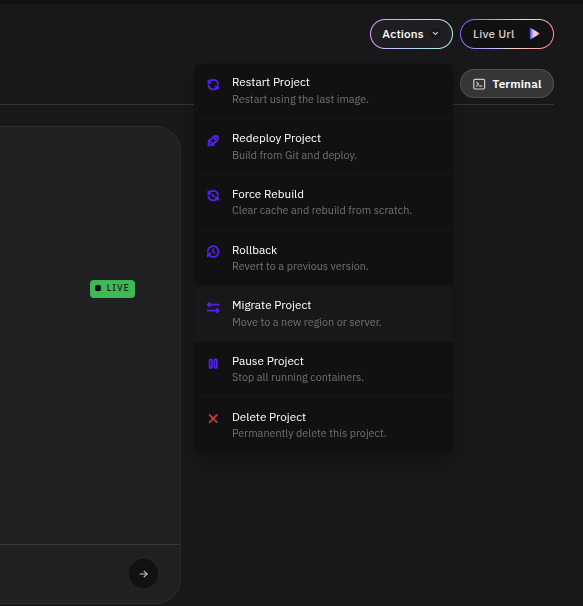
A modal will appear prompting you to choose a migration type.
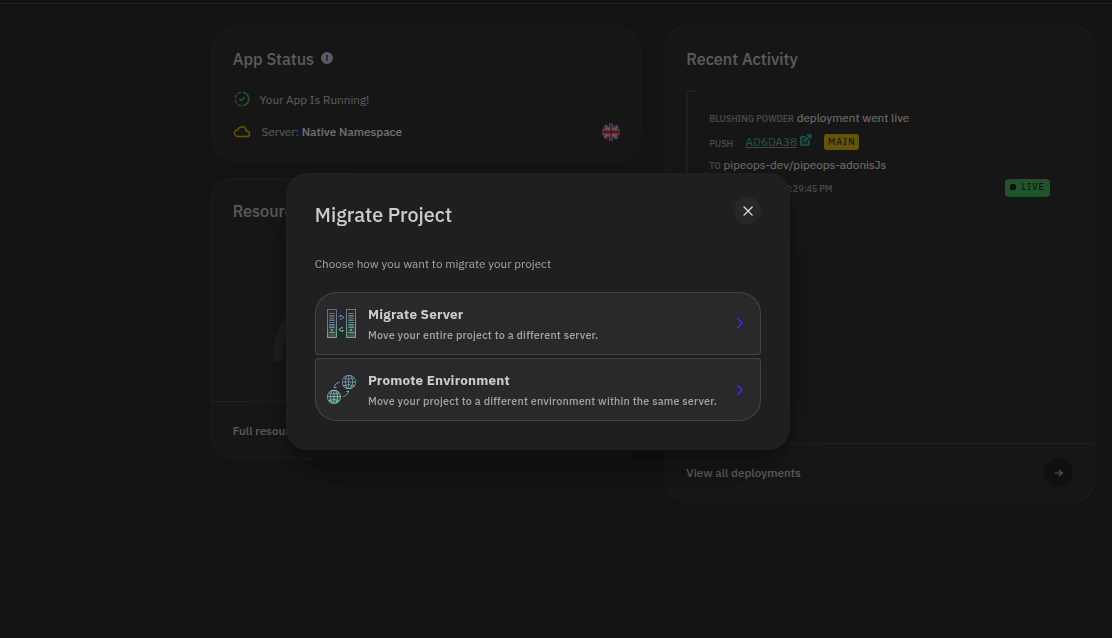
Migrate Server
Moves your entire project to a different server. Use this to change hosting infrastructure, switch regions, or move to a more appropriately sized server.
- Select Migrate Server from the migration options modal. A panel will open showing your Current Server and a Migration Server dropdown listing all available servers on your account. Each server entry shows its name, region, cloud provider, and current status.
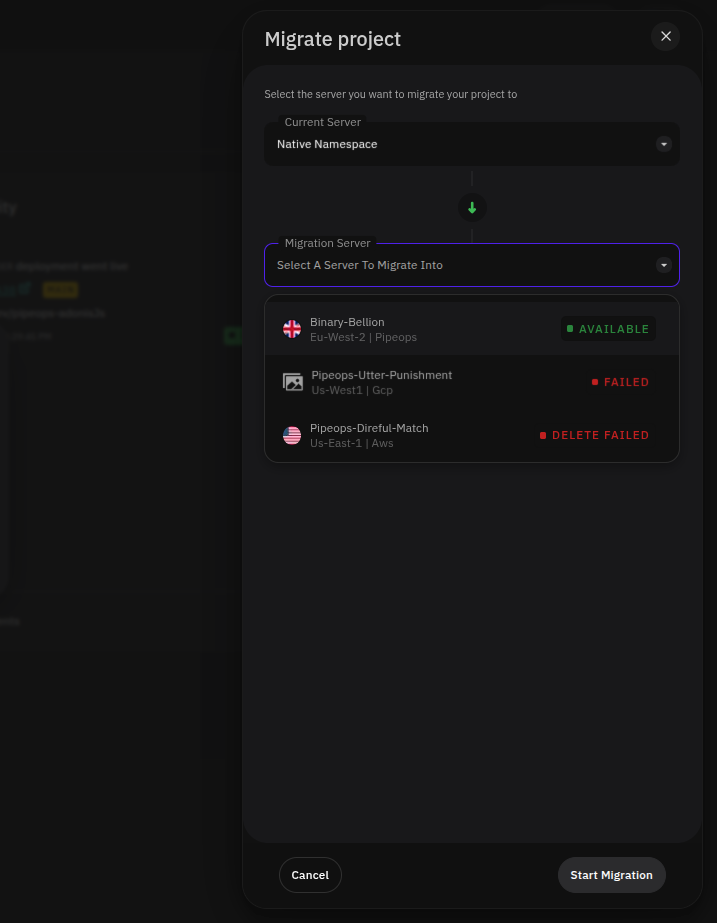
Only select servers marked as Available. Servers with a Failed or Delete Failed status are not suitable migration targets.
-
Select your target server and click Start Migration.
-
A Migration Project Summary page will load, showing the project name, target environment, destination server, resource allocation, and project source. Review these details before proceeding.
-
Click Migrate to trigger the Confirm Migration modal. The modal will display the exact source and destination servers and confirm that a new deployment of the same project will be triggered on the new server.
-
Click Yes, migrate to confirm. The migration will begin and a new deployment will be triggered on the destination server.
Promote Environment
Moves your project to a different environment within the same server — for example, from Production to Beta. This triggers a new deployment of the same project under the target environment.
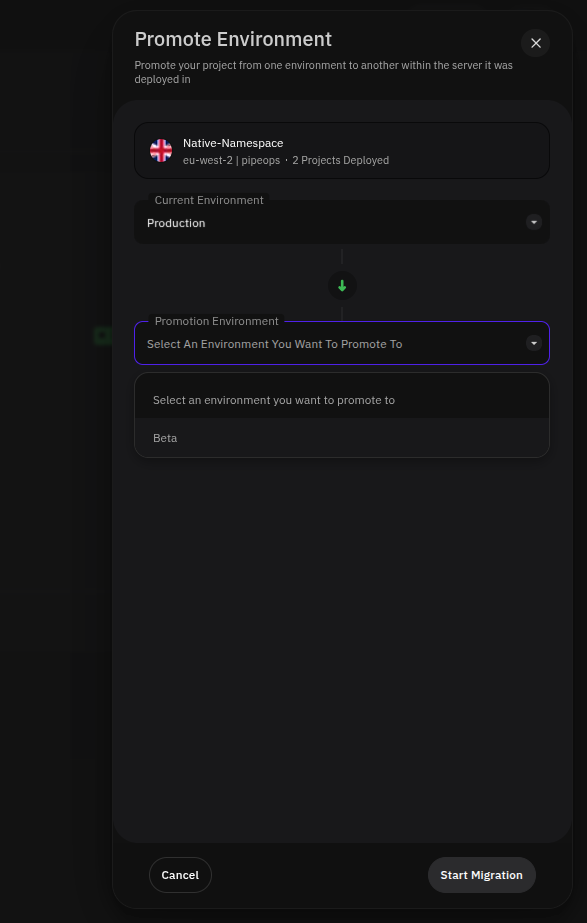
- Select Promote Environment from the migration options modal. A panel will open showing the current server, your Current Environment, and a Promotion Environment dropdown to select the target.
-
Select the destination environment from the Promotion Environment dropdown and click Start Migration.
-
A Confirm Migration modal will appear, summarising the move — for example, confirming the project will be migrated from production to beta. Click Yes, migrate to confirm.
-
A Project Summary page will load showing the updated project name, environment, server, resource allocation, and project source. Click Proceed to complete the migration.
Promoting an environment triggers a new deployment of the same project under the destination environment. The original environment deployment remains unaffected.