Connect AWS to PipeOps
Connecting your AWS account to PipeOps lets you provision AWS servers and deploy projects directly from your PipeOps dashboard.
Connect Your AWS Account
Step 1: Open the Integrations Page
In the left sidebar, click Integrations.
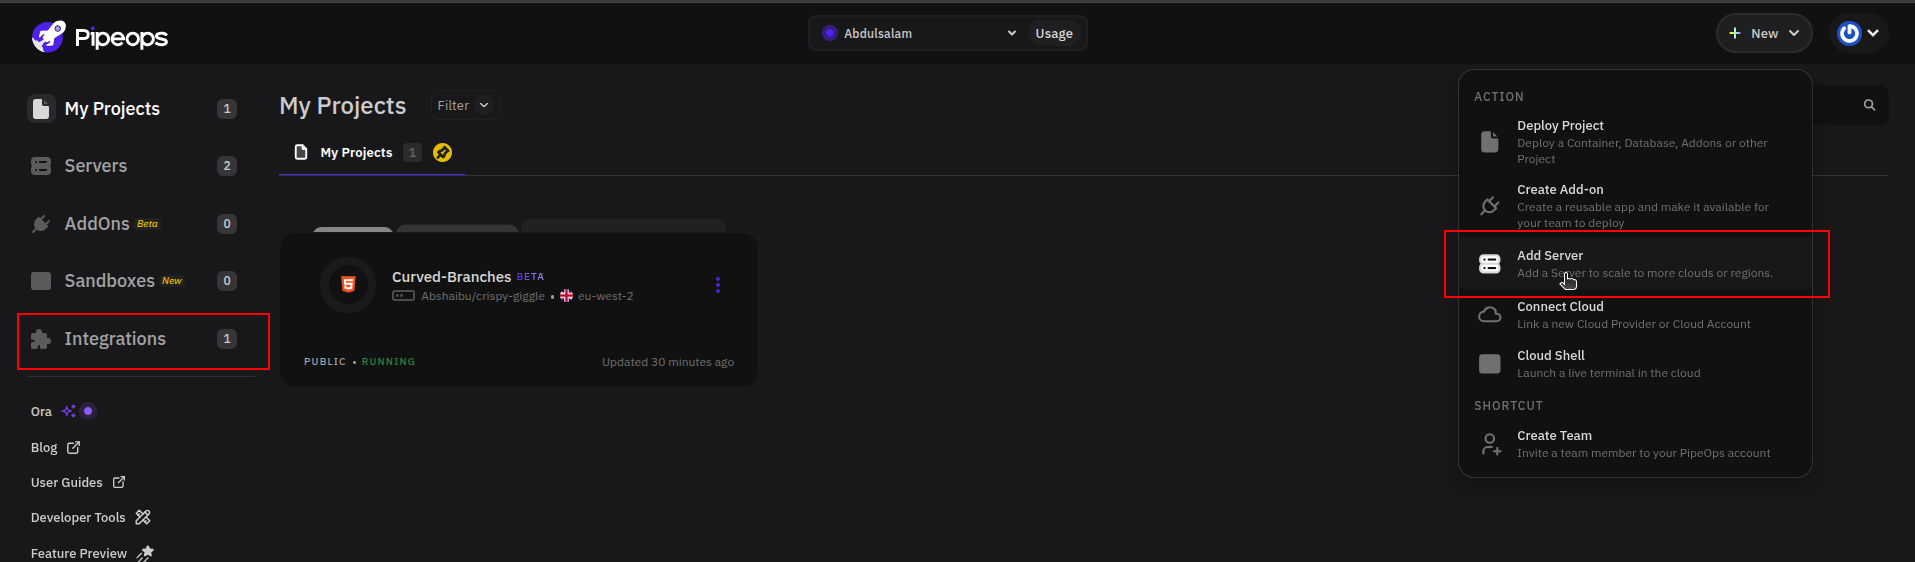
You can also get here by clicking + New in the top-right corner of your dashboard and selecting Add Server under Action, then choosing to connect a new cloud provider.
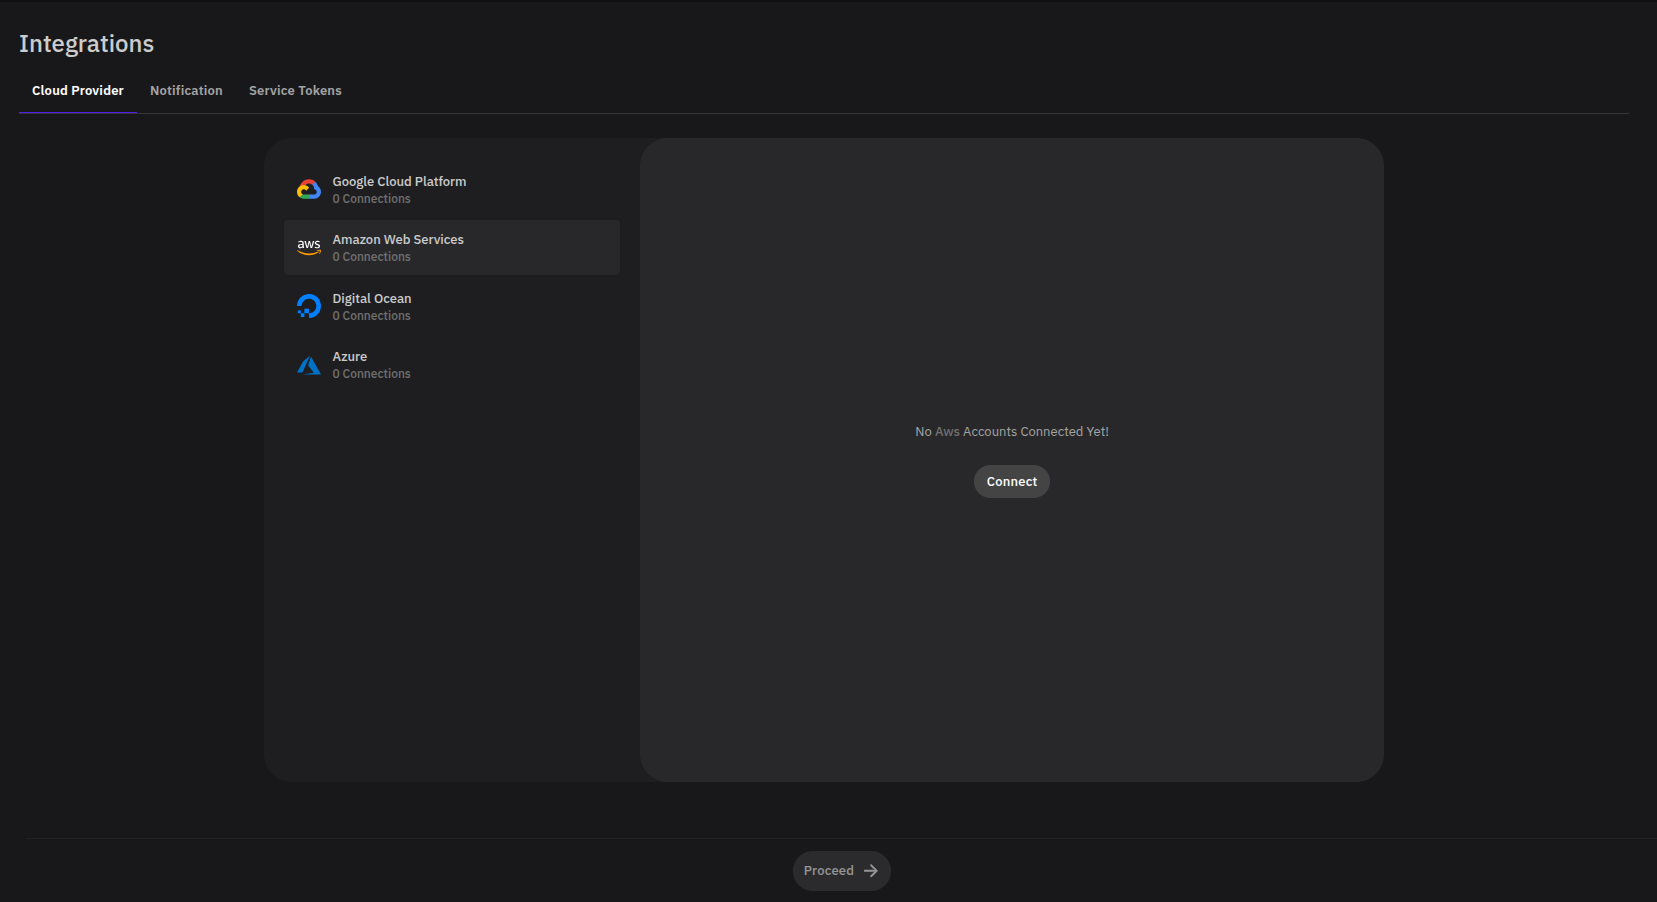
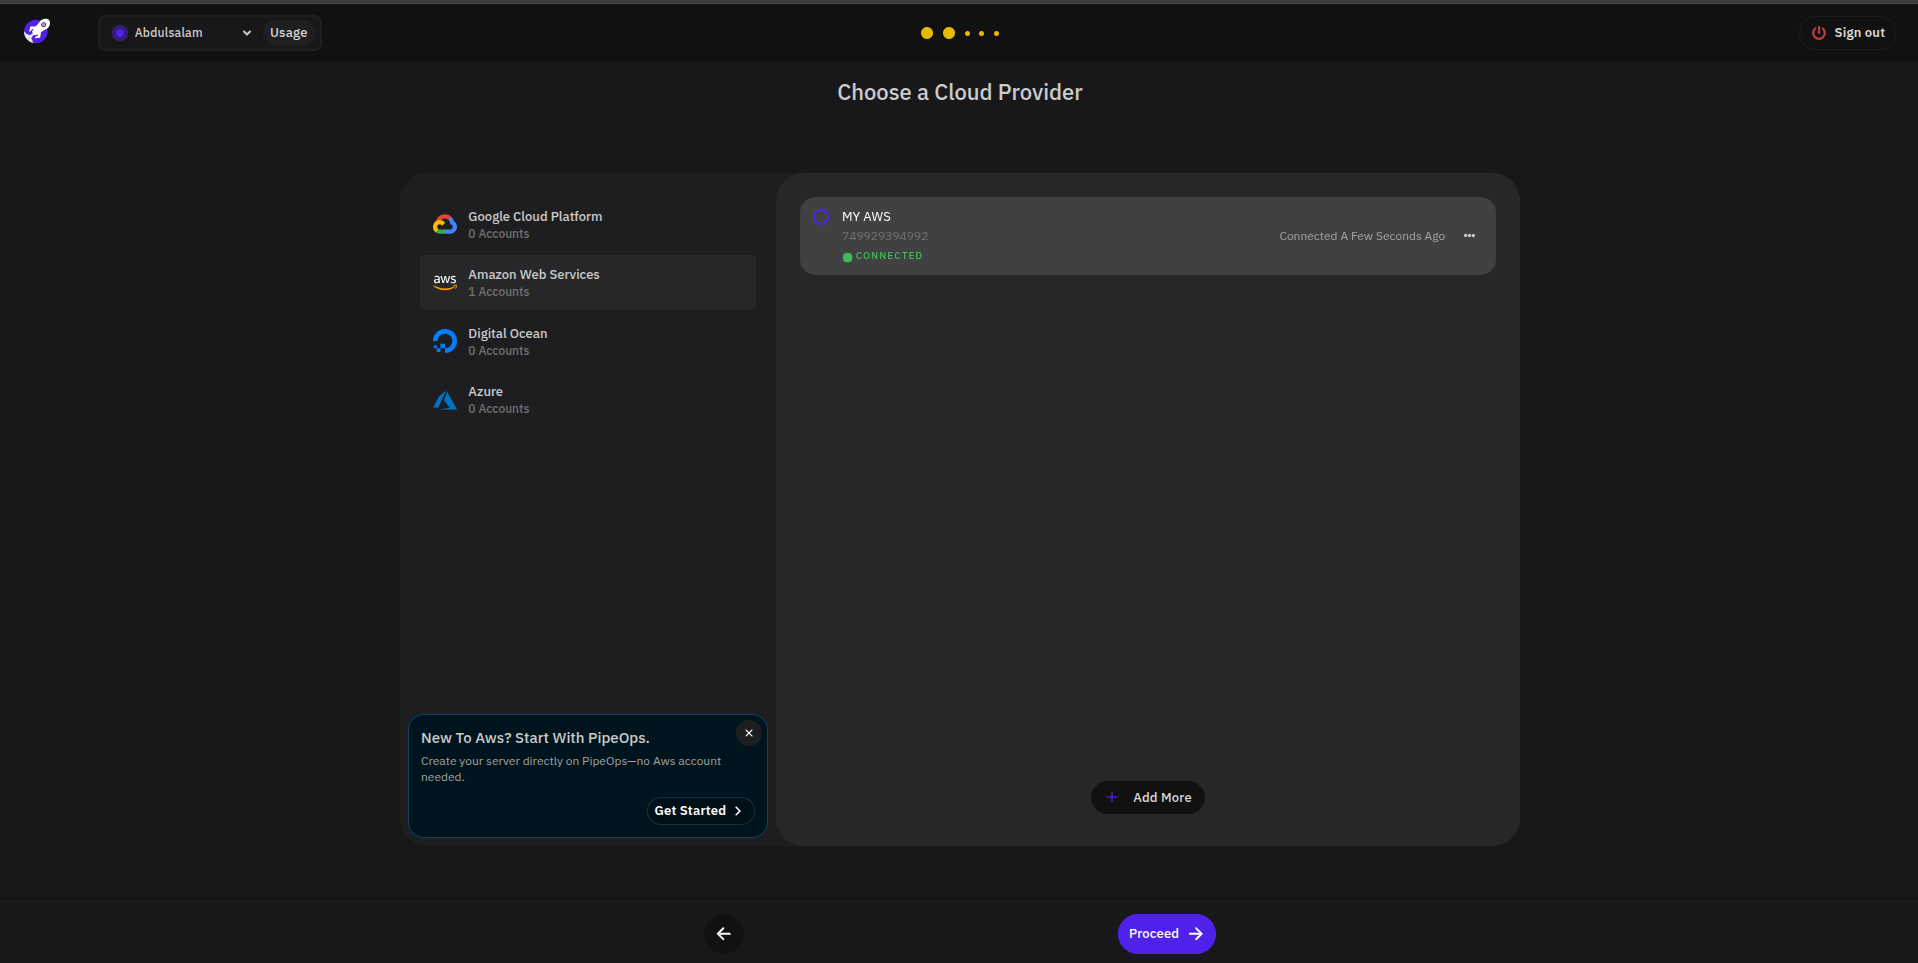
Step 2: Select Amazon Web Services
From the list of cloud providers, find Amazon Web Services and click Connect.
Step 3: Enter Your AWS Account Details
After clicking Connect, a side drawer will appear. Enter the following:
- AWS Account ID — Found in the top-right corner of your AWS Management Console.
- Name (optional) — A label to identify this AWS account in PipeOps. This is useful if you plan to connect more than one AWS account.
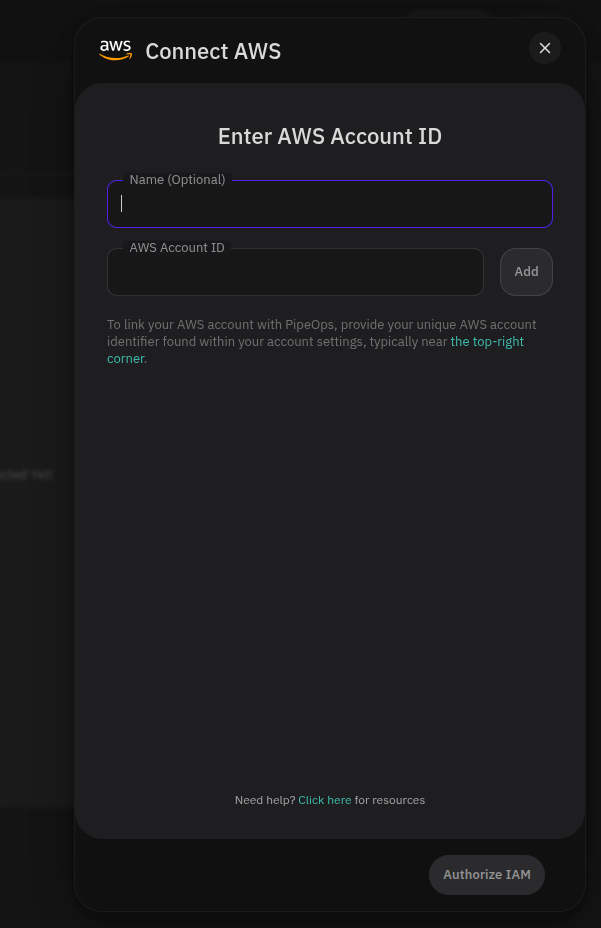
Click Add. PipeOps will process your details and activate the Authorize IAM button.
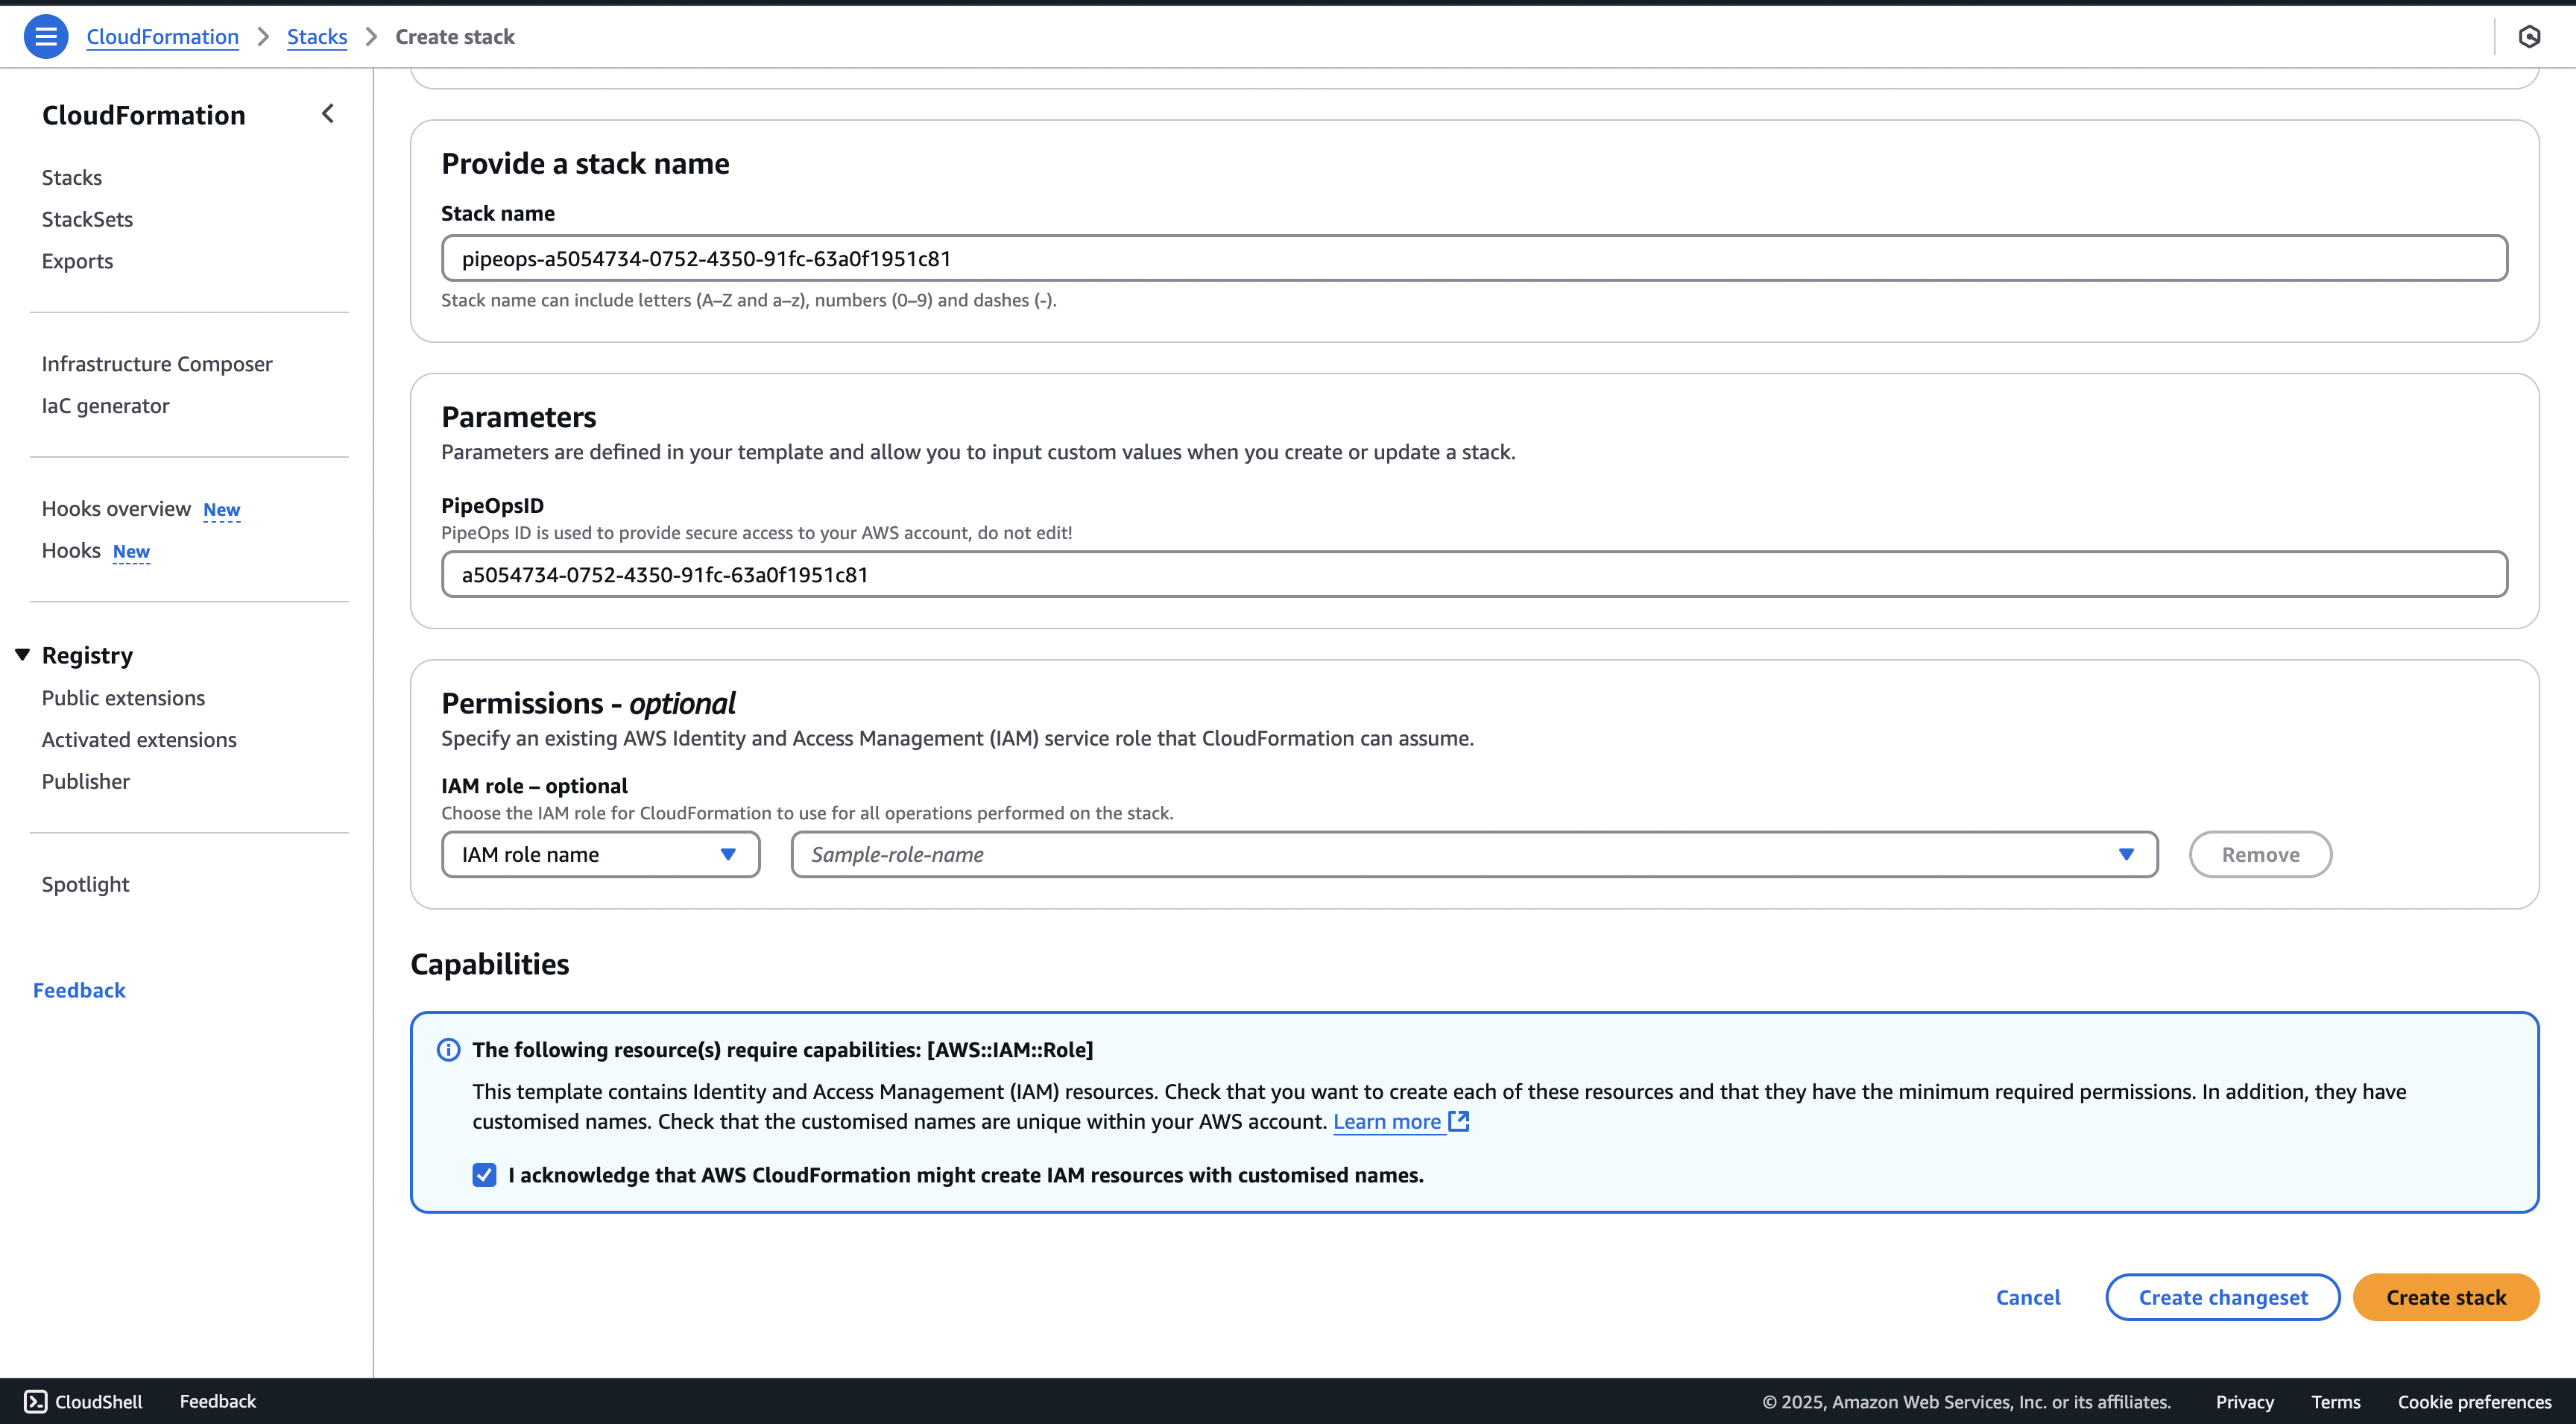
Step 4: Authorize IAM Access
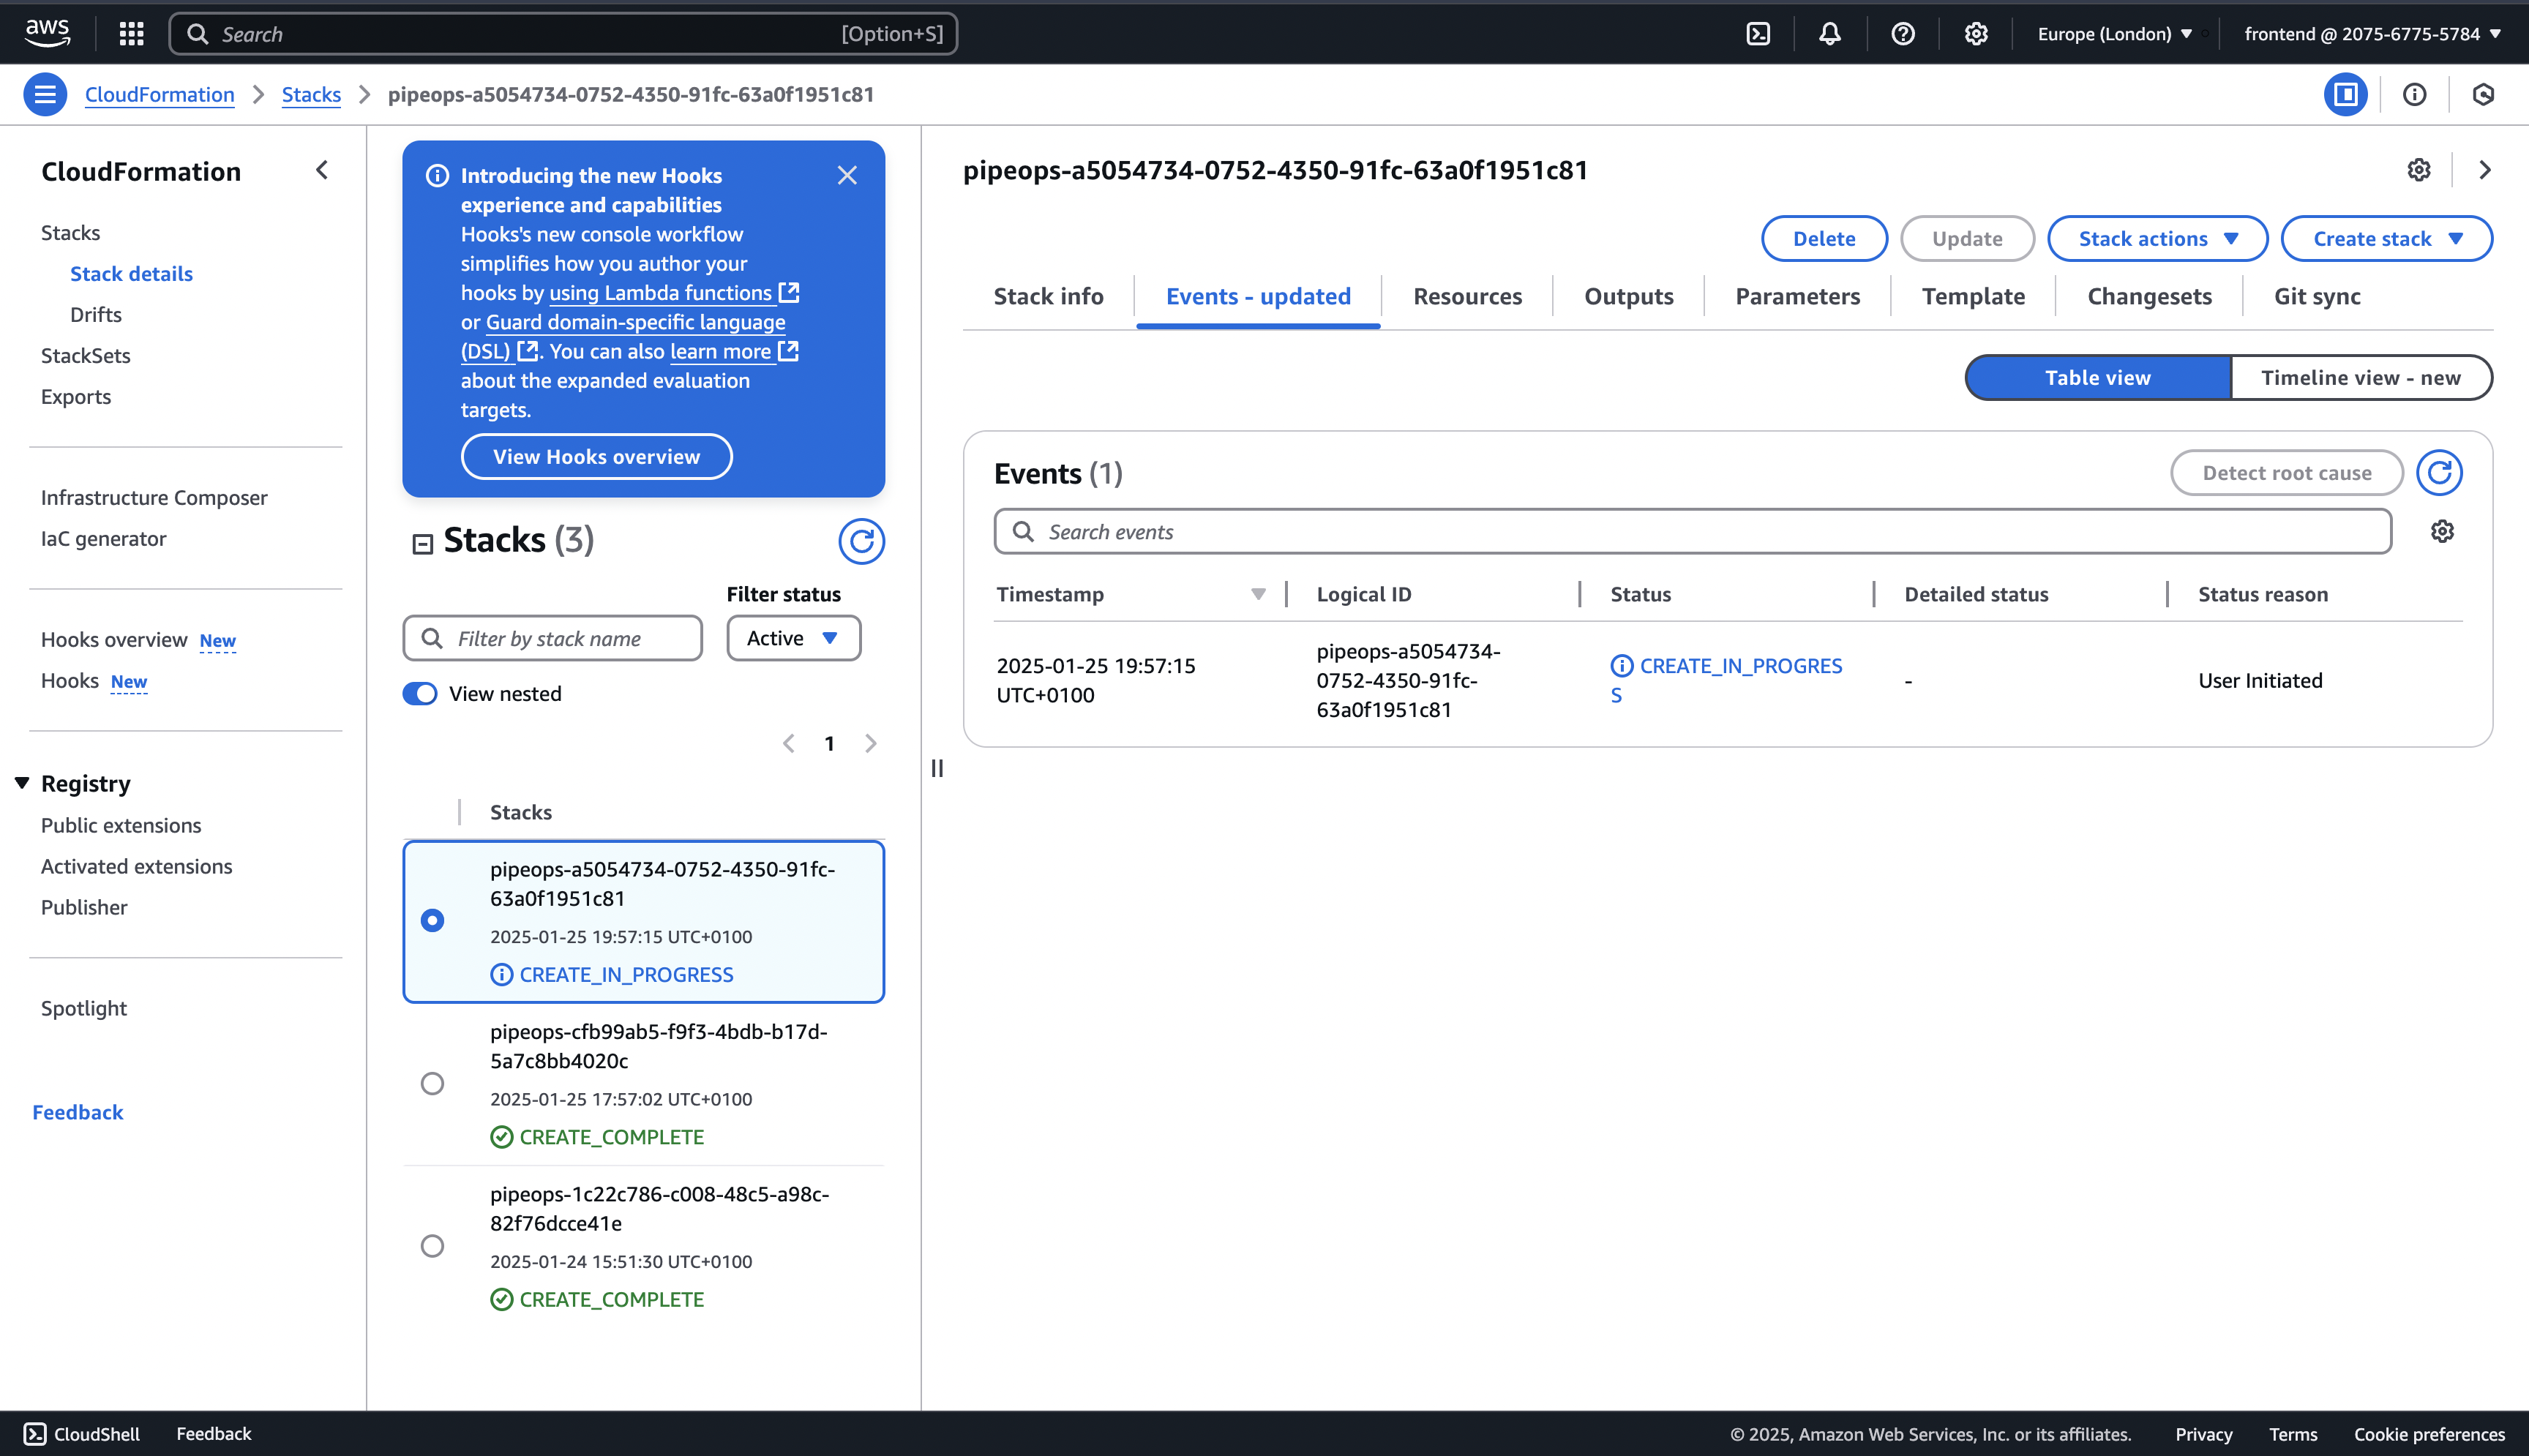
Click Authorize IAM. This opens a Create Stack page in a new tab in your AWS account.
On the AWS CloudFormation page:
- Scroll to the bottom of the page.
- Check the acknowledgement box confirming that AWS CloudFormation may create IAM resources with customized names.
- Click Create stack.
AWS will begin creating the stack. You'll see a progress page while the process runs — this typically takes a minute or two.
Step 5: Confirm the Connection
Switch back to your PipeOps tab. Once the stack creation completes, your AWS account will be automatically detected and marked as connected.
Your AWS account is now connected to PipeOps. You can proceed to provision a server on your connected AWS account — see Server Provisioning.