Connect DigitalOcean to PipeOps
Connecting your DigitalOcean account to PipeOps uses OAuth authorization, which grants PipeOps secure access to your DigitalOcean account for resource management. Once connected, you can provision DigitalOcean servers and deploy projects directly from your PipeOps dashboard.
Connect Your DigitalOcean Account
Step 1: Open the Integrations Page
In the left sidebar, click Integrations.
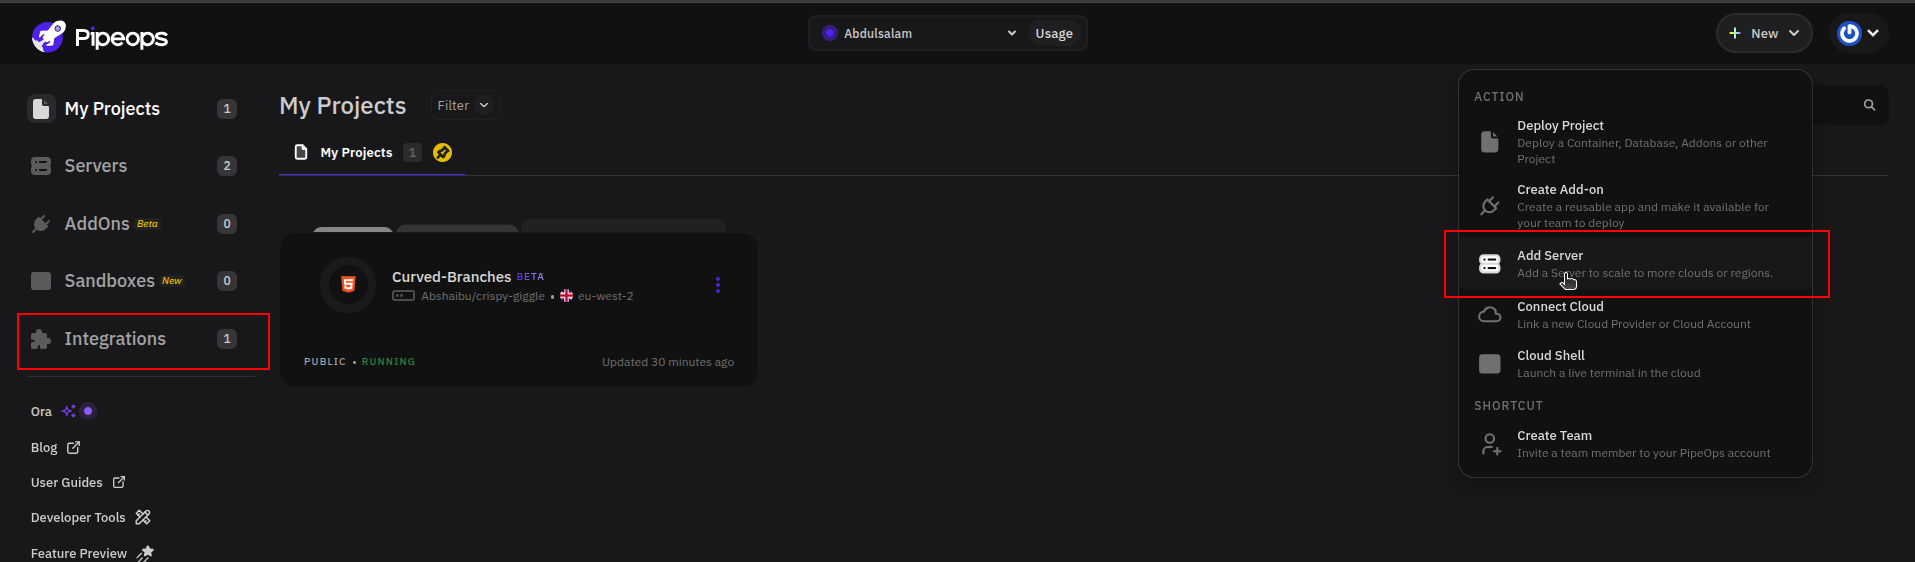
You can also get here by clicking + New in the top-right corner of your dashboard and selecting Add Server under Action, then choosing to connect a new cloud provider.
Step 2: Select DigitalOcean
Select Digital Ocean from the list, then click Connect.
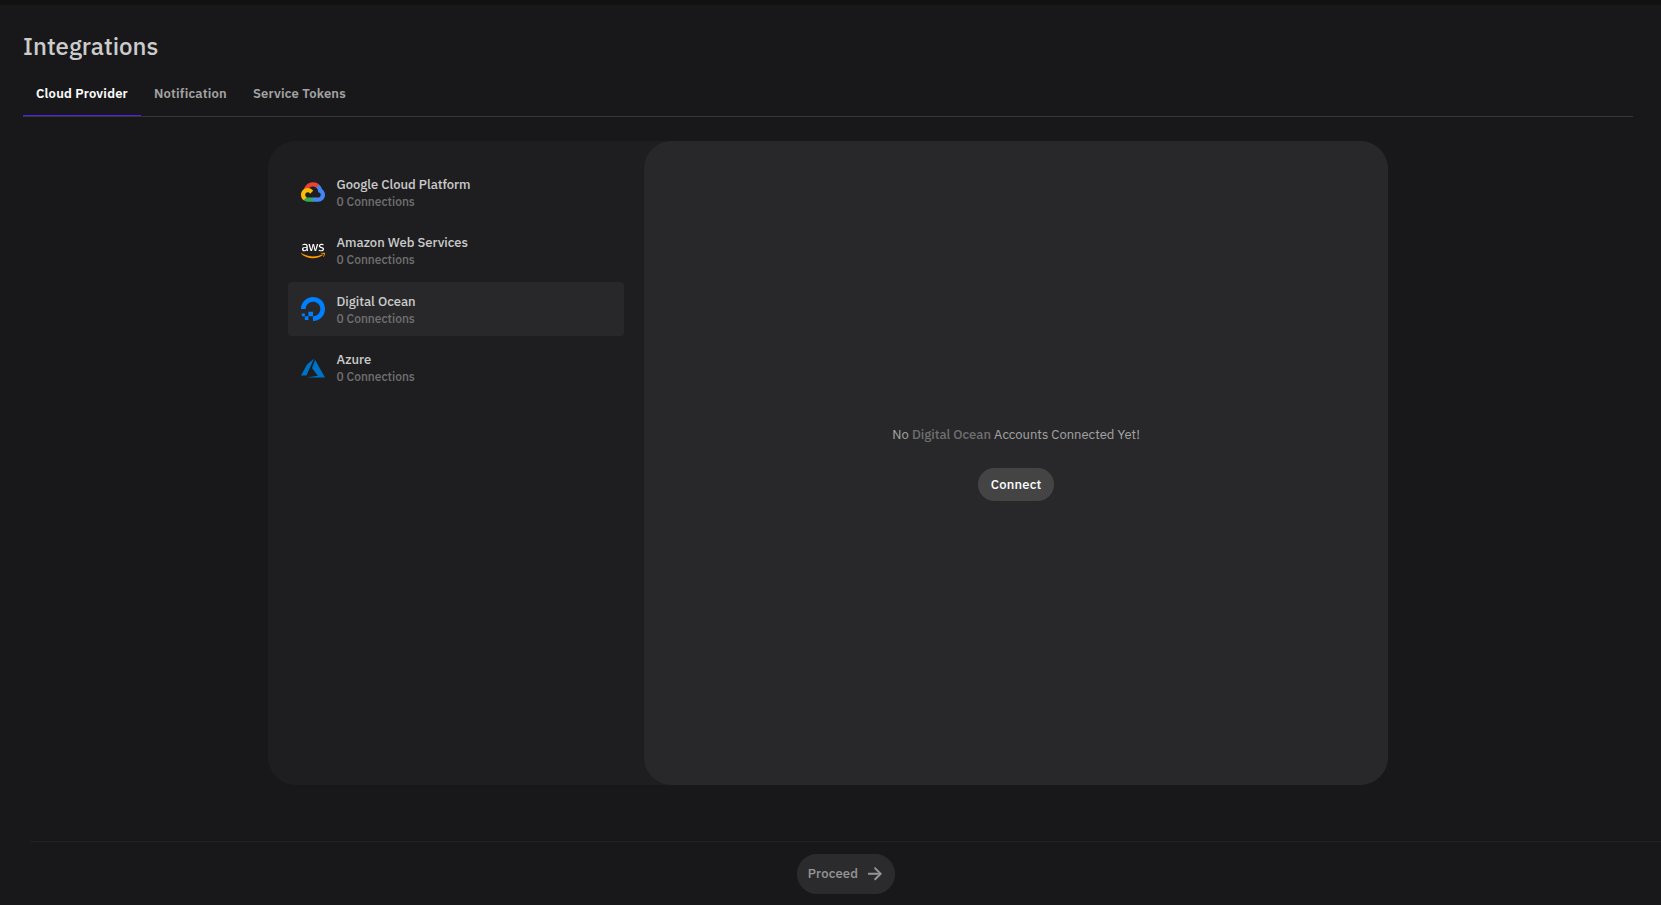
A modal titled Connect Digital Ocean Cloud will appear.
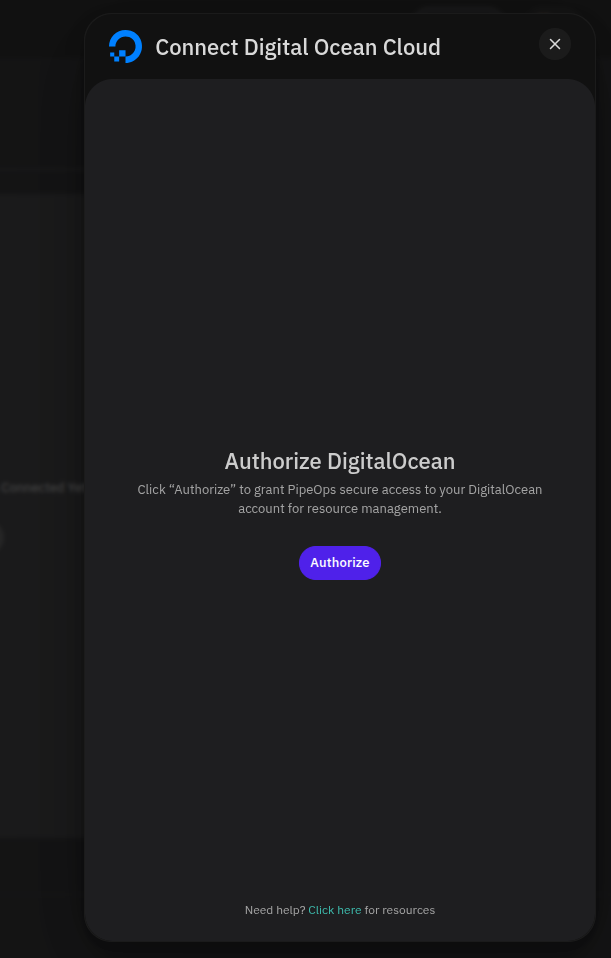
Step 3: Authorize PipeOps
In the modal, click Authorize. You will be redirected to DigitalOcean's OAuth authorization page, where you can review and approve the access PipeOps is requesting.
Step 4: Confirm the Connection
After approving access on DigitalOcean's page, you will be redirected back to PipeOps. Your DigitalOcean account will appear as a connected provider under the Digital Ocean section on the Integrations page.
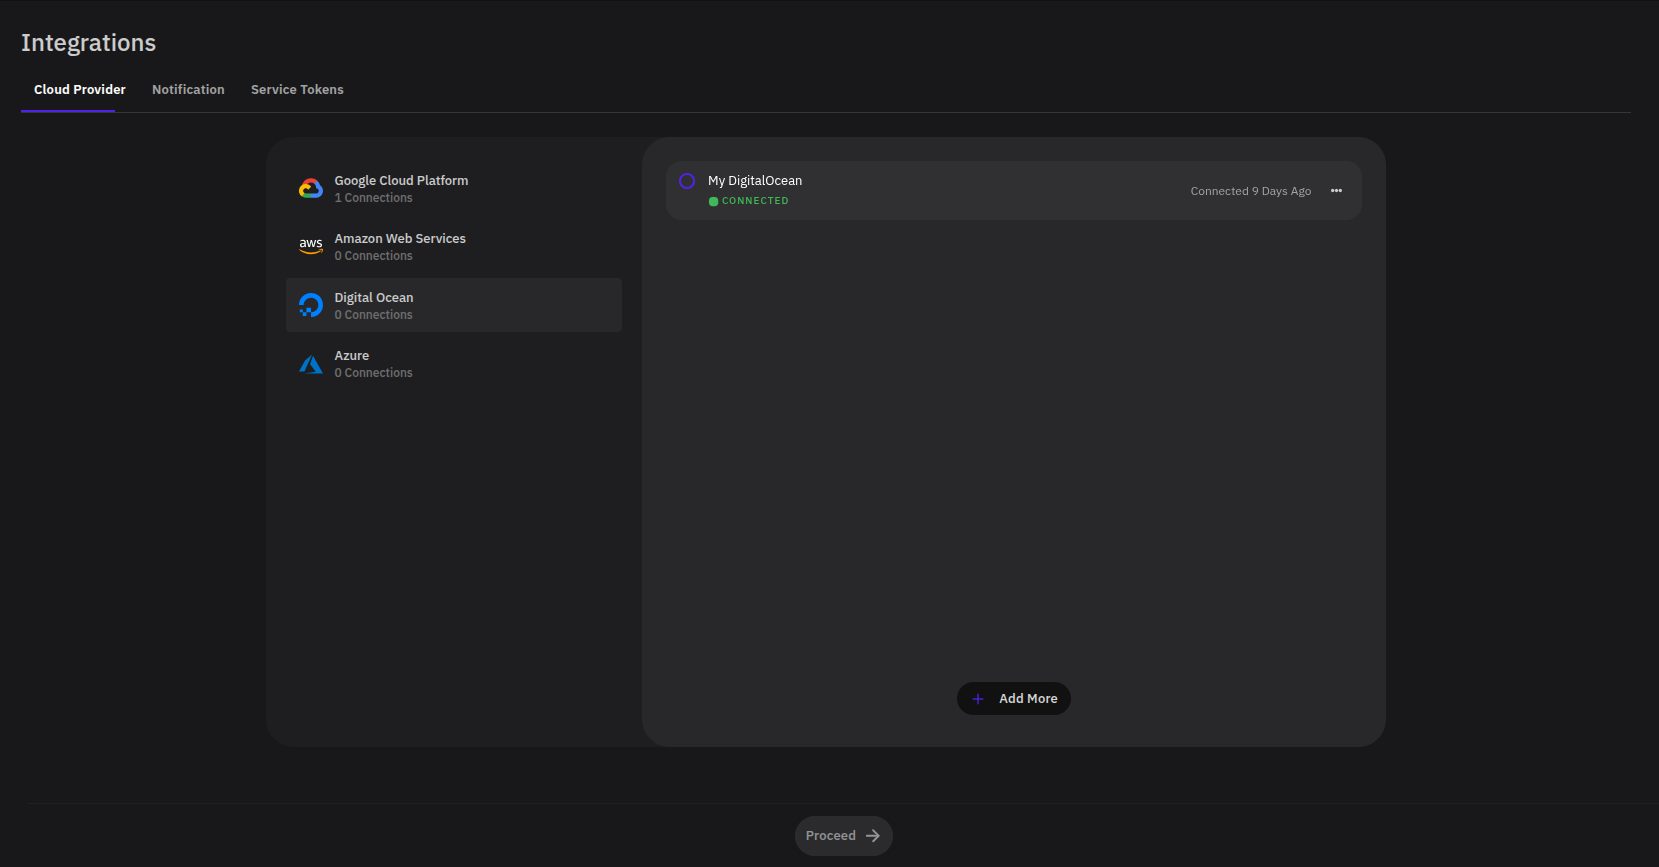
Your DigitalOcean account is now connected to PipeOps. You can proceed to provision a server on your connected account — see Server Provisioning.