Add-on Settings
The Settings tab is where you configure your add-on's behaviour and infrastructure. It is divided into six sections, accessible from the left sidebar: General Settings, Network, Firewall Rules, Environment Variables, Resources & Replications, and Storage.
General Settings
Rename your add-on by updating the Project Name field and clicking Save.
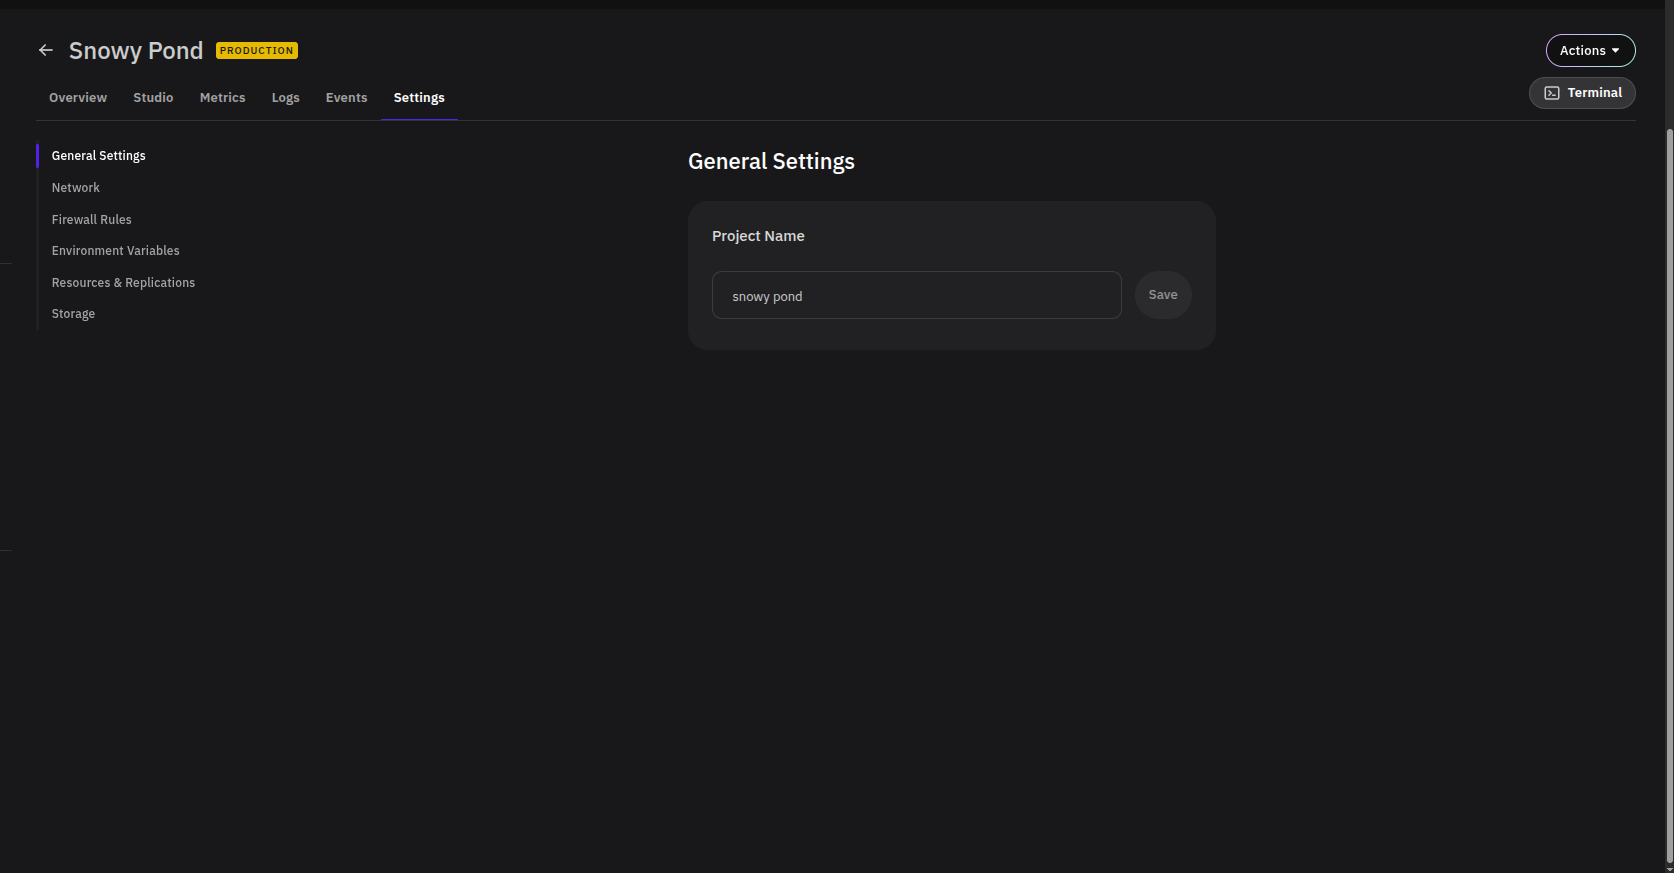
The project name is used to generate your add-on's public PipeOps domain. Renaming your add-on will change its domain, which will break any existing links or integrations pointing to the old address.
Network
Controls how your add-on is reachable — both from the public internet and from other services within your cluster.
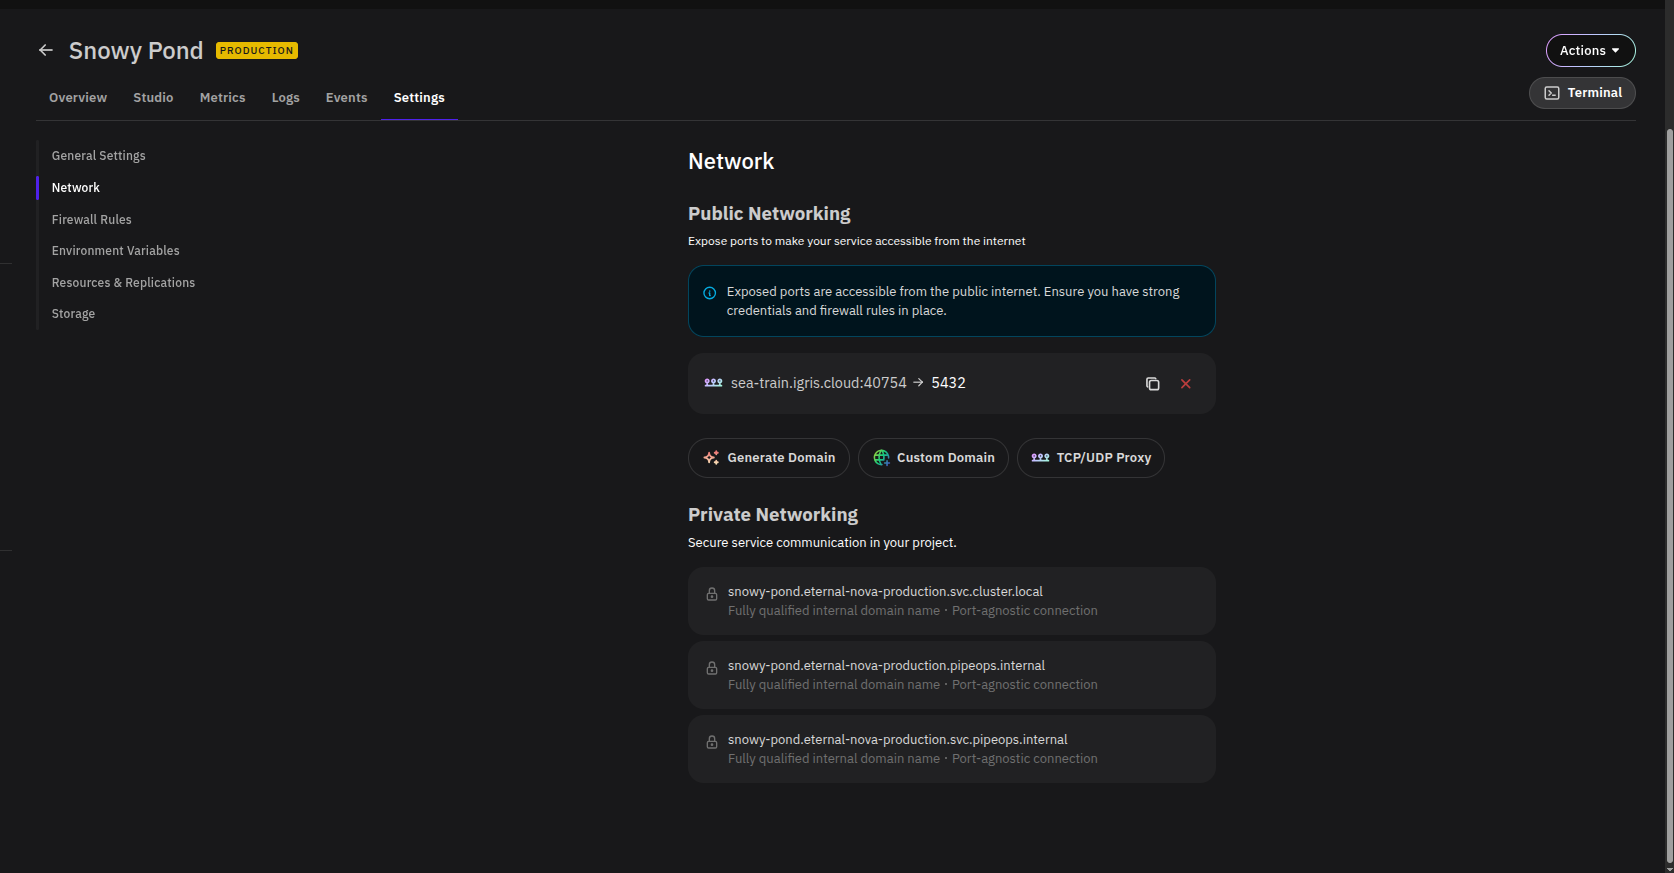
Public Networking
Exposes your add-on on a public endpoint. Any exposed port is accessible from the internet, so ensure you have strong credentials and firewall rules configured before enabling this.
Three actions are available:
- Generate Domain — Creates a PipeOps-managed public domain for your add-on.
- Custom Domain — Attach your own domain name to the add-on.
- TCP/UDP Proxy — Expose a non-HTTP port via a TCP or UDP proxy (e.g. a database port like
5432).
Existing public endpoints are listed with their external address and internal port mapping (e.g. sea-train.igris.cloud:40754 → 5432). Click the copy icon to copy the address, or the ✕ to remove it.
Private Networking
Displays the internal DNS names available for service-to-service communication within your cluster. These are not publicly accessible and do not require firewall rules. Three fully qualified domain names are provided:
<addon-name>.eternal-nova-production.pipeops.internal<addon-name>.eternal-nova-production.svc.cluster.local<addon-name>.eternal-nova-production.svc.pipeops.internal
All are described as port-agnostic — use whichever fits your internal routing needs.
Firewall Rules
Defines which traffic is allowed to reach your add-on.
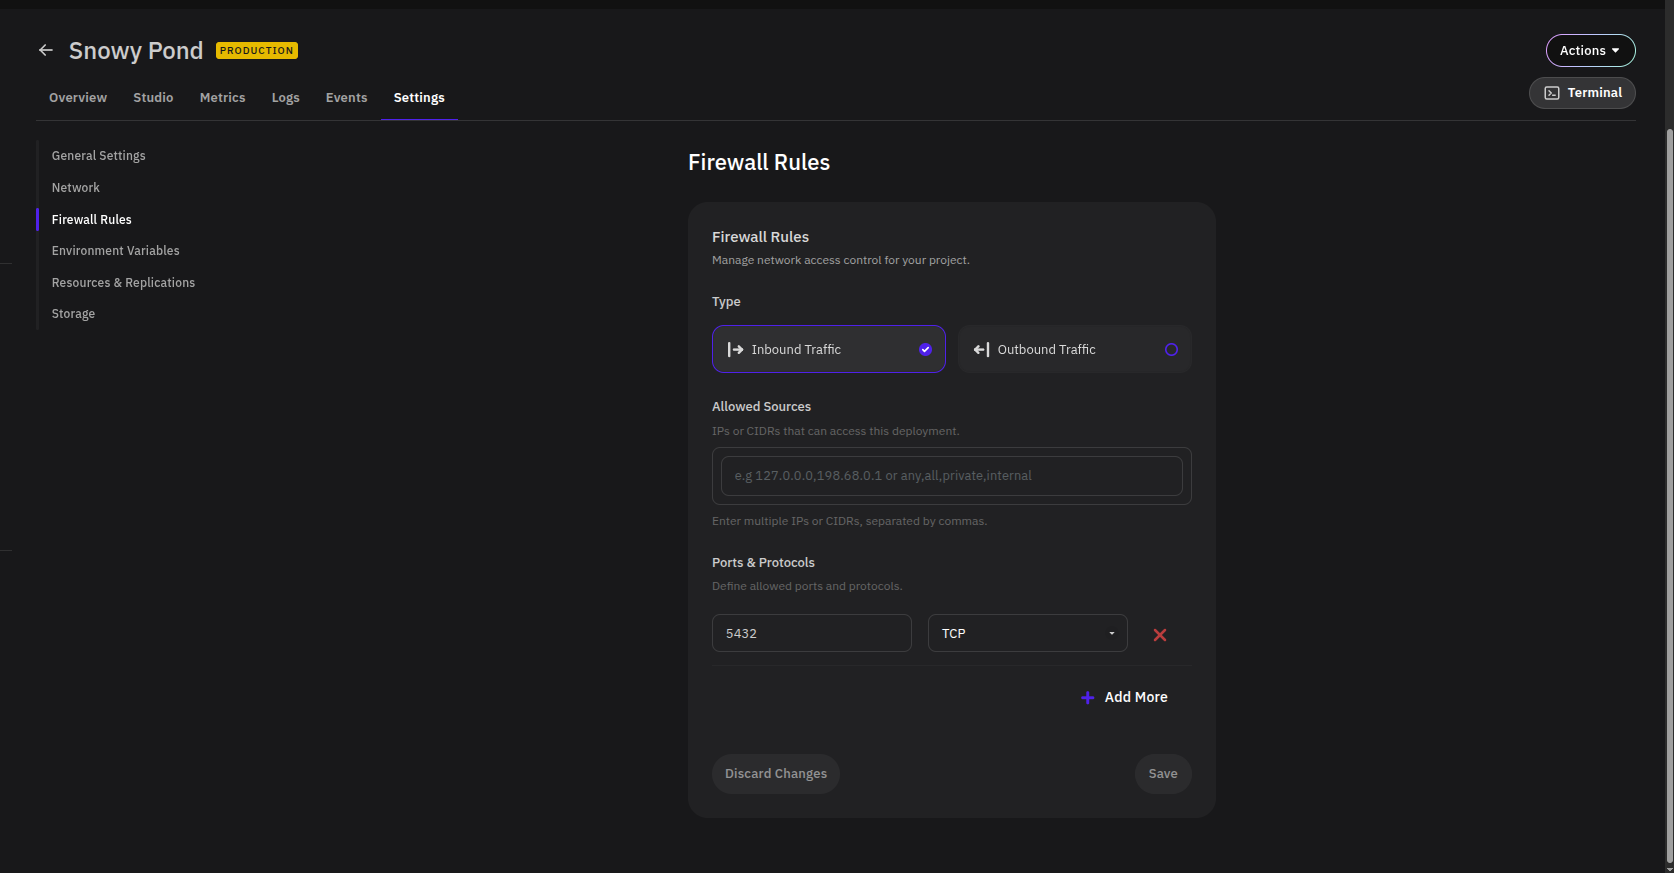
Traffic Type
Select whether the rule applies to Inbound Traffic (incoming connections) or Outbound Traffic (connections your add-on initiates).
Allowed Sources
Enter the IPs or CIDR ranges permitted to access the add-on. Multiple values can be entered as a comma-separated list. You can also use the following keywords:
| Keyword | Meaning |
|---|---|
any | All sources |
all | All sources |
private | Private network ranges only |
internal | Internal cluster traffic only |
Ports & Protocols
Specify which ports and protocols are permitted. Each entry takes a port number and a protocol (TCP or UDP). Click + Add More to define additional rules.
Click Save to apply changes, or Discard Changes to revert.
Environment Variables
Inject runtime configuration and secrets into your add-on's container environment.
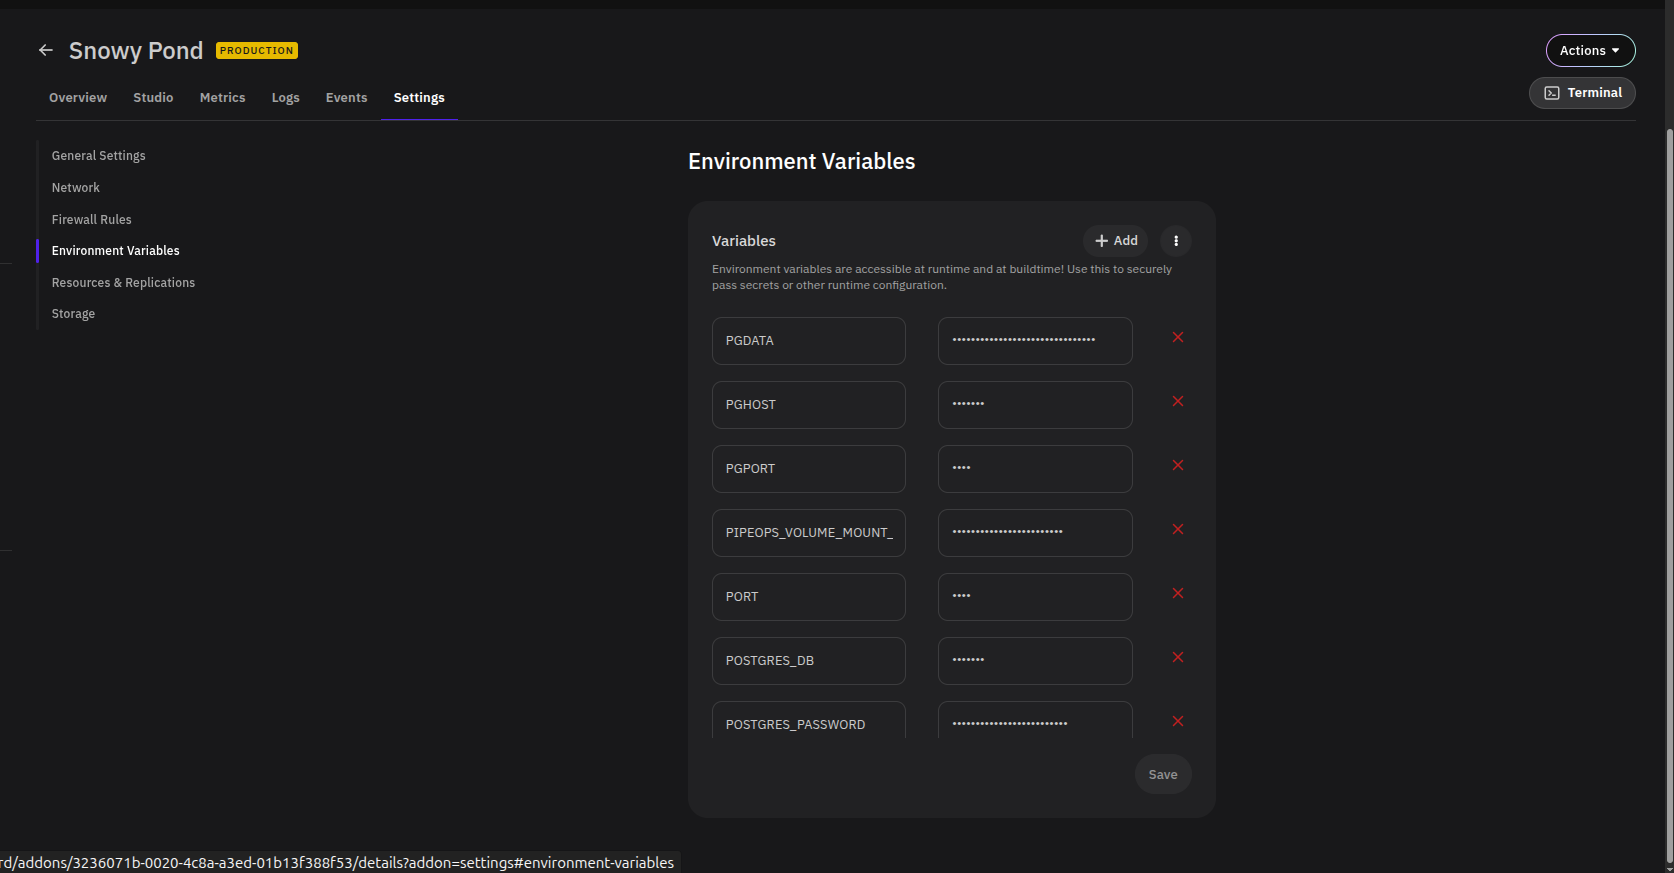
Variables are accessible at both runtime and build time. Each entry consists of a key (e.g. POSTGRES_PASSWORD) and a masked value. Click + Add to create a new variable, or the red ✕ next to any entry to delete it.
The ⋮ menu next to the Add button provides additional options:
- Bulk Edit — Edit multiple environment variables at once in a single text interface, useful when adding or updating several variables at a time.
Click Save to apply any changes.
Use environment variables to pass secrets such as passwords, API keys, and connection strings rather than hardcoding them in your application.
Resources & Replications
Controls the compute resources allocated to your add-on and how many instances run simultaneously.
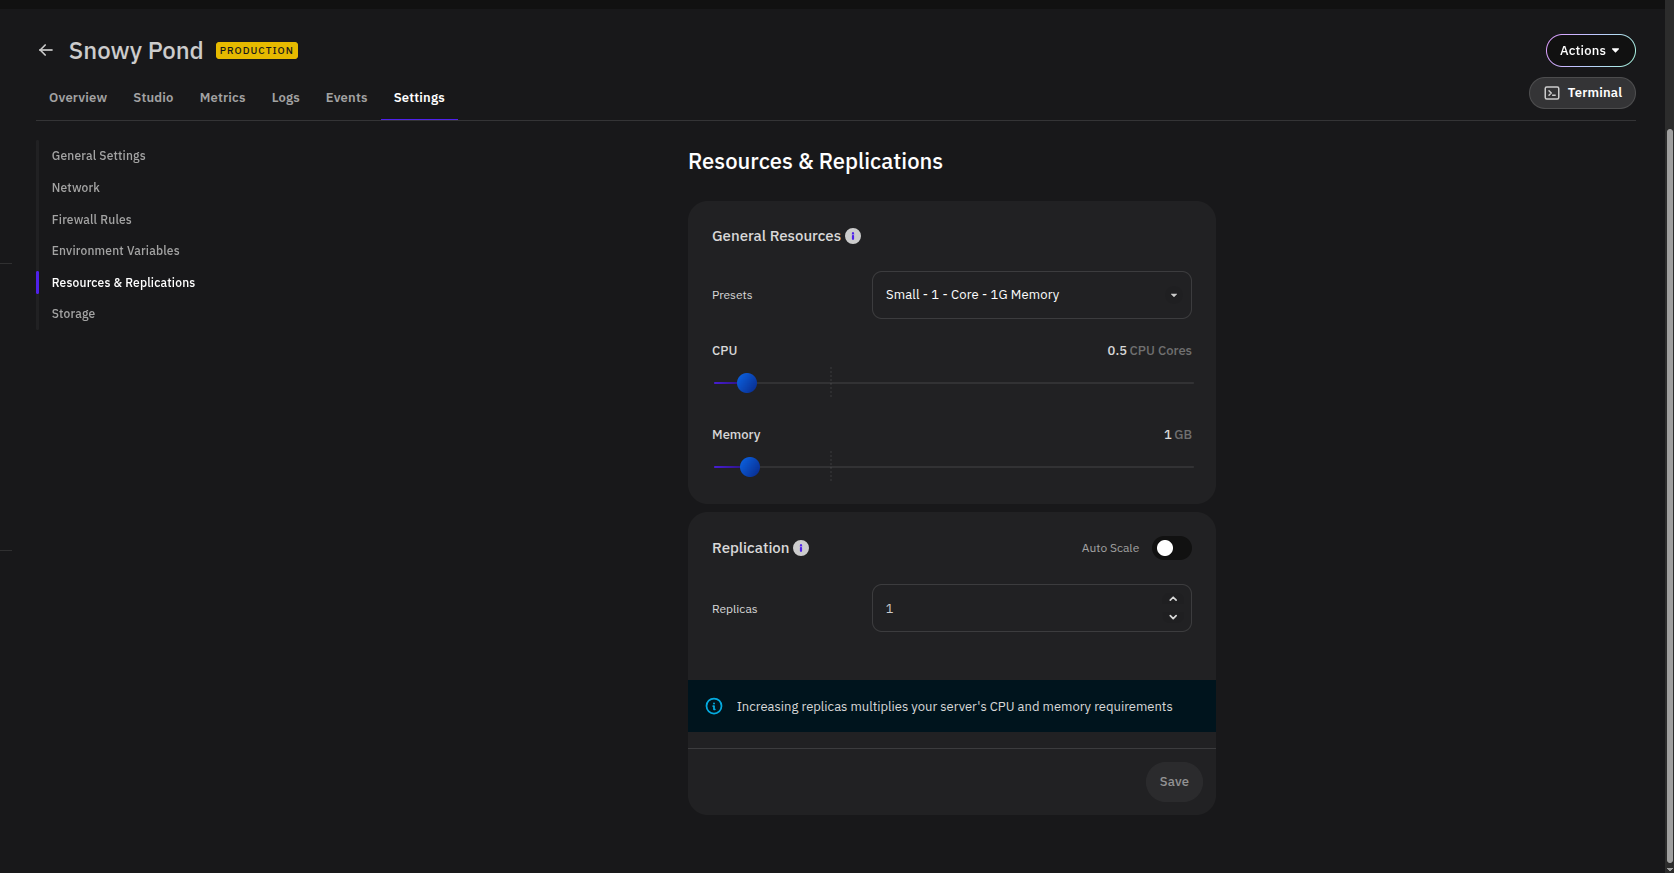
General Resources
Select a Preset from the dropdown to apply a predefined CPU and memory configuration (e.g. Small - 1 Core - 1G Memory), or adjust the sliders manually:
- CPU — Set the number of CPU cores allocated (e.g.
0.5). - Memory — Set the memory allocation in GB (e.g.
1 GB).
Replication
- Replicas — Set the number of running instances. Defaults to
1. - Auto Scale — Toggle to automatically adjust replica count based on load.
Increasing replicas multiplies your add-on's total CPU and memory requirements proportionally.
The maximum number of replicas you can configure is determined by your PipeOps plan. If you need more replicas than your current plan allows, you will need to upgrade your plan first.
Auto Scale is not available when your add-on has persistent storage volumes attached. To enable it, remove any configured storage volumes first.
Auto Scale Configuration
When Auto Scale is enabled, the fixed Replicas field is replaced with the following:
| Field | Description |
|---|---|
| Min Replica | The minimum number of instances to keep running at all times. |
| Max Replica | The upper limit PipeOps will scale up to under load. |
| Scale Trigger | The metric that drives scaling decisions (e.g. CPU Utilization). |
| Threshold | The trigger value at which scaling occurs (e.g. 50% total CPU utilization). |
Click + Add Autoscale Trigger to define additional scaling conditions. Click Save to apply changes.
Storage
Configures persistent volumes mounted into your add-on's container. This ensures data survives restarts and redeployments.
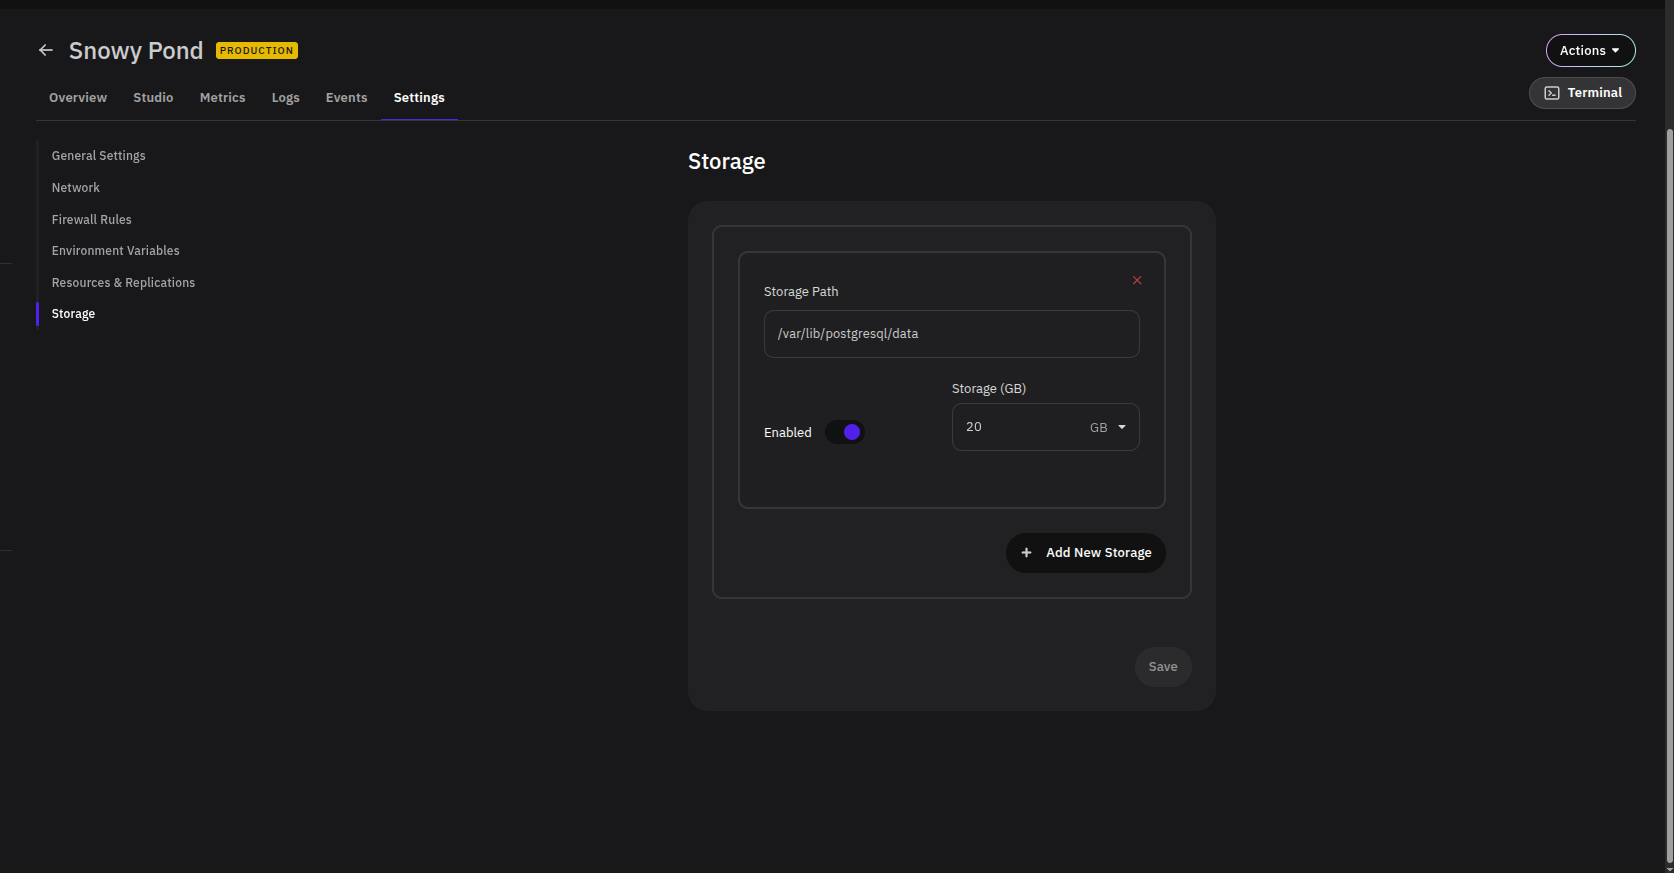
Each storage entry has three fields:
- Storage Path — The file system path inside the container where the volume is mounted (e.g.
/var/lib/postgresql/data). - Enabled — Toggle to activate or deactivate the volume without deleting its configuration.
- Storage (GB) — The size of the persistent volume (e.g.
20 GB).
Click + Add New Storage to attach additional volumes. Click Save to apply changes.