AddOns
This guide outlines the steps to deploy an add-on in PipeOps. The Add-ons section provides a variety of tools to enhance your projects. From databases to analytics tools, add-ons seamlessly extend your application's functionality.
Deploying An Add-on
- To deploy an add-on, first log in to your PipeOps dashboard.
- Click on the "Addons" option in the sidebar navigation menu on the left side of your screen. This takes you to the Add-ons marketplace.

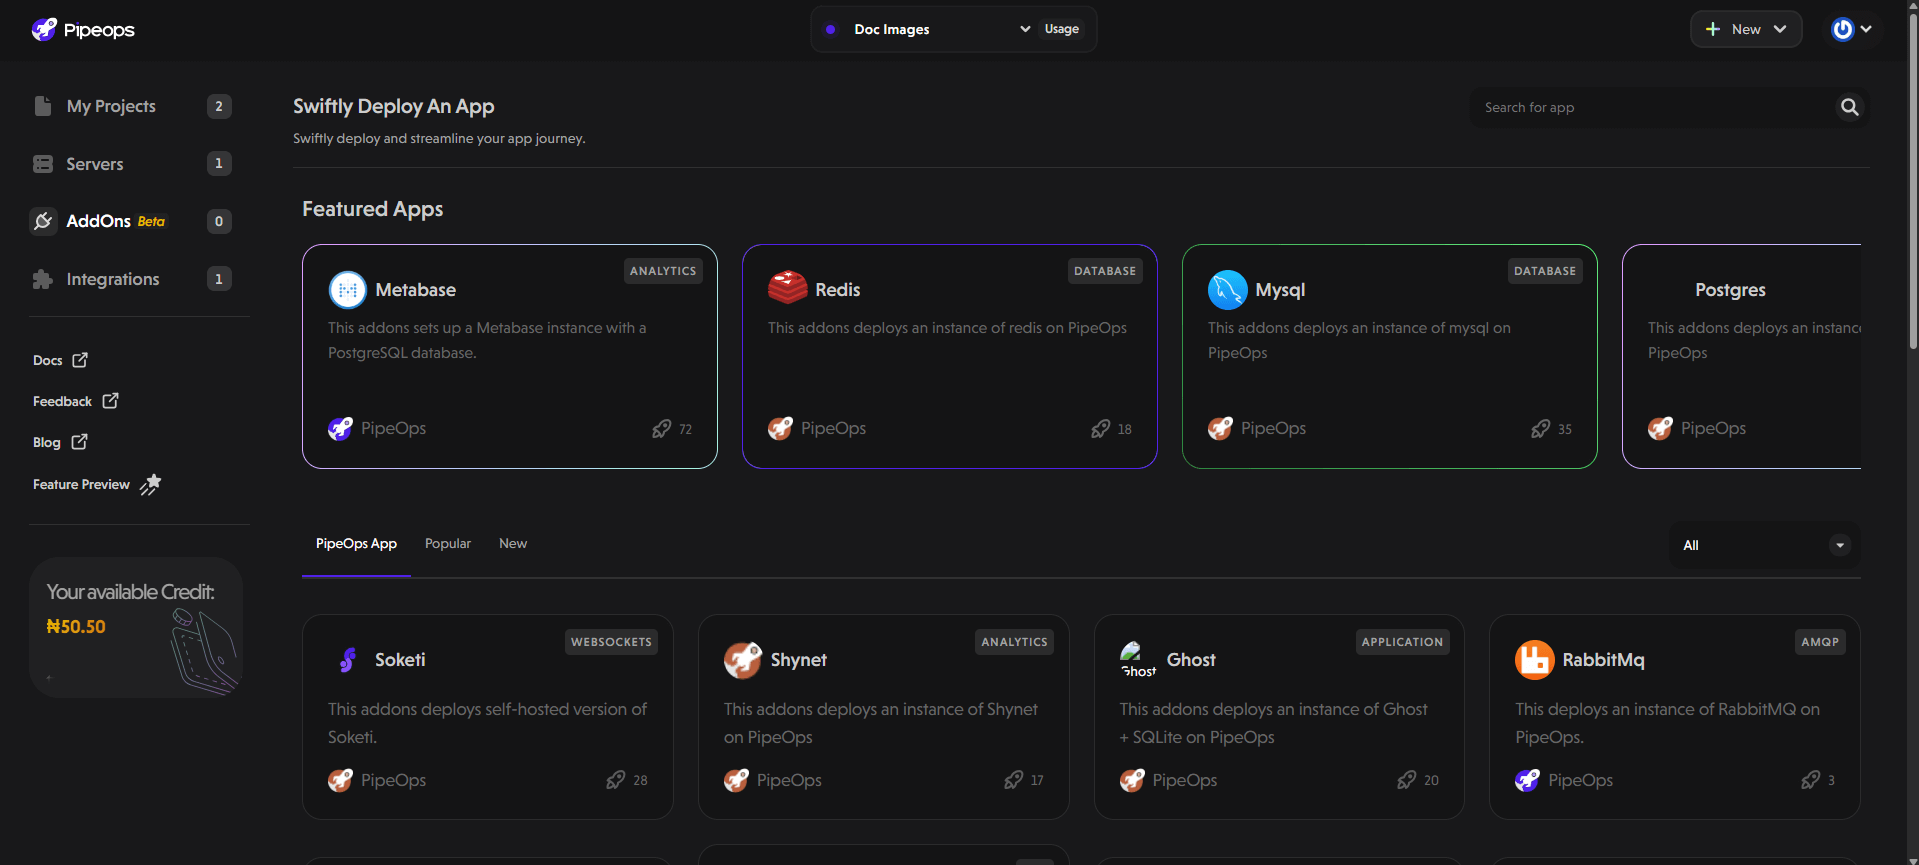
- Browse the available add-ons and choose the one you want to deploy.
- Click on the add-on to view its details.
Review Add-on Details
On the add-on's details page, you'll find:
-
A detailed description of the add-on's functionality.
-
Information about the add-on's creator or provider.
-
Any required dependencies.
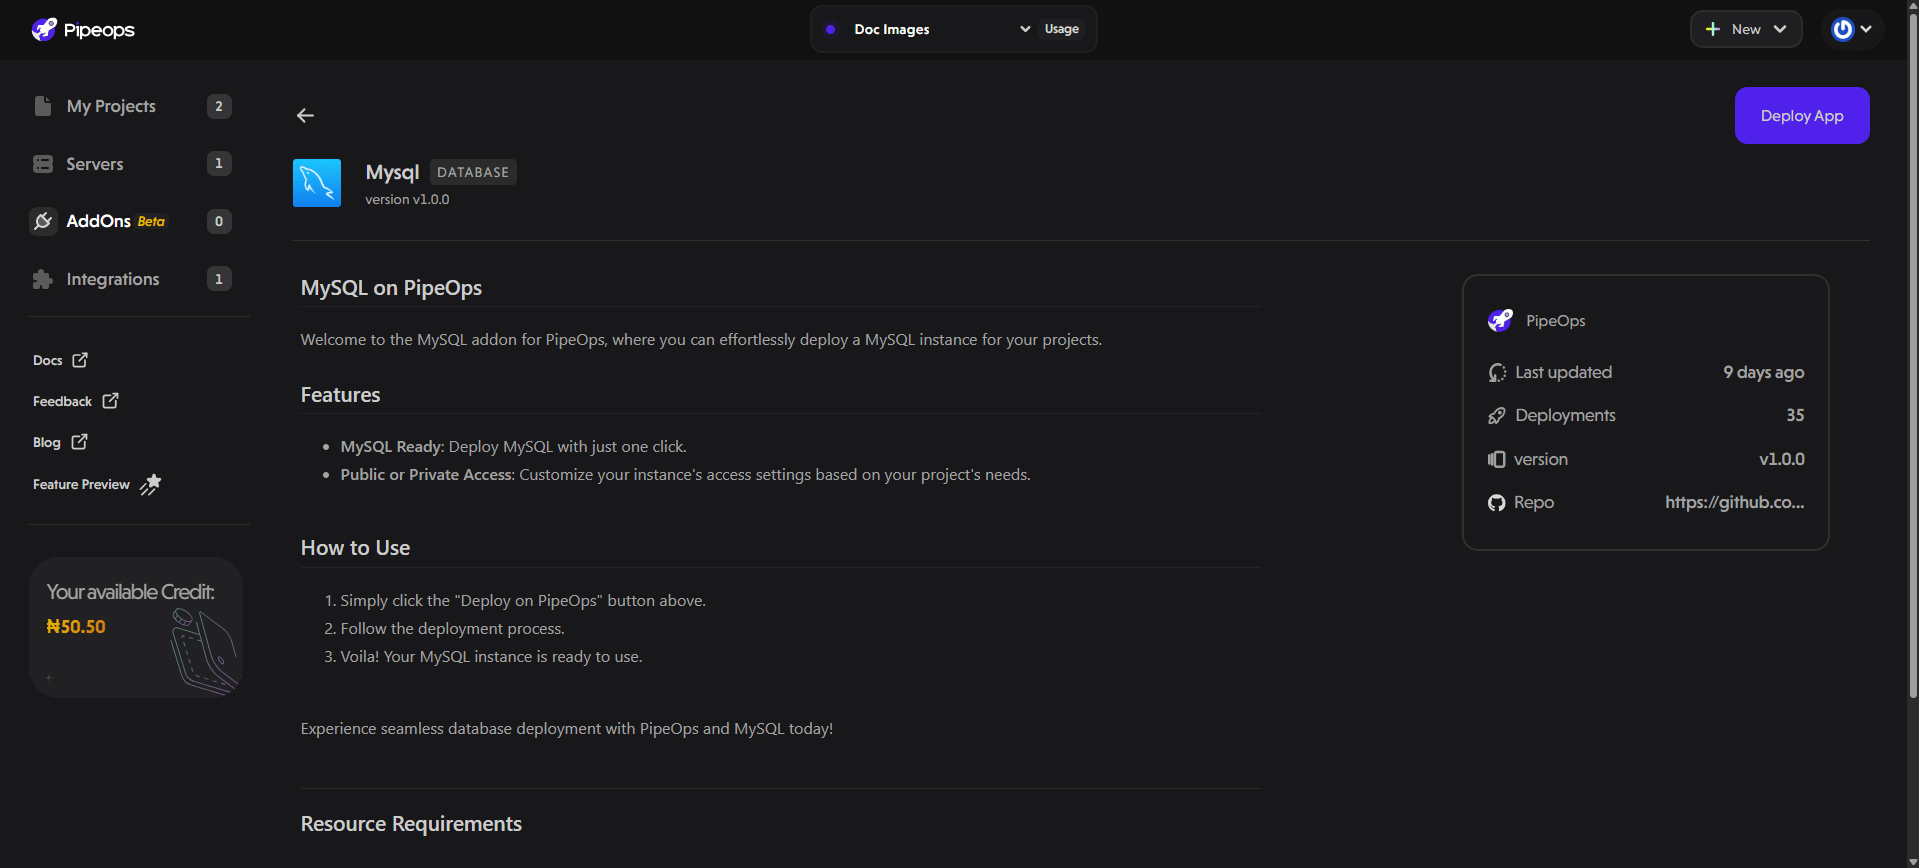
Once you’ve confirmed it’s the correct add-on, click the "Deploy App" button to proceed to the configuration page.
Configure Add-on
On the configuration page, you can do the following:
- Select the server where you want to deploy your add-on
- Choose the environment (e.g., beta, development, or production)
Learn more about environments here - View the resources required to deploy the add-on and the resources available to you
- Add additional add-ons to deploy alongside the current one
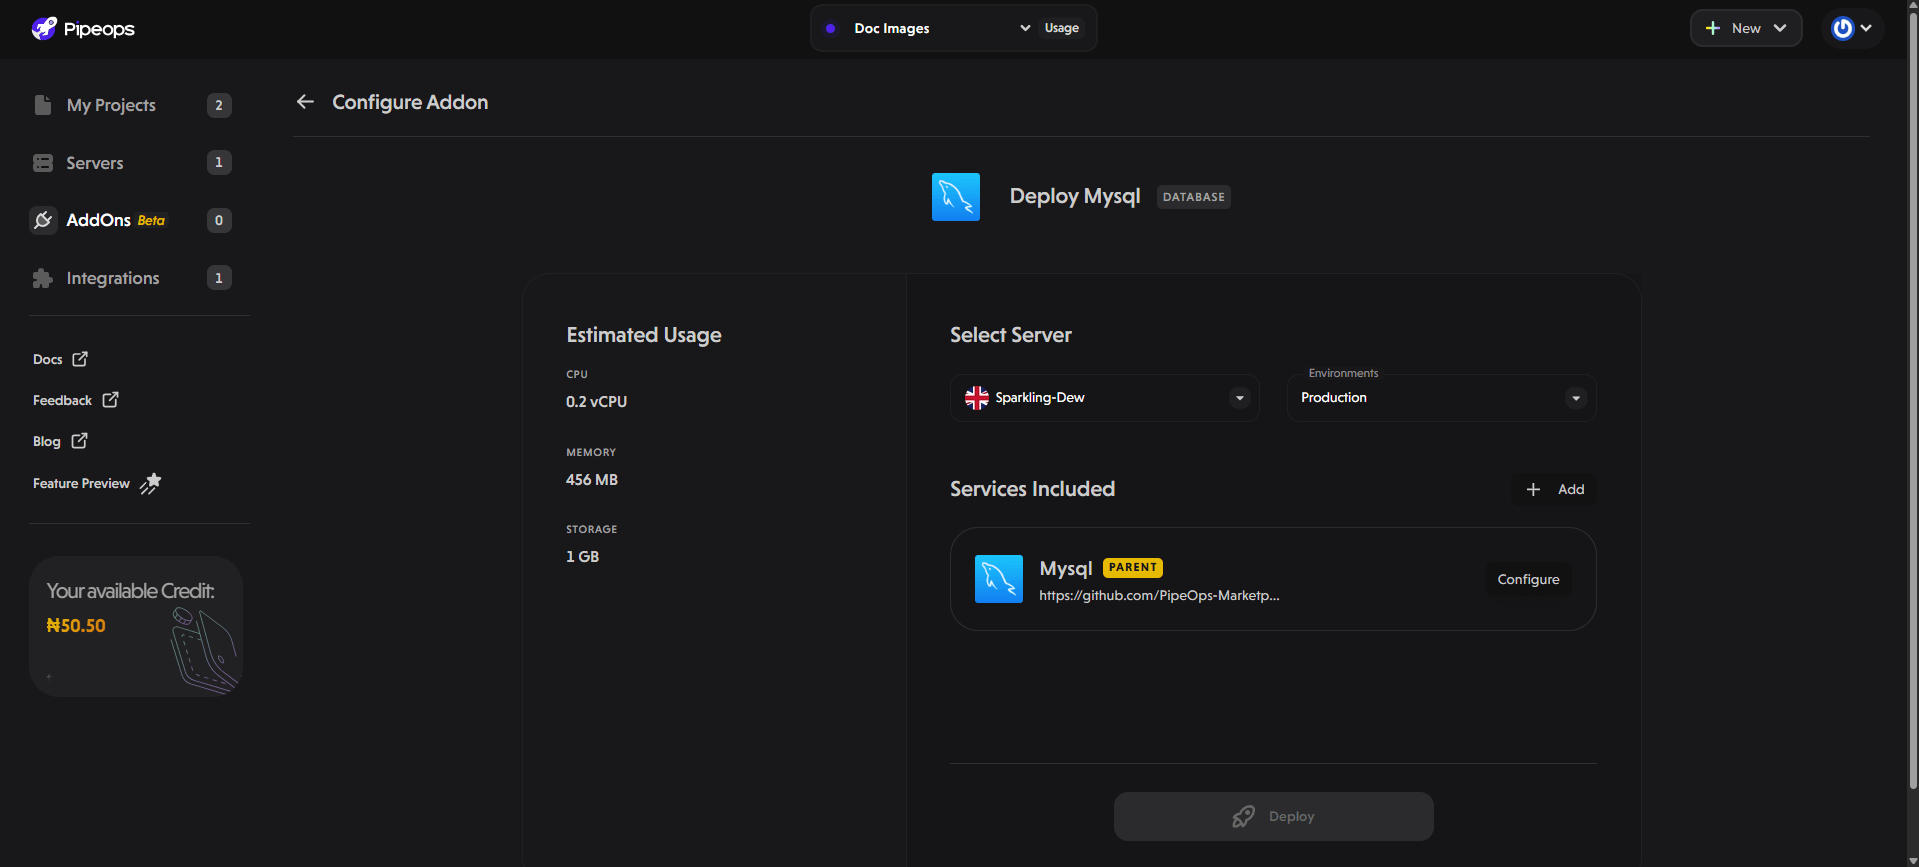
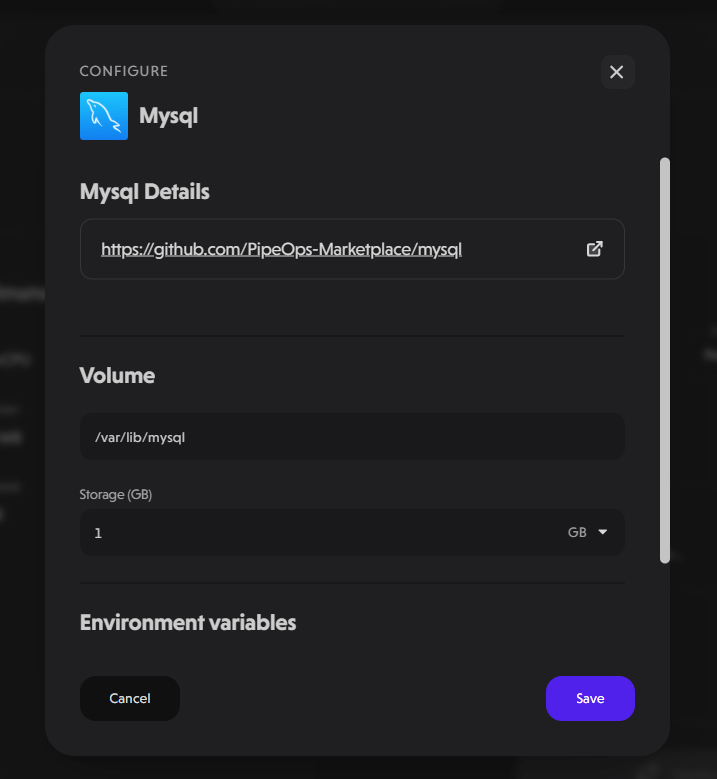
- Click the "configure" button to review and modify the current configuration settings.
Deploy Add-on
- Once you’ve fully configured the add-on, click the "Deploy" button to begin deployment.
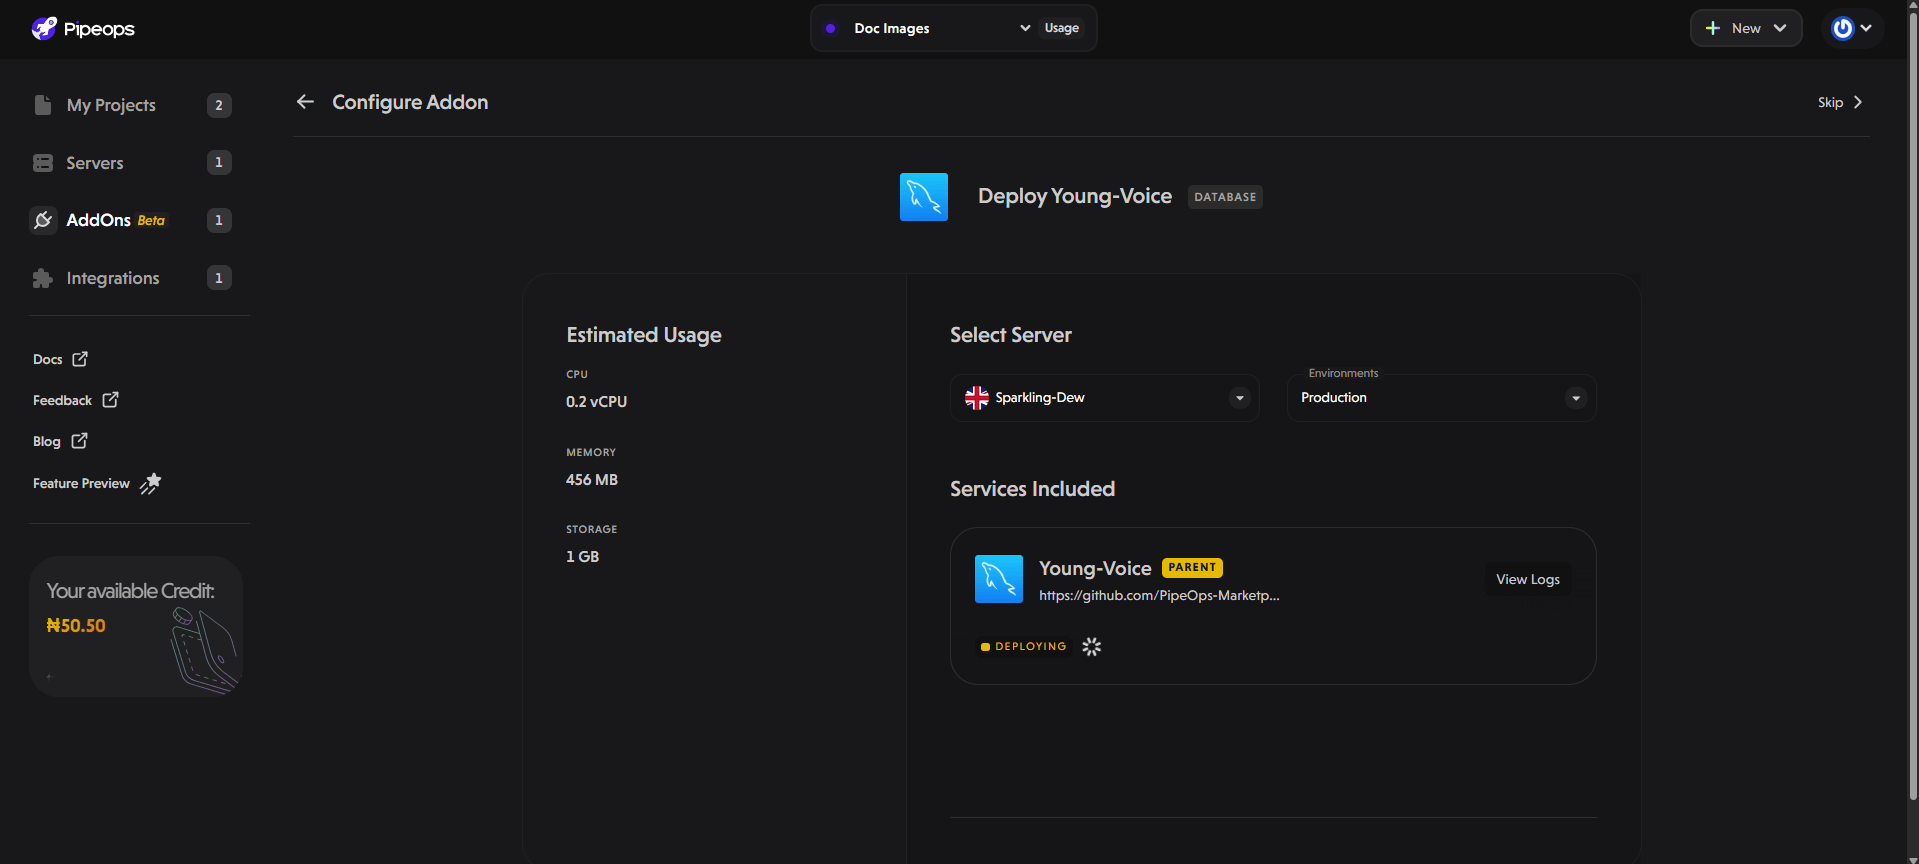
- Upon successful deployment, a success modal will appear. Click the "Got it" button to proceed to the Overview Page of the add-on you just deployed.
- Alternatively, you can skip waiting for the deployment to complete and navigate to the Add-on Overview Page immediately by clicking the Skip button.