Project Settings
The Settings tab is where you configure your project's behaviour and infrastructure. It is divided into nine sections, accessible from the left sidebar: General Settings, Source Control, Build Settings, Networking, Firewall Rules, Environment Variables, Resources & Replications, Storage, and Security Policy.
General Settings
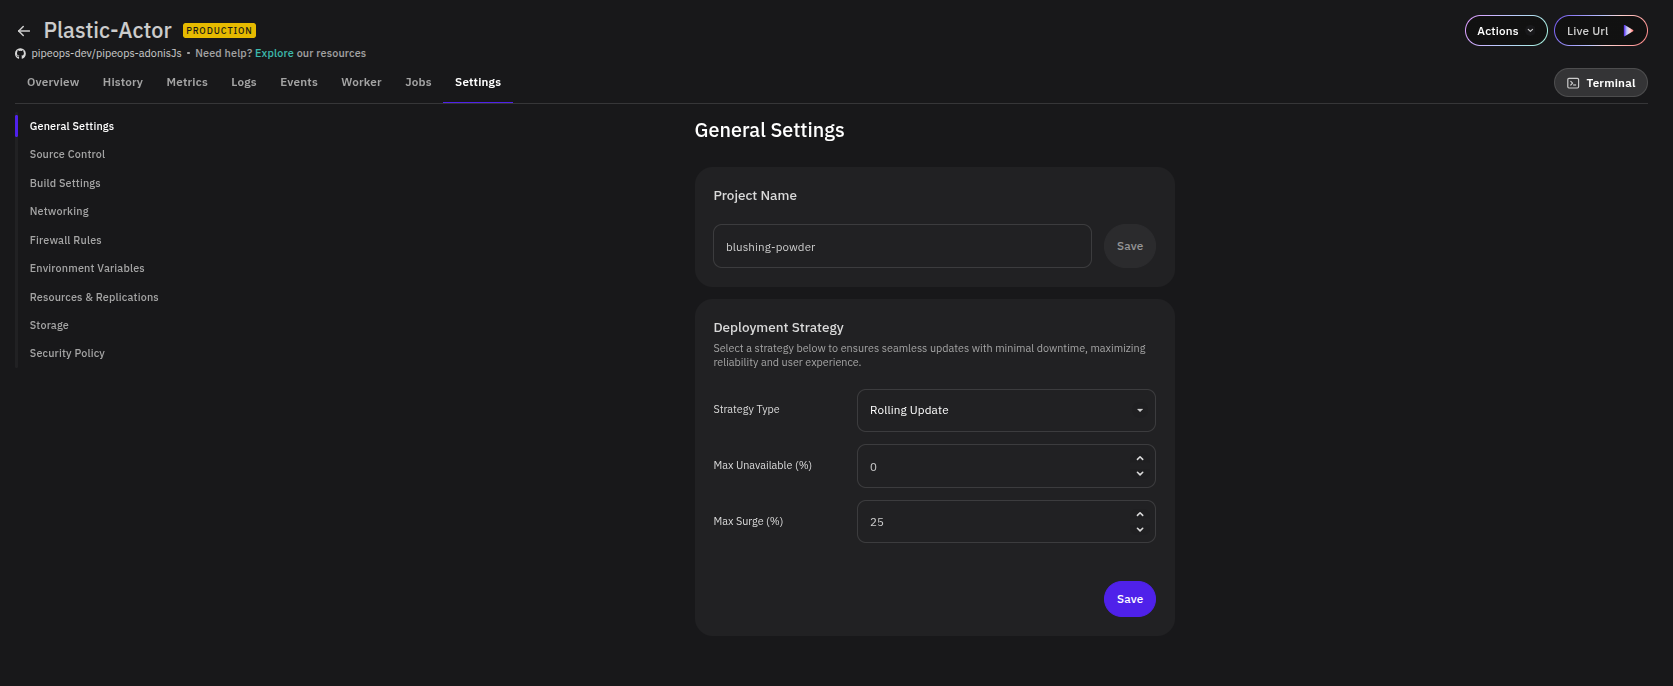
Project Name
Rename your project by updating the Project Name field and clicking Save.
The project name is used to generate your project's public PipeOps domain. Renaming your project will change its domain, which will break any existing links or integrations pointing to the old address.
Deployment Strategy
Controls how new deployments replace existing ones. Select a strategy type and configure its parameters, then click Save.
| Strategy | Description |
|---|---|
| Rolling Update | Gradually replaces old instances with new ones, maintaining availability throughout. Recommended for production environments. |
| Recreate | Terminates all existing instances before starting new ones. May cause brief downtime but ensures a clean start. |
When Rolling Update is selected, two additional parameters are available:
- Max Unavailable (%) — The percentage of replicas that may be unavailable during the update. Default is
0. - Max Surge (%) — The percentage of extra replicas that can be created above the desired count during an update. Default is
25.
Source Control
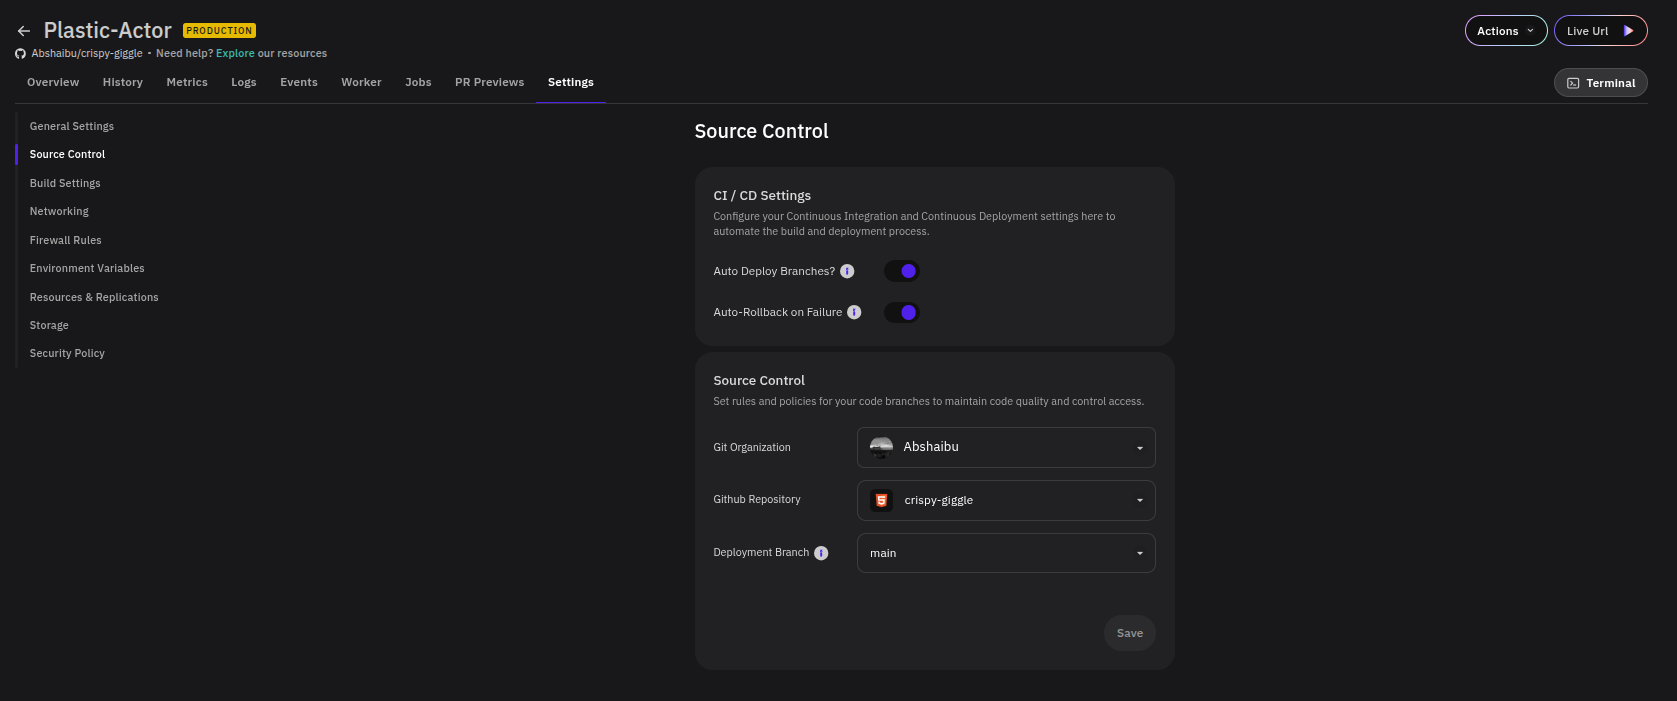
CI/CD Settings
Automates the build and deployment pipeline when changes are pushed to your repository.
| Setting | Description |
|---|---|
| Auto Deploy Branches | When enabled, PipeOps automatically triggers a new deployment whenever changes are pushed to the configured deployment branch. |
| Auto-Rollback on Failure | When enabled, PipeOps automatically reverts to the last successful deployment if a new deployment fails. |
Source Control
Connects your project to a specific Git repository and branch.
| Field | Description |
|---|---|
| Git Organization | The GitHub organisation or account that owns the repository. |
| Github Repository | The repository PipeOps will build and deploy from. |
| Deployment Branch | The branch PipeOps monitors and deploys (e.g. main). |
Click Save to apply changes.
Build Settings
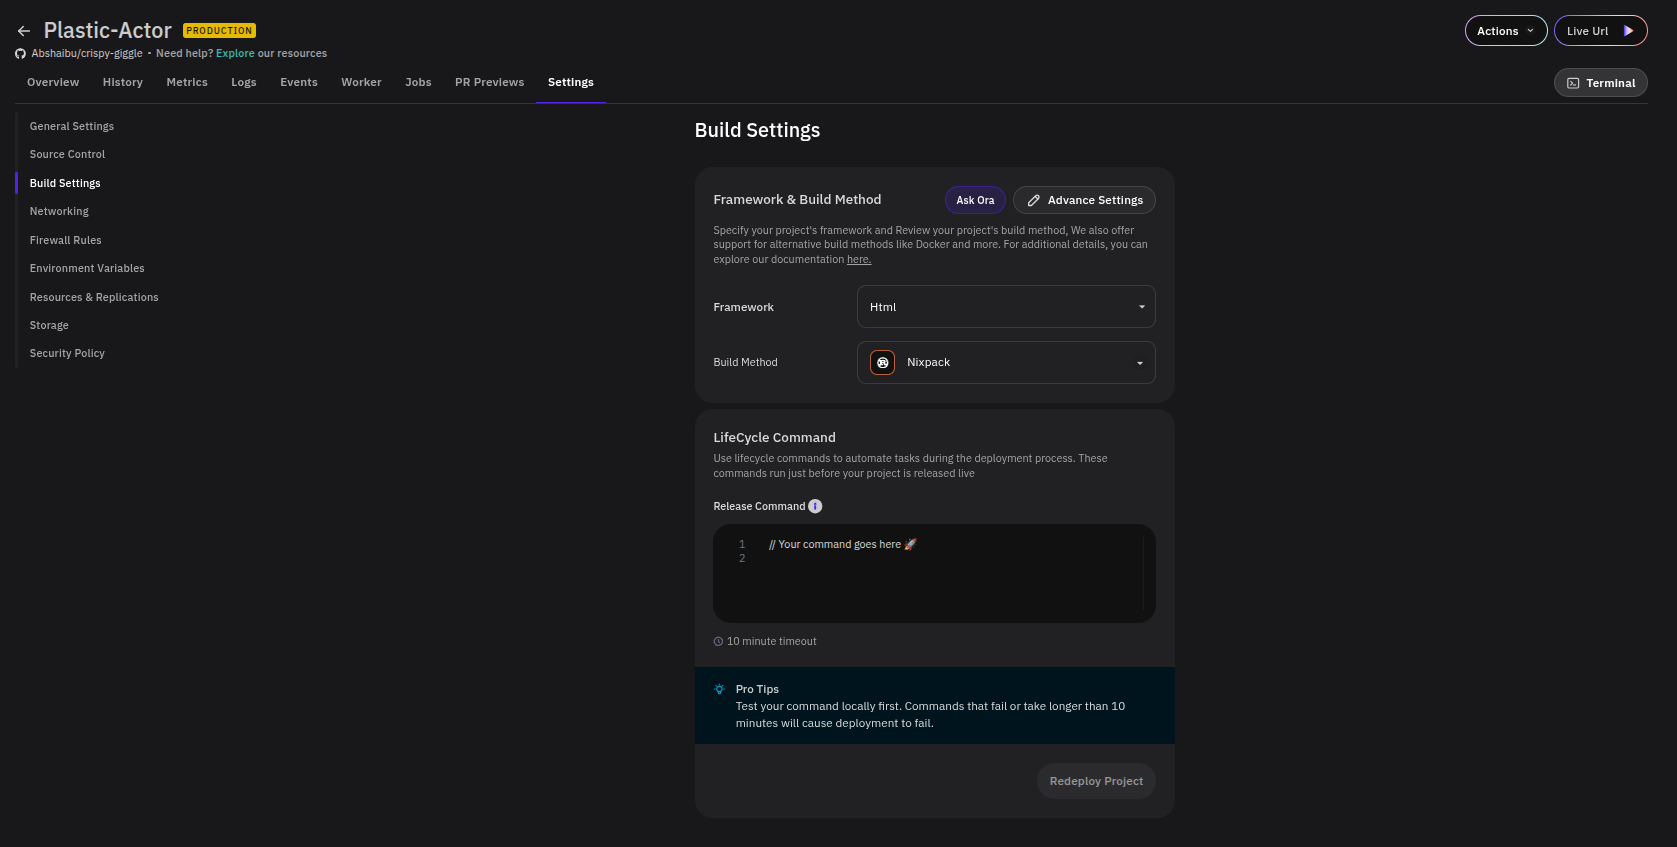
Framework & Build Method
Specifies how PipeOps builds your project.
- Framework — Select the framework your project uses (e.g.
Html,Node,Next.js). - Build Method — Select the tool used to build the project (e.g.
Nixpack,Dockerfile).
Two additional controls are available:
- Ask Ora — Opens the Ora AI assistant to help determine the right framework or build method for your project.
- Advance Settings — Expands additional build configuration options.
LifeCycle Command
Defines a Release Command that runs just before your project goes live on each deployment. Use this for tasks such as database migrations or cache warming.
Commands that fail or take longer than 10 minutes will cause the deployment to fail. Test your command locally before configuring it here.
Click Redeploy Project after saving to apply the lifecycle command to a new deployment.
Networking
Controls how your project is reachable from the internet and from within your cluster.
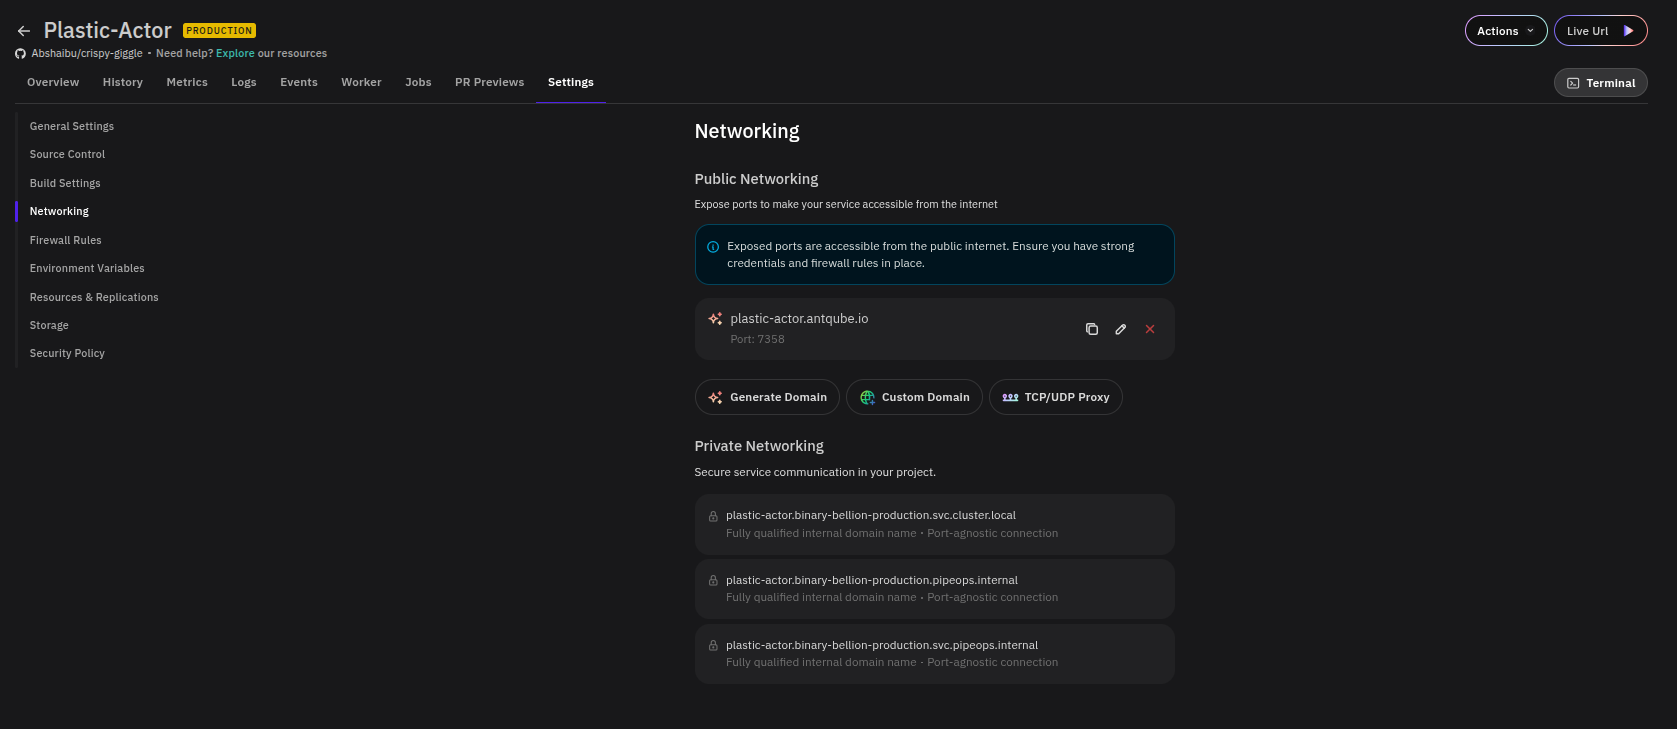
Public Networking
Exposes your project on a public endpoint. Any exposed port is accessible from the internet, so ensure you have strong credentials and firewall rules configured.
Three actions are available:
- Generate Domain — Creates a PipeOps-managed public domain for your project.
- Custom Domain — Attach your own domain name.
- TCP/UDP Proxy — Expose a non-HTTP port via a TCP or UDP proxy.
Existing public endpoints are listed with their domain and port mapping. Use the copy, edit, or delete icons to manage each entry.
Private Networking
Displays internal DNS names for service-to-service communication within your cluster. These are not publicly accessible. Three fully qualified domain names are provided:
<project-name>.eternal-nova-production.svc.cluster.local<project-name>.eternal-nova-production.pipeops.internal<project-name>.eternal-nova-production.svc.pipeops.internal
All are port-agnostic — use whichever suits your internal routing needs.
Firewall Rules
Defines which traffic is allowed to reach your project.
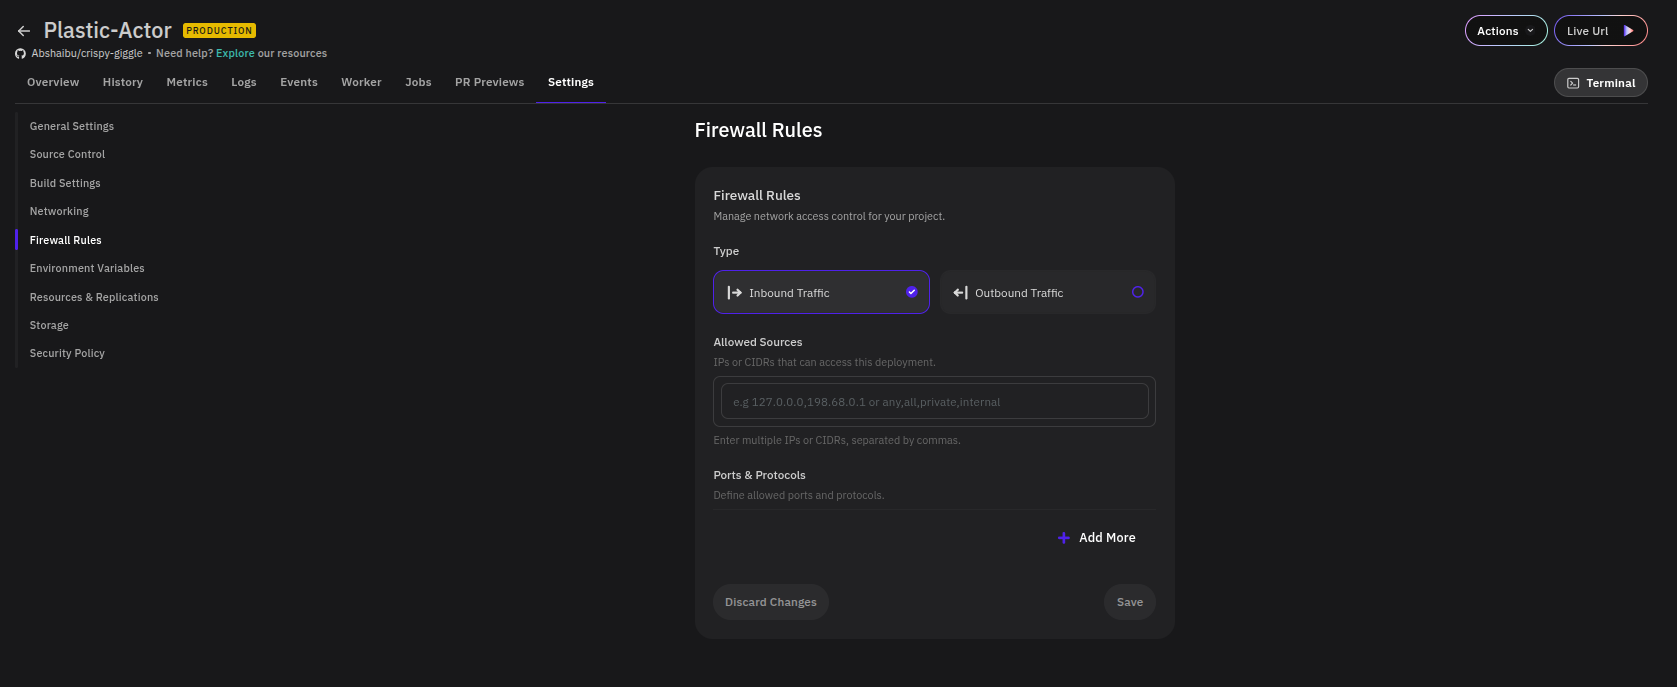
Traffic Type
Select whether the rule applies to Inbound Traffic (incoming connections) or Outbound Traffic (connections your project initiates).
Allowed Sources
Enter the IPs or CIDR ranges permitted to access the project as a comma-separated list. The following keywords are also supported:
| Keyword | Meaning |
|---|---|
any / all | All sources |
private | Private network ranges only |
internal | Internal cluster traffic only |
Ports & Protocols
Specify which ports and protocols are permitted. Each entry takes a port number and a protocol (TCP or UDP). Click + Add More to define additional rules.
Click Save to apply changes or Discard Changes to revert.
Environment Variables
Inject runtime configuration and secrets into your project's container environment.
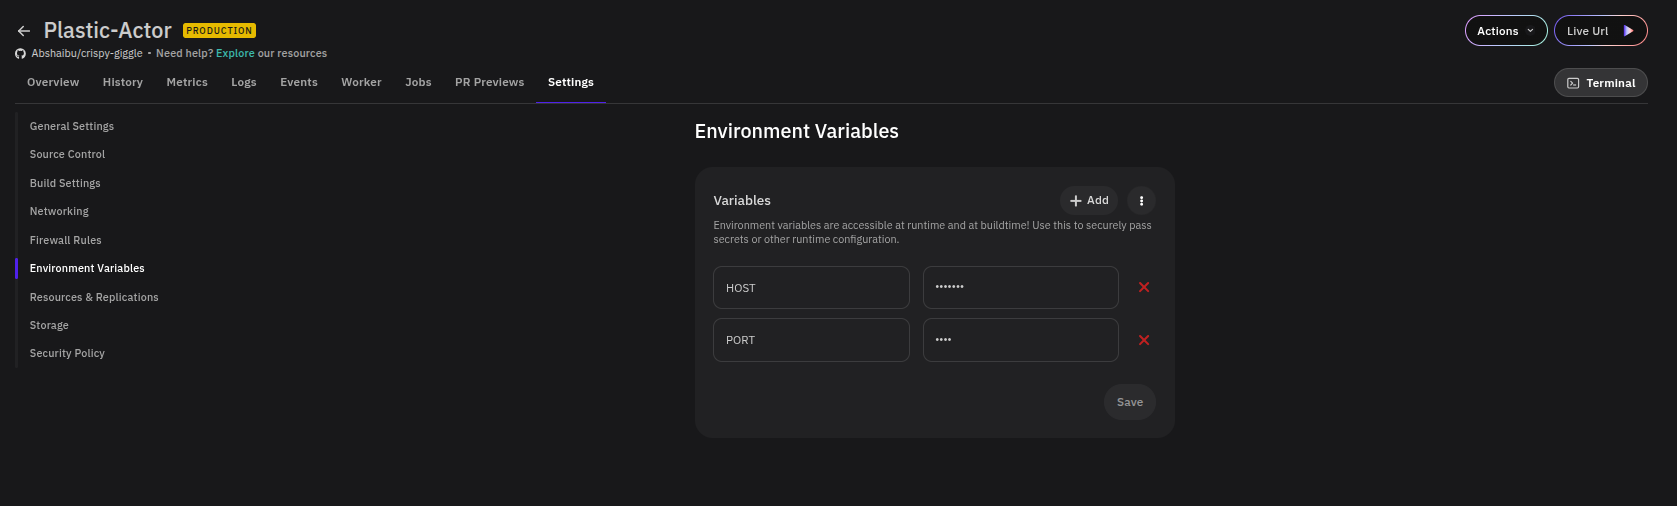
Variables are accessible at both runtime and build time. Each entry has a key and a masked value. Click + Add to create a new variable, or the red ✕ to delete one.
The ⋯ menu next to the Add button provides additional options:
- Bulk Edit — Edit multiple environment variables at once in a single text interface, useful when adding or updating several variables at a time.
- Add Database Credentials — If you have a database deployed as a PipeOps add-on, use this option to inject its connection credentials directly into your project without manually copying them one by one.
Adding Database Credentials
Instead of navigating to your database add-on, copying each credential, and adding them individually, PipeOps can inject them automatically:
- Click the ⋯ menu and select Add Database Credentials.
- A modal lists all your deployed database add-ons. Select the one you want to connect to.
- On the Review Credentials screen, choose whether to inject credentials using the Internal or Public network connection.
- Review the list of variables to be injected (e.g.
POSTGRES_USER,POSTGRES_PASSWORD,POSTGRES_HOST,POSTGRES_PORT,DATABASE_URL). All are selected by default — uncheck any you don't need. You can also rename keys before injecting to avoid conflicts. - Click Inject Variables to add them to your project.
Existing environment variables with the same key will be overwritten. Rename any conflicting keys before clicking Inject Variables.
Don't have a database add-on yet? Browse available database add-ons on the PipeOps Add-on Marketplace and deploy one in minutes. Learn more about Add-ons.
Click Save to apply any manually added or edited variables.
Resources & Replications
Controls the compute resources allocated to your project and how many instances run simultaneously.
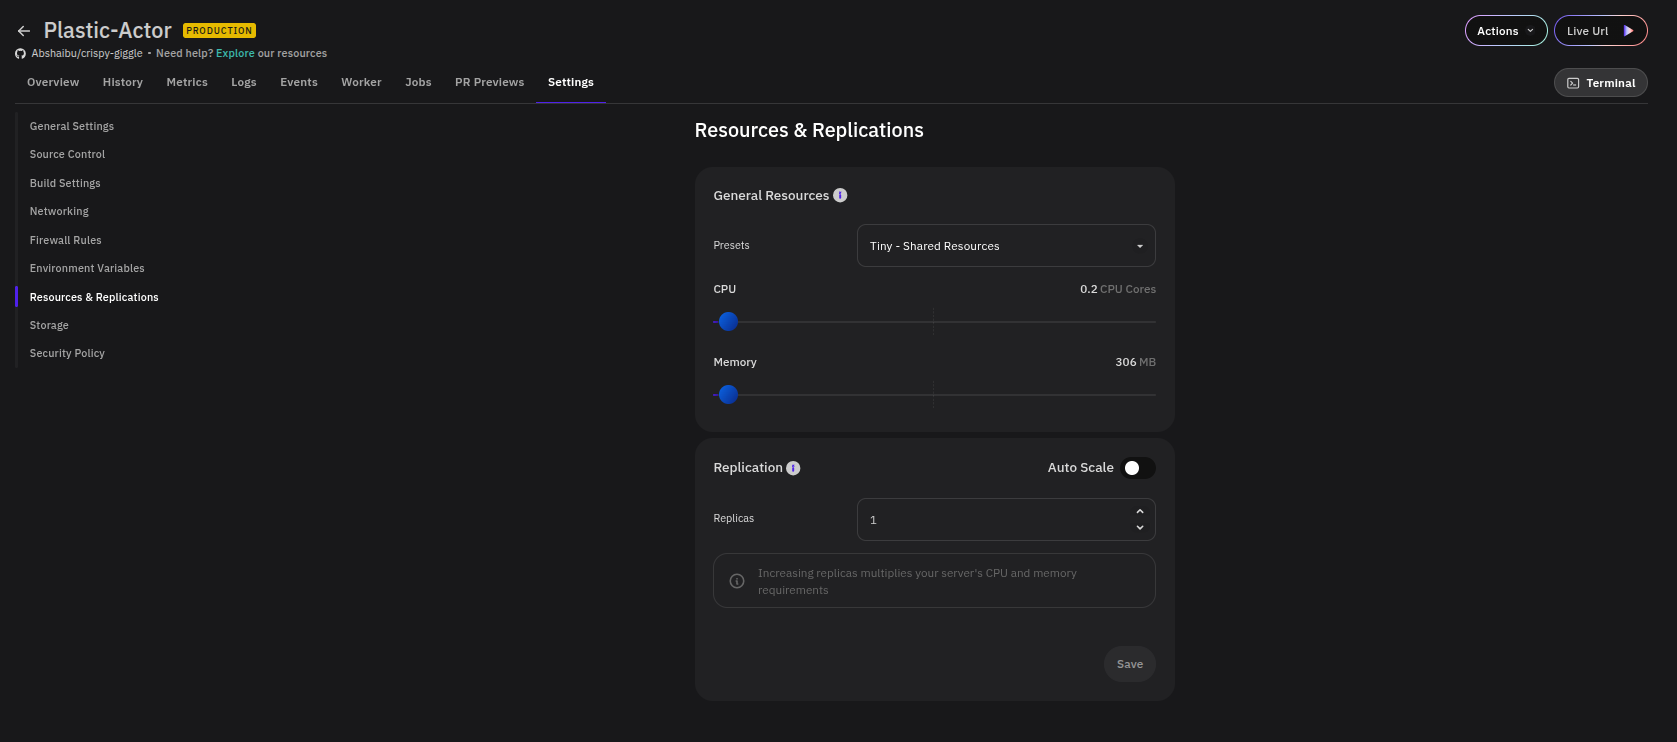
General Resources
Select a Preset from the dropdown to apply a predefined resource configuration (e.g. Tiny - Shared Resources), or adjust the CPU and Memory sliders manually.
Replication
- Replicas — Set the number of running instances. Defaults to
1. - Auto Scale — Toggle to allow PipeOps to automatically adjust replica count based on load.
Increasing replicas multiplies your project's total CPU and memory requirements proportionally.
The maximum number of replicas you can configure is determined by your PipeOps plan. Upgrade your plan if you need to exceed your current limit.
Auto Scale is not available when your project has persistent storage volumes attached. Remove any configured storage volumes first to enable it.
Click Save to apply changes.
Storage
Configures persistent volumes mounted into your project's container, ensuring data survives restarts and redeployments.
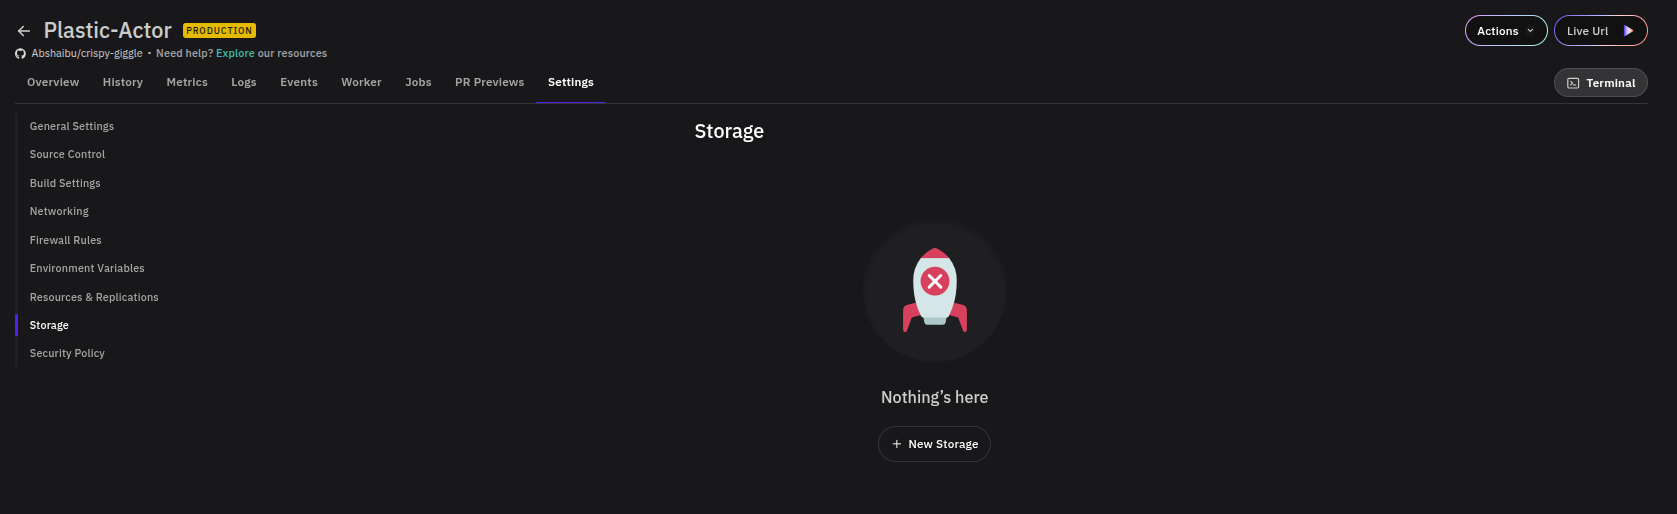
If no volumes are configured, the section shows a Nothing's here empty state. Click + New Storage to add a volume. Each storage entry requires:
- Storage Path — The file system path inside the container where the volume is mounted.
- Enabled — Toggle to activate or deactivate the volume without deleting its configuration.
- Storage (GB) — The size of the persistent volume.
Click Save to apply changes.
Security Policy
Runs automated security scans on every deployment and optionally blocks deployments that exceed defined vulnerability thresholds.
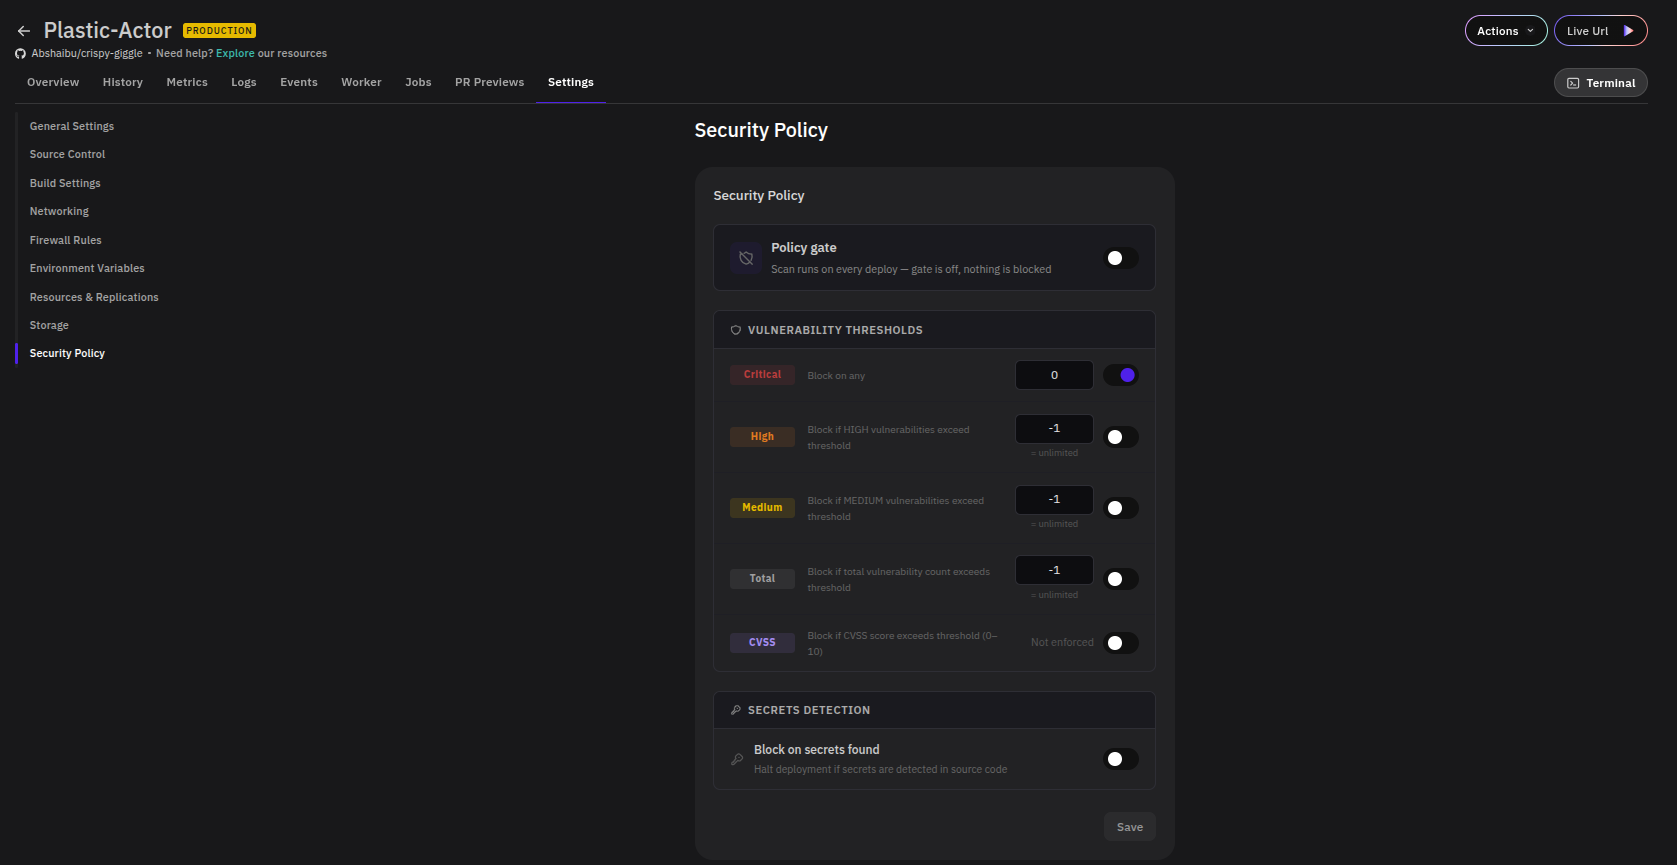
Policy Gate
The Policy gate toggle controls whether scan results can block a deployment. When off, scans still run on every deploy but nothing is blocked — results are informational only. Enable the gate to enforce the thresholds configured below.
Vulnerability Thresholds
Define the conditions under which a deployment is blocked based on vulnerability severity. Each threshold can be toggled on or off independently.
| Severity | Description |
|---|---|
| Critical | Block if any critical vulnerabilities are found. Threshold defaults to 0 (block on any). |
| High | Block if the number of high vulnerabilities exceeds the set threshold. Set to -1 for unlimited (not enforced). |
| Medium | Block if the number of medium vulnerabilities exceeds the set threshold. Set to -1 for unlimited (not enforced). |
| Total | Block if the total vulnerability count across all severities exceeds the threshold. |
| CVSS | Block if the CVSS score exceeds a value between 0–10. Defaults to not enforced. |
Secrets Detection
- Block on secrets found — When enabled, halts the deployment if secrets such as API keys or credentials are detected in the source code.